- REVIEWS
Camera Reviews 
More Reviews Mobile Reviews Photography Reviews - GALLERIES
- VIDEOS
- BUYER'S GUIDES
Photoshop Basics: How to Select & Edit Midtones in Photos (VIDEO)
What’s the first thing you do after opening an image in Photoshop to begin the editing process? For many photographers it’s messing with the Shadow/Highlight sliders to arrive at what you consider a good exposure.
But what about the oft-ignored midtones in an image? How do you select and edit those? That’s what the six-minute tutorial below is all about. The technique is super simple, and can improve a photo more than you may think.
Image-editing expert Anthony Morganti is a favorite among Shutterbug readers for his quick tutorials that deliver big results. This episode was actually suggested by one of the many subscribers to his popular instructional YouTube channel. If all you do is enhance the highlights and shadows in an image, it’s time to listen up and pay attention.

Morganti begins with a graphic that features a black bar on the left, a white bar on the right, and bars with three shade of gray in between. The middle gray bar represents the midtones, with shadows and highlights on either end. As he admits, this is a simplistic representation for the sake of discussion, because complex images typically have midtones dispersed through the frame.
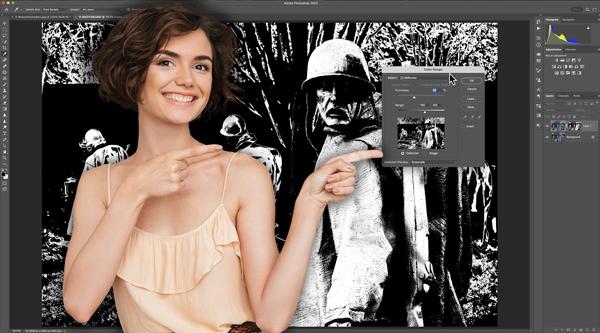
The trick is knowing how to select all the midtone areas of an image so that you can make whatever adjustments are required. The process begins by clicking on Select at the top of the screen, and choosing the Color Range option from the dropdown menu.
Once the Color Range panel is open you’ll find another dropdown menu. This one includes options for various colors, as well as those for Highlights, Midtones, and Shadows. Obviously it’s the Midtones selection that you want to make for this particular task.
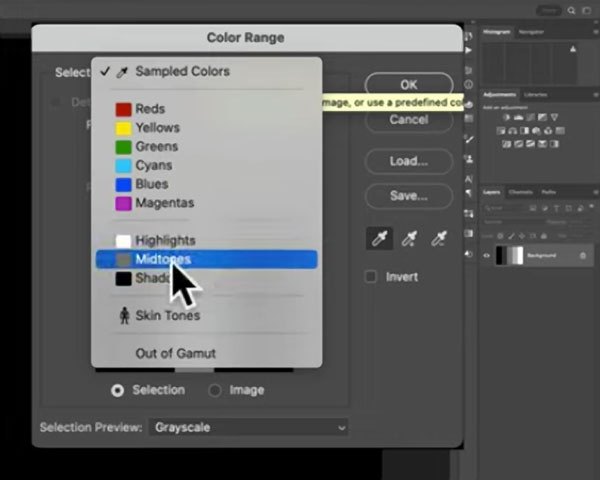
From here you’re well along the way, and Morganti demonstrates how to narrow or refine the Midtone selection for precise control. As you’ll see, now it’s a simple matter to edit just the Midtones of your shot, and Morganti walks you through the step-by-step process.
You can find more editing advice like this by paying a visit to Morganti’s YouTube channel the next time you run into a problem.
And don’t miss another of his quick tutorials that we posted earlier, with a beginners guide to Luminosity Masking in Photoshop.


![]()
Get the Latest Photo Tips, News & Reviews from Shutterbug!
| Camera Reviews Other Reviews | Mobile Reviews Photography Reviews Columns | News | Features | How-To | Resources |
 © 2026 Shutterbug
AVTech Media Americas Inc., USA
All rights reserved