- REVIEWS
Camera Reviews 
More Reviews Mobile Reviews Photography Reviews - GALLERIES
- VIDEOS
- BUYER'S GUIDES
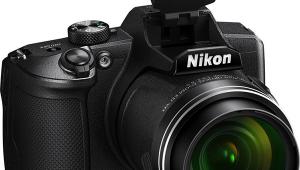
Nikon Coolpix P900 Superzoom Camera Review (Full Resolution Test Images)
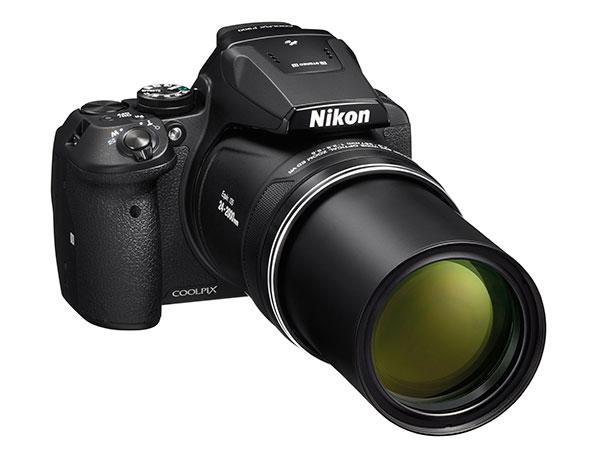
I’ve often wished I had a camera that could go from 24mm to 2000mm at the touch of a button and without being weighed down by a ton of glass. Okay, maybe not all the way to 2000mm and perhaps not in a power zoom, but you get my point. The Nikon Coolpix P900 superzoom (super-duper-zoom?) camera gives you that reach in a fairly compact body, relative to a lens with such a broad range of focal lengths.
And the Nikon P900 does so in a camera build that looks and feels like a lightweight DSLR, more or less. This combination is what initially enticed me to take a closer look at this new Cooplix model from Nikon. But are the Nikon P900’s eye-popping zoom specs just glitz or is there a substantial picture-taking machine underneath this façade?
Here’s a breakdown of the Nikon Coolpix P900’s top features:
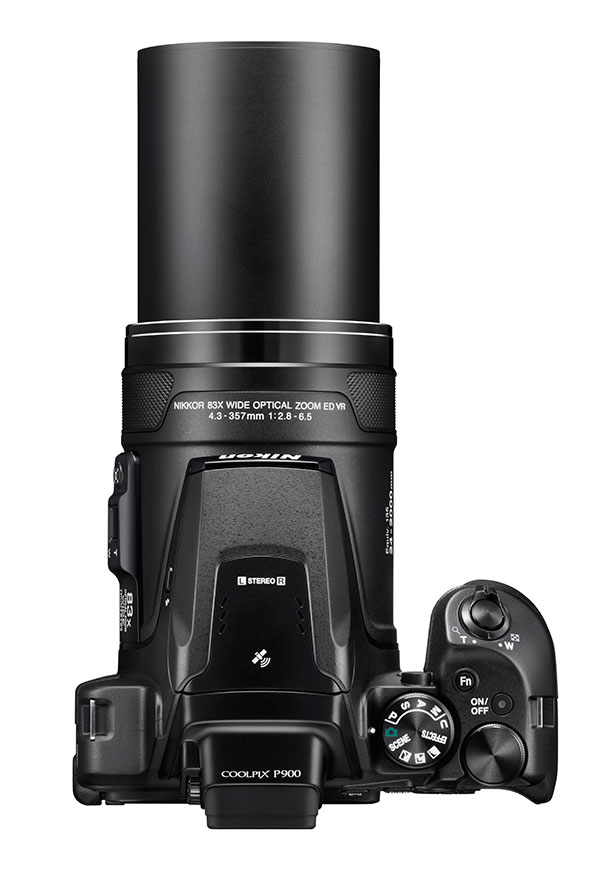
• 83x optical zoom (24-2000mm/35mm equivalent) Nikkor ED glass lens, with close-up capability
• 16MP CMOS sensor
• Contrast-detect AF system
• 7 fps (up to 120 fps in low-res burst mode)
• Built-in Wi-Fi and NFC
• EVF and 3-in. vari-angle LCD display
• Dual Detect Optical VR image stabilization technology
• Built-in GPS and POI (point-of-interest) functions
• Full HD 1080p video
• Scene Modes, filter effects, special effects, Picture Controls, Time Lapse
• $596 street price
Build
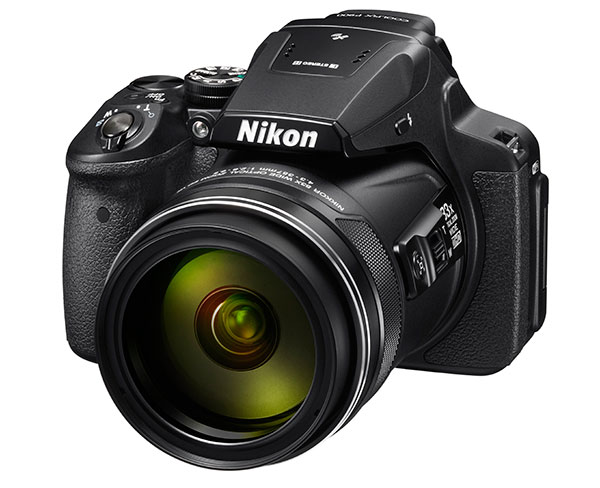
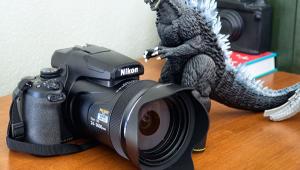
The obvious starting point to the Nikon P900 is its honking 24-2000mm (35mm equivalent) lens. When zooming, you get the feeling you’re addressing Pinocchio as the lens extends to its full length. But, truth be told, you don’t mind. And the camera still feels well balanced in your hands even with its long lens fully extended.
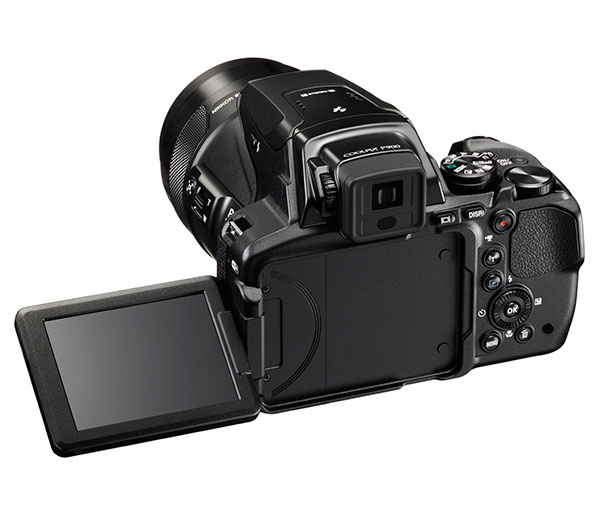
The Nikon P900 sports a DSLR-style textured handgrip and thumb-rest for a comfortable, sure grasp. It gets even more DSLR-like with its eye-level viewfinder. Okay, it’s not an optical viewfinder; it’s electronic, but it lets you shoot as if you’re working with a DSLR. There’s a sensor that automatically switches between EVF and LCD monitor, with manual override.
The downside to the LCD is that it’s not a touchscreen. However, it is articulated, going from flat against the back of the camera to vari-angle and even selfie-compatible when fully extended outward and facing you.
And rounding out the list of prominent features is the pop-up flash. You’ll note this one stands fairly tall, and for good reason: it successfully gets around that long schnozz at all zoom settings and distances. The exception is when you move in for a very tight macro shot, within inches of the subject. Even here, you may find the flash manages to deliver without stumbling noticeably.
Zooming Experience
Surrounding the shutter button is a zoom control, which differs from the one on the lens barrel. When zooming on camera, the focal length increments are by defined amounts, with an indication of focal length in the viewfinder (provided Zoom memory is set to On in the Menu; otherwise it’s continuous, with no indication of focal length).
Zooming via the lens barrel lever is continuous, but without any indication of focal length. I often found myself using the lens control to zoom quickly, then switched to the incremental control to lock in a specific focal length.
We’re not done talking about zooming just yet. You know how when you zoom in real tight, you tend to lose sight of your subject? Well, the P900 features a “snap-back zoom” button on the lens barrel. This zooms out (widens the view) so you can get your bearings. While holding this button, zoom out with the incremental zoom control (not the one on the lens barrel). Release the button and the lens automatically zooms back in for that tight shot. A clever little feature.
Interface
More serious shooters will appreciate the Nikon P900’s PSAM shooting mode dial, which puts greater control in your hands. That aside, the camera’s interface is pretty sparse—and that’s where a touch screen would have been helpful. Instead, you have to resort to the Menu to change the majority of user settings.
You can relegate a specific setting, such as ISO, to the user-defined Fn (Function) button (on top, between the on/off button and shutter release), but that still means you have to turn to the Menu for AF Area mode and drive functions, among other settings. Fortunately, settings for flash, AE override, self-timer, macro/manual are all conveniently located on back, on the multi-selector dial surrounding the OK button.
Also on the back are the Wi-Fi activation, playback, display, movie record, and delete buttons. The final major control is the command dial on top.

The number of buttons may be scarce, but that’s also what makes the camera less intimidating to new users and, more importantly, for the occasional snapshooter who just takes the camera out to photograph a son’s baseball game or daughter’s soccer match.
Auto and Manual Focus
The P900 brings 99 points to the table in contrast-detect AF. The camera features face-priority AF, as we’d expect, but also offers “manual” modes. The word “manual” may be deceptive. It’s still AF, but you can move the focusing point around, as well as vary its size/area (hence the spot, normal, wide “manual” options).
Target-finding AF is the mode I’d recommend for anyone new to the camera or who only occasionally uses it. It should work nicely for a grab shot of the batter at the plate in a Little League game but less so for a child running the bases. For that there is Subject-tracking AF mode.
Subject-tracking AF first requires you to isolate the subject with the targeting frame, hit the OK button to “register” it, then wait for the ideal moment to release the shutter. (Note: don’t press down on the shutter button until ready to take the picture. Pressing down even partially locks in focus at the moment the shutter button is depressed, and possibly losing focus on the target. That said, be sure VR is switched on to avoid blurring the shot when you suddenly jam down on the shutter release, which hopefully you won’t do.)

There’s a choice between single AF (AF-S) and Full-time (continuous) AF (AF-F). AF-F remains on, hence consuming battery power. With the camera set to AF-F, the subject gradually comes into focus. To bypass and lock in focus on the subject immediately, press down partially on the shutter button.
Manual focus is a bit odd and time-consuming. Instead of employing a focusing ring on the lens, you have to use either the rotating multi-selector or the zoom lever on the lens, depending on how you set it up under user settings in the Menu. When you use the zoom, you are left with the incremental zoom switch for this function. And to first activate manual focus, you first have to press down on the multi-selector Macro button, select MF, then hit OK. If you shut the camera down, or it goes into standby, you have to repeat this last procedure to activate manual focus. All this work makes me long for my Nikon D610. (Important note: if nothing happens when you hit the zoom lever after reactivating the camera, don’t fret that there’s something wrong. Simply reinitiate Manual mode or switch to another focusing mode.)
Performance
I figured that wildlife near and far would be the best subjects for this camera, so I headed over to Lincoln Park Zoo for my first outing, followed by the Peggy Notebaert Nature Museum (both in Chicago) a few days later. In some instances, the camera was quietly responsive. At other moments, autofocus proved downright frustrating. Manual focus was not helping. I attributed my frustrations to being a newbie with the camera, and when all was said and done, I came away with some nice images, albeit not nearly as many as I would have liked.
When you have a lens with a 2000mm reach, you want to take advantage of that, so I was constantly zooming in for tight shots. What I discovered was that AF was not following my progress. Beyond a certain focal length (and this changed with the situation), AF completely fell on its face. If I backed off to a wider setting, no problem. Other times, AF worked fine, even at 2000mm. I could never be quite sure when it would and would not kick in correctly. And I didn’t find the snap-back feature very helpful, though, to be fair, I only tried it a couple of times.

Nikon’s lens shift VR image stabilization did, however, work quite nicely, and beyond my expectations. I got a tight shot of a goose’s head at 2000mm—at 1/100 sec. That’s slightly better than a 4-stop window below the optimum shutter speed. This VR function is rated by Nikon at 5 stops.
As for the lens itself, it was prone to flare spots. Contrast was on the low side: images lacked punch, which detracted from the overall impression of sharpness. However, I didn’t detect any distortion to speak of.
Digital (luminance) noise was not a serious problem till you went past ISO 800. But even at ISO 1600, it only annoyingly manifested itself if you post-processed the image.


If you stick with the camera captures, you may find that the images look cleaner, though perhaps less polished. Then again, when sharing files at less than 100 percent, notably for email or web, feel free to post-process, because the noise will not become readily apparent.
Finally, I didn’t feel a need to use the Wi-Fi function, but did engage the GPS for geotagging. In some instances, the tag was, as they say, close but no cigar. Other times it was right on. Still, it’s a nifty feature that I’m always looking for in a camera.
Conclusion
I can’t help but have a certain affection for the Nikon Coolpix P900. Granted, it did not come through as consistently as I would’ve hoped, but that 2000mm optic in a camera under $600 is still noteworthy. It was nice to be able to go out and shoot with one camera and capture everything from 24mm scenic views to 2000mm portraits of wildlife. Where distance is an obstacle for the ordinary camera, it’s simply fodder for the Nikon P900. I think that says a lot about a camera. And the real kicker—it delivered some very nice close-ups of butterflies in macro mode, with the flash performing admirably. If it had Raw image capture, I’d buy the P900 in a New York minute (good thing I now live in Chicago).
Sixteen megapixels may not seem like much these days, but you don’t need more pixels thanks to the long reach of the lens, which should lessen the need for cropping. Beyond that, the Nikon P900 has pretty much what any advanced amateur would want, while maintaining that user-friendly outward guise for the enthusiast.
So, would I recommend the Nikon Coolpix P900? That’s a qualified yes. It’s definitely worthwhile if you want to step up from a cell phone camera or pocketsize point-and-shoot, want DSLR styling and handling, and don’t care about carrying it around in a separate, albeit compact, shoulder bag. And more so, if you want to capture those life-altering moments of your child from the bleachers or graduating senior from the cheap seats. And it’s especially worthwhile for all that and more if you also plan to shoot movies, in HD or slow/fast-motion.
(Note: even though all captures were JPEG, I was still able to make some improvements by post-processing in Adobe Lightroom 5. All pictures were shot with the camera handheld. All focal lengths are 35mm equivalent.)
Jack Neubart (www.jackneubart.com, www.pixelPERFEXION.net) is a photographer, photo-technical writer, educator, photo industry consultant, and author with over 35 years of experience, covering practically every aspect of photography.


Here's a sample video I shot with the Nikon P900 in slow-motion mode HS 480/4x. No sound is recorded during slow motion:


![]()
Get the Latest Photo Tips, News & Reviews from Shutterbug!
| Camera Reviews Other Reviews | Mobile Reviews Photography Reviews Columns | News | Features | How-To | Resources |
 © 2026 Shutterbug
AVTech Media Americas Inc., USA
All rights reserved