- REVIEWS
Camera Reviews 
More Reviews Mobile Reviews Photography Reviews - GALLERIES
- VIDEOS
- BUYER'S GUIDES
Neutral Density And Color Blends; An Excerpt From The Creative Digital Darkroom
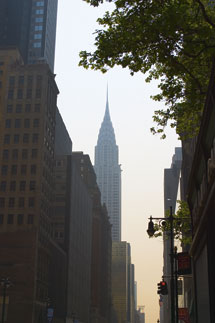
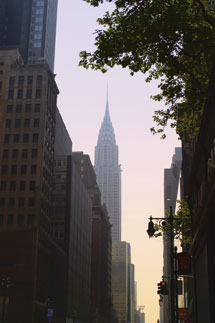
Enhancing photographic color is emotionally similar to painting, in which a painter applies a brushstroke and then reflects, reacts, and responds to the brushstroke by adding complimentary brush strokes. In the process the image grows and changes and gains an identity of its own. In the case of sophisticated color blending, working with layers, masks, and blend modes enables you to experiment with the image and, admittedly, the final outcome often creates itself. It is best to start off subtly and build up the effect gradually. In the example seen in Figures 1 and 2, Mark Beckelman started with an early morning shot of the Chrysler Building in Manhattan and, with a few layers, created the much richer final image.
 |
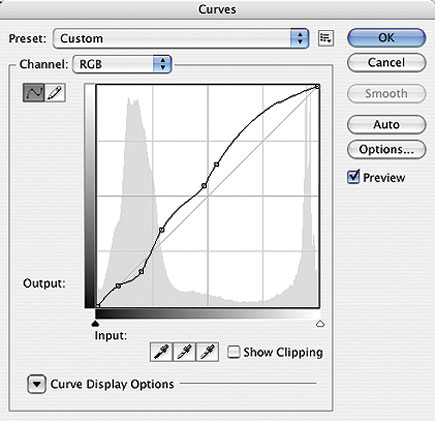
Photographed against the light on a warm summer morning, the air is thick with humidity, which reduces the image contrast. To push the less important buildings on the left out of visual interest, add a Curves adjustment layer and, as seen in Figures 3 and 4, push the shadow detail down to darken the buildings.
 |
 |
|
|
||
 |
|
 |
|
|
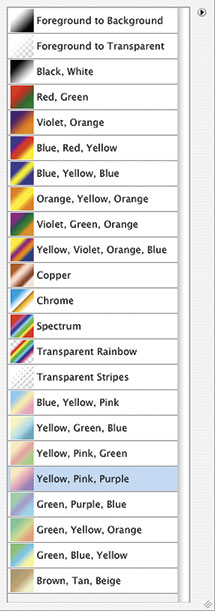
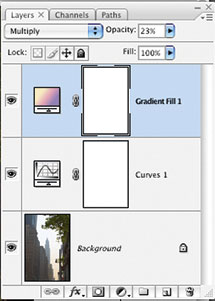
To enhance the morning light, load the pastel gradients by selecting Edit>Preset Manager, use the pull-down menu to select Pastels. Click Append to add them to the Gradient palette. Add a Gradient Fill layer and use the Linear Yellow, Pink, Purple pastel gradient, which, as you can see in Figures 5 and 5a, obliterates the entire image. Since this gradient is on its own layer, the Multiply blend mode with 23% opacity will enhance the image perfectly (Figures 6 and 7).
 |
 |
|
 |
 |
|
|
||
As is often the case, the creative process requires that you work flexibly and, in this instance, Mark wanted to add density to the sky and warm the buildings to better reflect the new color of the light. To warm the buildings while not affecting the rest of the image, we need a selection that excludes the sky and included the buildings. Of course, there are many ways to make a selection, but in instances that are so clearly defined, you can let Photoshop do the work. Cmd/Ctrl-click the icon of the green channel in the channel palette to activate the tonal values of the channel into an active selection, as seen in Figure 8.
 |
|
|
|
| |||||||||


![]()
Get the Latest Photo Tips, News & Reviews from Shutterbug!
| Camera Reviews Other Reviews | Mobile Reviews Photography Reviews Columns | News | Features | How-To | Resources |
 © 2026 Shutterbug
AVTech Media Americas Inc., USA
All rights reserved