- REVIEWS
Camera Reviews 
More Reviews Mobile Reviews Photography Reviews - GALLERIES
- VIDEOS
- BUYER'S GUIDES
My Top 10 Tips For Better Sports Photography
One of the things I love about sports photography is that no matter which sport you’re shooting, the actual camera techniques themselves have an awful lot in common. For example, while baseball and tennis are very different sports, the skills you need and the settings you use for shooting both are just about the same. To help you capture better images of “the thrill of victory and the agony of defeat,” here are my top 10 tips to help you no matter which sport you’re shooting.
1. Know Which Kinds of Shots People Love to See
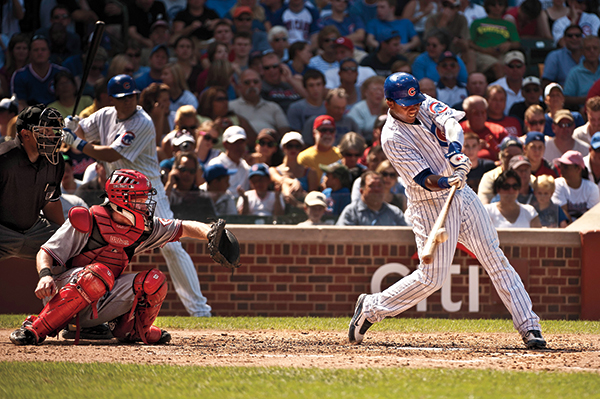
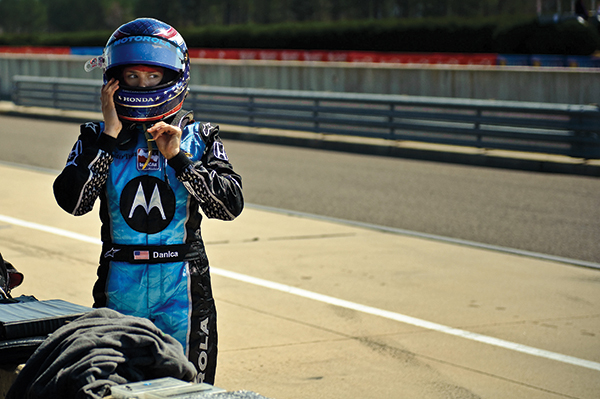
If you’re shooting team sports, there are two types of shots that are always in high demand. Those are: (a) shots captured at the peak moment of action. For example, if you’re shooting a baseball game, it wouldn’t be a player jogging around the bases after hitting one out of the park. The peak action was the moment he made contact with the ball (and you see the ball on the bat, or just coming off it). If it’s football, maybe it’s a player getting the ball stripped, or a receiver leaping up high to catch a pass while he’s fighting off a corner. It’s not a guy running with the ball all by himself. That happens all the time during every game. Now capture that same guy running with the ball when the free safety is reaching around and grabbing his face mask as he pulls him to the ground and you’ve got a peak moment of action shot. And (b) celebrations! This is the emotional side of the game, and people love to see this aspect of it. Picture the tennis player pumping her fist when she wins a comeback set, or the racecar driver lifting the trophy over his head in a shower of confetti. But don’t just capture the moments of joy: remember to show the emotion when a team is losing or a player loses a match. Showing a distraught player hanging their head after a big mistake, or a goalie’s reaction after letting one get past him, and you’ve got a very powerful image.

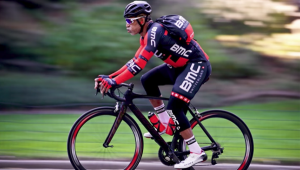
2. Create Separation From the Background
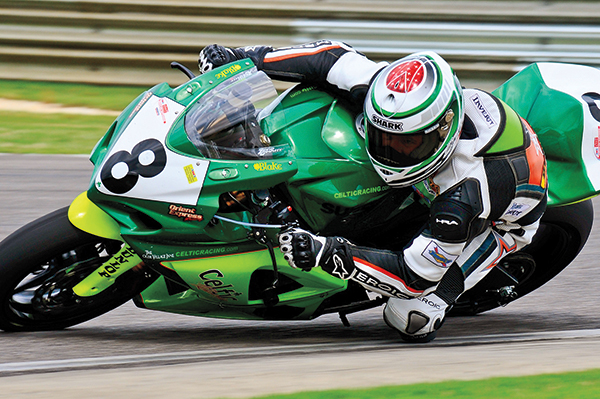
If you want to create more professional-looking sports shots, you’ll want to create some serious separation between the athlete and the background behind them. We want the background very soft and out of focus so the athlete clearly stands out and is separated from that background (instead of bending in to it). This takes two camera techniques: (a) use as “wide open” of an f/stop as you can, so if you have f/2.8 use that. If not, f/4 or f/5.6, but the lower the number, the more separation you’ll get. However, that number doesn’t really matter much if (b) you don’t zoom in tight on your subject. That’s what really creates that level of soft background you’re looking for—the zooming in tight part, so having a long lens really makes a big difference.

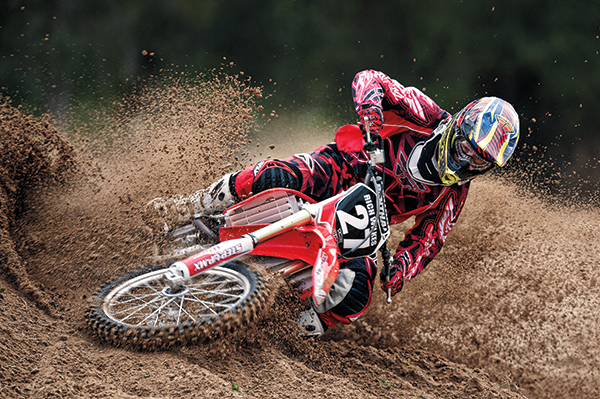
3. Use the Right Camera Settings
If there’s one thing you need to be able to do when shooting sports, it’s freeze the action. Without freezing the athlete’s movement, we wind up with lots of blurry shots. Luckily, one thing that helps us get there is the fact that for most sports, we want to shoot “wide open” using the lowest possible numbered f/stop our lens will allow, so ideally f/2.8 or f/4. The lower the number the better.
So how high a shutter speed do we need to freeze action? Generally we want 1/1000 of a second or faster to freeze motion. That’ll usually be enough to freeze a power forward driving to the basket or even stop an Indy car in its tracks. When you’re shooting in daylight, at wide-open apertures like f/2.8 or f/4, getting 1/1000 of a second is nearly automatic. Getting 1/1000 of a second inside a gymnasium, arena, or at night is a much bigger challenge, and basically it will require you to raise your ISO until your shutter speed hits 1/1000 of a second. Even at a brightly lit NFL stadium, if I’m shooting at f/4, I’ll have to raise my ISO to 4000.
One thing you can do to make sure your shutter speed doesn’t fall below 1/1000 of a second is to turn on your Auto ISO feature and then set your minimum allowable shutter speed to 1/1000 of a second. That way, it’ll automatically raise your ISO to whatever it needs to get you to that 1/1000 of a second sweet spot.
4. Use Two Camera Bodies
While I often see other sports photographers at events carrying three camera bodies, I only use two (believe me, two is cumbersome and heavy enough). Why would you even need two bodies? Because with the fast pace of sports, there’s no time to change lenses—by the time you change lenses, even if you’re really fast about it, you’ve already missed the shot, so we carry more than one body, and switch bodies (I put a long lens on one body and a shorter or wide-angle lens on the other). Even if you have to borrow a body for the game, it’ll make a big difference when it comes to getting those crucial shots.
5. Use the Right Lenses
Having the right lens makes all the difference in the world. The “right lens” for sports is typically a really long lens because you’re going to want to be somewhat physically separated from where the action takes place—for obvious safety reasons, they can’t have you wandering on the track, or on the playing field—and because a long lens helps bring far away scenes up close.
I would say that a minimum of a 300mm lens for your main lens is necessary for quality sports photography. You can get there (or really, really close), by adding a 1.4 tele-extender to your 70-200mm lens, making it essentially a 280mm lens without a loss of quality (but you will lose one f/stop of light, so this works best if you shoot your sports in daylight). Outside of a tele-extender (around $500) or buying a new 400mm f/2.8 lens (deep breath: these sell for around $12,000), you can actually rent these long lenses for a fraction of the cost. Renting is a great option for really important games (such as the finals or a championship) where you need that pro-quality reach, but without a working pro’s budget.
6. Keep Shooting After the Play is Over
Don’t stop shooting just because the play is over—keep your eye on your viewfinder for a little bit longer because that’s when any emotion (jubilation, anger, or even a fight) is likely to happen. It can be a coach arguing with a ref, or a manager running out of the dugout to give the umpire the “what for,” so be prepared to keep shooting after the play and you might capture some real fireworks.
7. Come to Grips with Cropping
I do my darnedest to compose my photos in camera. I have always felt that composing the shot is an essential part of my job as photographer, so if I have to crop a shot after the fact, I have failed, on some level, in my basic duty. That is, until it comes to sports. Then, it’s a totally different mindset and if I were to mount a video camera in the photo workroom of any major sporting event (where every photographer there is shooting a 300mm, 400mm, or 600mm), you know what you’d see them all doing? Cropping their images. The reason is you can’t control the movement of the athletes—one moment they’re right in front of the goal, and five seconds later they’re at the other end of the field. Just because they’ve moved away from you, doesn’t mean you’re excused from “getting the shot,” so that’s why we crop.
8. Don’t Forget to Shoot the Details
It’s easy to get swept away with the action—after all that’s probably what drew us to a particular sport in the first place—but there’s more to the story than just what happens while the game clock is ticking. The story of a game is just that, a story, and that’s why it’s important to capture “detail” shots—the stuff that surrounds the game—and not just the action. If you’re shooting baseball, game detail can be anything from the catcher’s mitt lying on the bench in the dugout to a close-up shot of the dirt on the batter’s cleats. In football it can be a tight shot of a player holding his helmet in one hand between plays with grass stains all over it, to a close-up shot of a challenge flag lying at the coach’s feet. These are all the details that help tell the full story of the game, and including a few of them in your images of a sports event can make a big difference.
9. Want Better Shots? Start Worrying About the Background
One of the biggest killers of great shots is a bad background. If you clearly see a chain-link fence behind the batter with an ad for a local plumber, it’s going to be a huge distraction. One of the things the pros do pretty consistently is to seek out angles where the background is clean and simple, so when they do take a shot, it has a real chance of being a winner. Another big thing to avoid? Empty seats in the stands. They’re instant shot killers and makes it look like nobody cared enough about the game to show up. Plus, their solid color draws the eye, and the more empty seats you see, the worse it is. Start thinking about your position on the field, or the track, and what types of distracting things will appear behind your athlete. Once you start being aware of stuff like this, it will take the quality of your shots to the next level.

10. But Perhaps the Biggest Tip is…Know the Game!
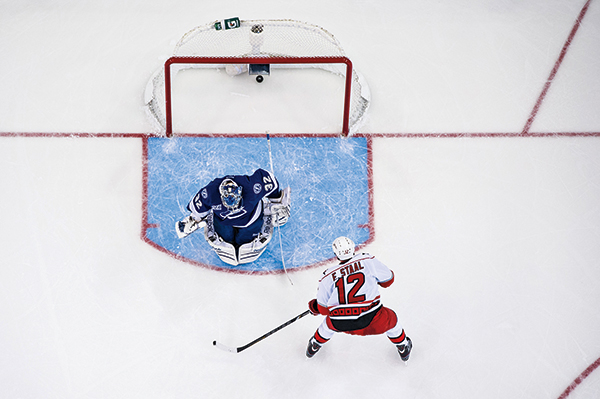
The best shots come from people who not only love the game but understand it. If you want a chance of knowing where the puck is going next, and you want to be there to capture that moment, you need to really know hockey, and the photographers who do are getting the types of shots you’ve been dreaming of. In a football game, they know who is most likely to get a pass thrown their way at any given time. In baseball they know which players are likely to steal, and when a batter is likely to bunt. They know the team. They know the game. They know the players. They know what’s likely going to happen next so they’re already ahead of the action as the play unfolds.
Scott Kelby is a Florida-based freelance sports photographer specializing in action sports and editorial portraits of athletes. He shoots for an international sports newswire service and teaches sports photography workshops and online classes. He is the author of the book Professional Sports Photography Workflow. See more of Scott’s work at scottkelby.squarespace.com. He also writes the monthly Ask a Pro column in Shutterbug.


![]()
Get the Latest Photo Tips, News & Reviews from Shutterbug!
| Camera Reviews Other Reviews | Mobile Reviews Photography Reviews Columns | News | Features | How-To | Resources |
 © 2026 Shutterbug
AVTech Media Americas Inc., USA
All rights reserved