- REVIEWS
Camera Reviews 
More Reviews Mobile Reviews Photography Reviews - GALLERIES
- VIDEOS
- BUYER'S GUIDES
Lighting Review: Westcott Eyelighter Reflective Panel

All Photos © Joe Farace

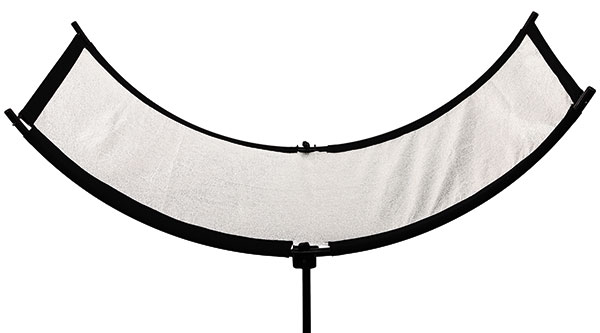
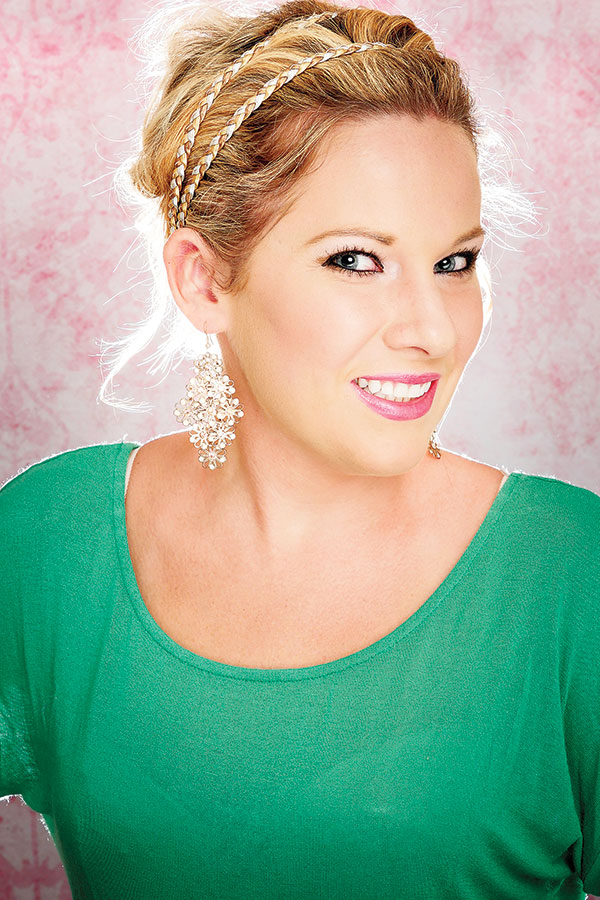
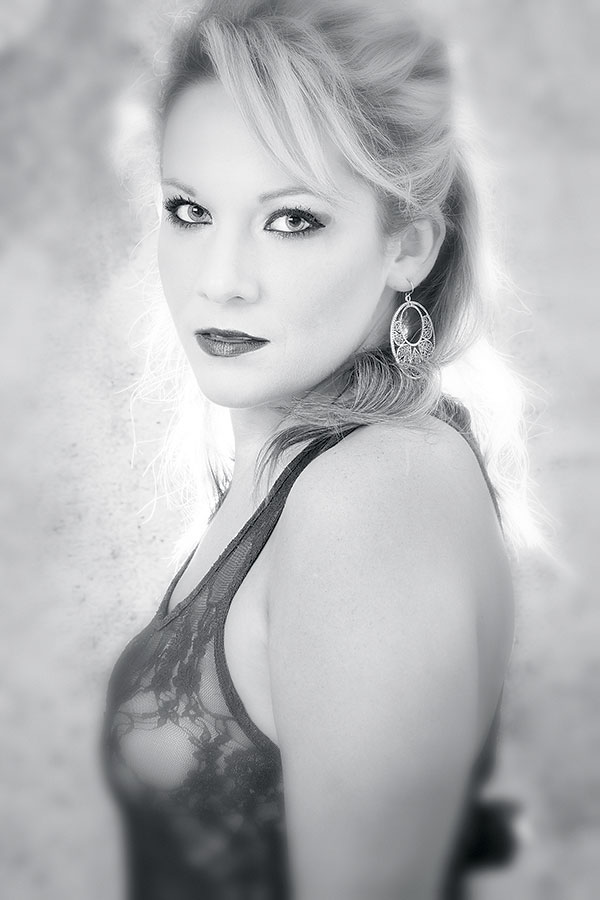
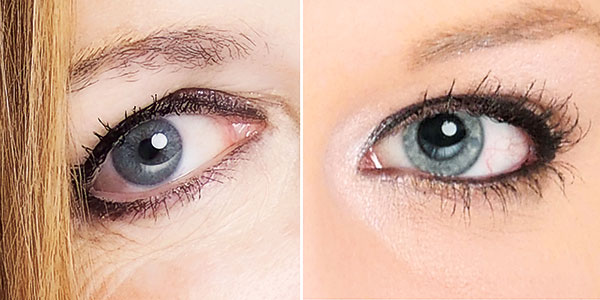
Traditional flat reflectors do a good job of bouncing fill light when placed under a subject’s chin for portrait lighting but catchlights in their eyes can sometimes appear less than natural. Westcott’s Eyelighter Reflective Panel addresses the problem by providing an arc-shaped surface that matches the natural curvature of the human eye. Specifically designed for beauty and portrait photography, the Eyelighter reflects an arched light up toward your subject, producing not only flattering light but also a catchlight that follows the natural curve of the iris. Unlike three-piece, multi-reflector kits, this catchlight is seamless, without gaps.
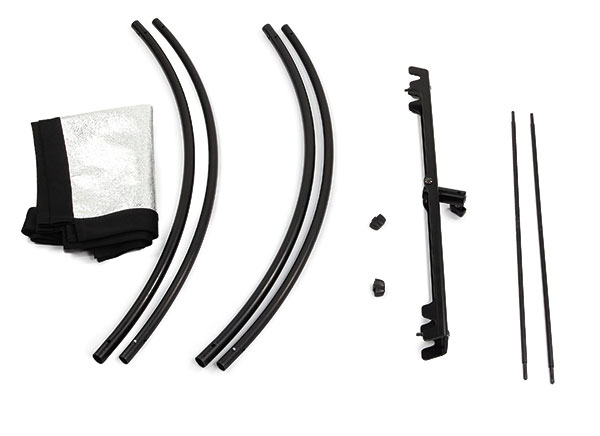
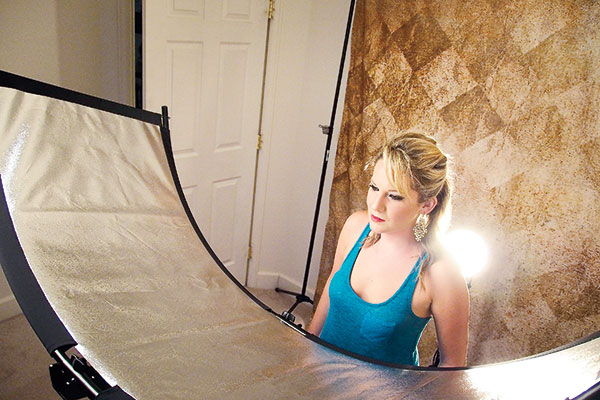
The Eyelighter measures 58x33x23.5 inches, comes with a carrying case for storage and transport, and, like most Westcott products, is ruggedly constructed. As you can see from the illustrations, it’s also big. Not so large that you wouldn’t mind taking the Eyelighter on a location shoot when you had more than a few headshots but I’m guessing it will spend more time as a dedicated headshot setup in a studio, even a small one like my 11x15-foot home studio.
In The Studio
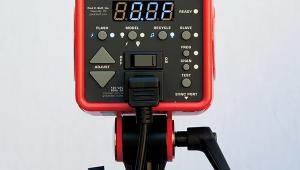
Assembling the Eyelighter is simple, whether you use the supplied directions or not. Making it work, on the other hand, takes a little time as you experiment with different light sources and placement of both the Eyelighter and the main light. My friend, photographer Cliff Lawson and I fine-tuned the first setup using ourselves as models. Here’s what we found: Using an AlienBees B800 with an Omni reflector (see article in the 2014 Expert Photo Techniques) the results looked good and we were getting the characteristic catchlight so we broadened and softened the source by attaching a diffusion sock to the reflector. Our initial conclusion was that a broad source placed near camera position and the Eyelighter produced better than acceptable results. In addition to lighting the area under a subject’s face, the Eyelighter solves a major problem with deep-set eyes, especially with male subjects, by fully illuminating the eyes, all that catchlight hoopla notwithstanding.
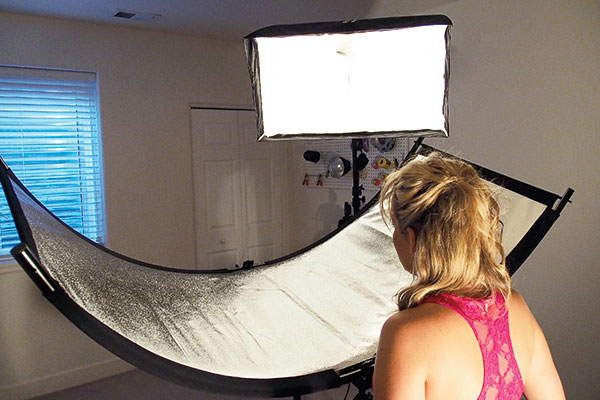
Because of her travel schedule, I haven’t used my wife Mary as a model for a long time but drafted her for this test. Also using that diffused AlienBees B800 as the main light, I added Westcott’s 400 ws Strobelite Plus as a side/backlight placed as shown in the illustration, producing results with a slightly different looking catchlight than my initial test. You might like the feathered look it produces; I did. But it also points out that with subjects of different heights, raising and lowering the Eyelighter has a distinct effect on the shape and look of the catchlight and overall lighting effect. Then again, maybe you only care what the final result looks like. Me? I was happy with both the lighting and the catchlight.
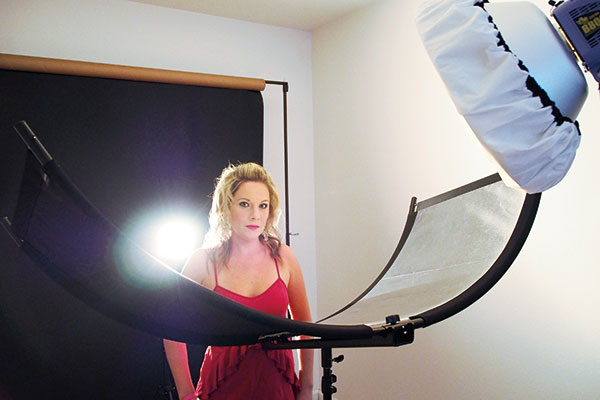
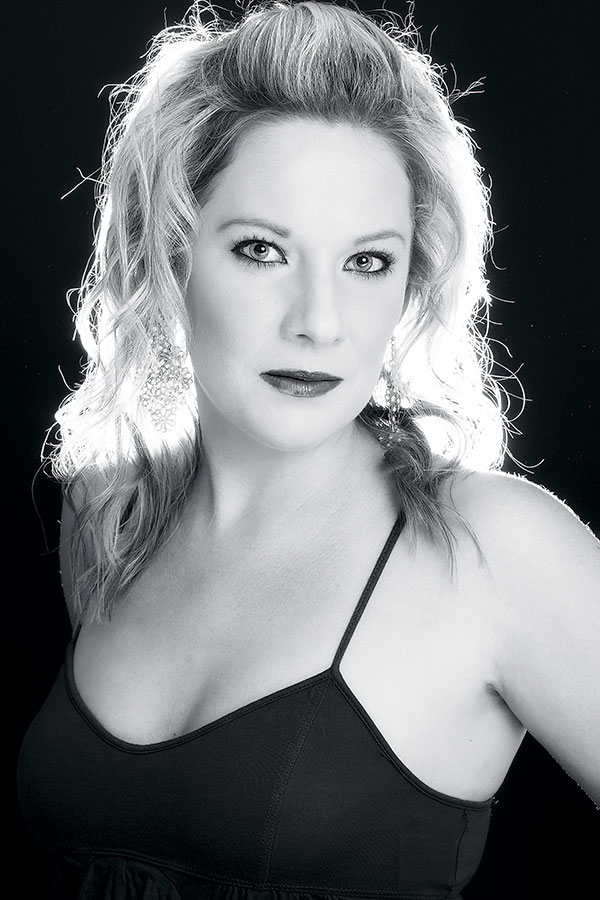

Next, I worked with Colleen Breanne, a model who has appeared in my lighting reviews in the past and I was looking forward to photographing her again, initially with a lighting setup similar to Mary’s but also experimenting with broader light sources and different light placements. I started by asking Colleen to stand close to the Eyelighter but she wasn’t close enough to touch the support bracket that sticks out slightly from its edges of the Eyelighter. Even though that bracket is relatively smooth and has no sharp parts, if this were my Eyelighter I would paint the bracket (on the subject’s side) red or white to remind them not to get too close.
For the next setup, my main light remained the AlienBees B800 but I placed the Westcott Strobelite Plus behind the subject. Later, to see the effect of using a larger light source, I swapped lights, with the Strobelite Plus acting as the main light and putting the AlienBees B800 to work as a backlight. Then I attached a 16x30-inch Apollo Strip light bank mounted vertically for the first series of shots and for subsequent shots rotated (not so easy since the Apollo Strip doesn’t use a speed ring) horizontally for a final set of headshots. Based on the many different types and shapes of light modifiers used, I found it was almost impossible to make a bad shot.
Conclusion
While not inexpensive, the Westcott Eyelighter ($299) is a high-quality product whose rugged construction shows it was designed for professional applications. The upside is you can use the Eyelighter with even the least expensive monolight—or even speedlight—to create beautifully lit headshots and portraits for business as well as beauty or glamour. Once you set up the Eyelighter, it’s a slam-dunk to create gorgeous headshots that should look much better than whatever you’re currently taking.
Westcott Eyelighter Specifications
Construction: Aluminum frame, synthetic fabric
Dimensions: 58x33x23.5 inches
Weight: 7.0 lbs
Price: $299


![]()
Get the Latest Photo Tips, News & Reviews from Shutterbug!
| Camera Reviews Other Reviews | Mobile Reviews Photography Reviews Columns | News | Features | How-To | Resources |
 © 2026 Shutterbug
AVTech Media Americas Inc., USA
All rights reserved