- REVIEWS
Camera Reviews 
More Reviews Mobile Reviews Photography Reviews - GALLERIES
- VIDEOS
- BUYER'S GUIDES
Learn How to Use Lightroom’s Dehaze Feature to Save Images You Thought Were Trash (VIDEO)

You can’t really blame your camera for the occasional washed out image you discover on a memory card after returning from a shoot. There’s simply no getting around the fact that those sad mistakes are the result of operator failure; i.e. you!
Fortunately, as you’ll learn in the video below, there’s a way to save washed out photos by using what Nathaniel Dodson calls “the insane power of Lightroom’s Dehaze feature” for bringing washed out images back to life. In the six-minute video below, Dodson demonstrates the simple and effective technique.
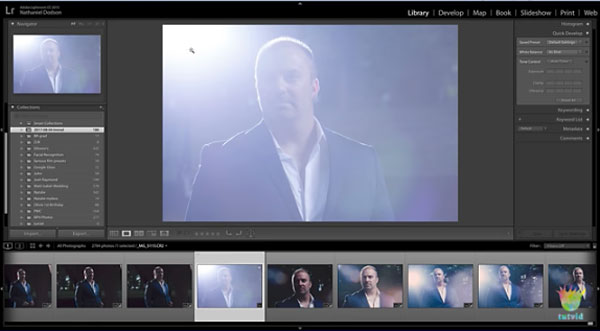
Dodson begins with an image that looks like a goner because of backlight that flashed into the front of his lens. Working with a Raw file, he demonstrates how to restore an incredible amount of detail in the shot.

After using the Dehaze slider, Dodson adjusts colors, adds a bit of contrast, and gives the shadows a boost. Then it’s a simple matter of adjusting the hue and reducing vibrance in skin tones, and adding a touch of sharpening to complete the process.
You can find more editing tips on Dodson’s YouTube channel, and be sure to look at another video of his we shared recently, with a five-minute lesson on using Photoshop’s healing brush.


![]()
Get the Latest Photo Tips, News & Reviews from Shutterbug!
| Camera Reviews Other Reviews | Mobile Reviews Photography Reviews Columns | News | Features | How-To | Resources |
 © 2026 Shutterbug
AVTech Media Americas Inc., USA
All rights reserved