- REVIEWS
Camera Reviews 
More Reviews Mobile Reviews Photography Reviews - GALLERIES
- VIDEOS
- BUYER'S GUIDES
Kodak’s Ektar 100 Medium Format Film; If You Want That “Film Look,” Just Shoot Film!
At photokina in September 2008 Kodak announced its Professional Ektar film in 35mm format. Due to popular demand, they next introduced Ektar 100 medium format film, calling it “the finest, smoothest grain of any color negative film available today.” I got to test it using a bunch of cameras and in doing so got a hard look at what film photographers face in an increasingly—maybe it’s already here—digital world.
 |
In years past, the Ektar name, especially Ektar 25, was synonymous with fine-grained film, but the downside of using any ISO 25 film meant that you needed a tripod for most photography. The new Ektar 100 film offers the same fine grain as the ISO 25 film but tosses into the bargain two additional stops of speed, making hand holdable shutter speeds easily practical. On top of that, there’s significantly more exposure latitude. Kodak posits one stop of underexposure and two stops of overexposure and my experience shooting a wide bracket set certainly bears that out.
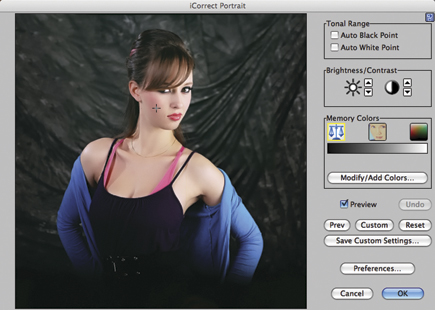
Ektar 100 is ideal for pros and advanced amateur film shooters for nature, travel, fashion, and architectural photography where the subject’s emphasis is on detail and color. Kodak suggests that professional photographers will “more likely prefer Kodak Professional Portra films for their natural reproduction of the full range of skin tones,” but I found that skin tones captured in studio shots while indeed vivid were quickly and easily adjusted in the digital darkroom into something more natural and neutral by using a Photoshop-compatible plug-in such as PictoColor’s (www.pictocolor.com) iCorrect Portrait 1.5.
 |
|
|
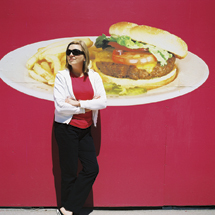
On the other hand, portrait shooters eschewing digital manipulation and planning on going directly from the negatives to prints might heed Kodak’s advice but, for whatever reason, all of the portraits I made outdoors using only natural light exhibited more natural-looking skin tones. I’m betting Ektar 100 would be wonderful for outdoor portraits and suggest wedding and senior high school photographers still using film shoot a test roll to see if they agree.
 |
|
|
Like Kodak’s Portra film, Ektar 100 uses Micro-Structure Optimized T-GRAIN emulsions that make it ideal for scanning with a variety of desktop or high-end drum scanners. Kodak told me that “because no standards exist to define the colored filter sets that film scanners use to capture the red, green, and blue information from film, each manufacturer’s scanner has its own characteristic output. The output depends on the scanner’s sensitivity to the dyes in the film.” This sensitivity is determined by the distribution of the colored filter sets and the spectral sensitivity of the scanner’s CCD (or whatever) imager. Scanner output also depends on look-up tables or matrices the scanner software or plug-in uses to work with your specific image-manipulation program. The generic color negative film channel designation that’s available with some scanner software should just be considered a starting point and you can adjust the final color balance and the scene-dependent contrast and brightness by using scanner controls during pre-scan.
 |
|
|
I tried scanning some Ektar 100 using my old (in Internet years anyway) entry-level Canon desktop scanner and sharp-eyed readers will notice that the image appearing in the illustration is backward. That’s because the film retained a slight curl produced during processing, probably during the drying cycle, that made Canon’s film holder refuse to hold film when it was inserted the proper direction. It just fell through the holder! Even though it was an inexpensive scanner, it produced acceptable results partially because of the large size of the medium format negative and would have produced superior results if I used specialized scanner software such as LaserSoft’s (www.silverfast.com) SilverFast. Personally, I find scanning film to be a dreadfully painful experience and prefer to have a vendor do it for me but, as I soon found out, that approach is not without its own pitfalls.
 |
|
|
|
| |||||||||


![]()
Get the Latest Photo Tips, News & Reviews from Shutterbug!
| Camera Reviews Other Reviews | Mobile Reviews Photography Reviews Columns | News | Features | How-To | Resources |
 © 2026 Shutterbug
AVTech Media Americas Inc., USA
All rights reserved