- REVIEWS
Camera Reviews 
More Reviews Mobile Reviews Photography Reviews - GALLERIES
- VIDEOS
- BUYER'S GUIDES
Here’s a Simple Explainer on How to Use the Powerful Curves Adjustment in Photoshop (VIDEO)
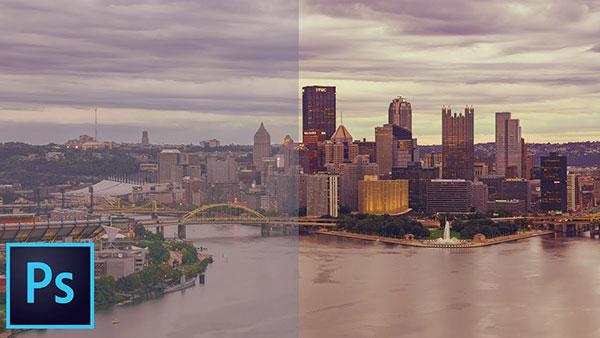
Curves might be one of the most important yet most misunderstood adjustment tools in all of Photoshop. Because Curves is so key to tweaking the tones in your images to make them pop, some users might even be intimidated by this tool.
Don’t be. Instead watch Nathaniel Dodson’s (AKA Tudvid's) short video tutorial below titled “How to Use Powerful Curves in Photoshop.” In the 9-minute clip, Dodson walks you through the basics of Curves and explains why it’s a Photoshop tool he absolutely “loves.”
“Curves is the adjustment I instantly reach for whenever I’m working with an image that needs any kind of lighting adjustment, a tonal adjustment, color corrections, color grading, color stylizing, and just about anything else having to do with Curves,” Dodson says.
In the video, he talks about setting black point and white points in Curves; what the finger icon (aka the targeted adjustment tool) does; how you can create an “S Curve” for boosting contrast; and how to use the RGB dropdown menu to do color-related adjustments including how to infuse color, correct color, and color grade.
“Curves is absolutely something that you do not want to sleep on,” Dodson says. “It is an incredibly powerful tool that finds uses not only in Photoshop but also in Lightroom, Premiere Pro and more. If you understand Curves just in this one application, you’re going to be able to take this knowledge and apply it across the board and use it all over the place.”
For more information on how to use Photoshop’s Curves, check out this helpful 5-minute tutorial. You should also check out more great software how-to videos on Tutvid’s YouTube channel.


![]()
Get the Latest Photo Tips, News & Reviews from Shutterbug!
| Camera Reviews Other Reviews | Mobile Reviews Photography Reviews Columns | News | Features | How-To | Resources |
 © 2026 Shutterbug
AVTech Media Americas Inc., USA
All rights reserved