- REVIEWS
Camera Reviews 
More Reviews Mobile Reviews Photography Reviews - GALLERIES
- VIDEOS
- BUYER'S GUIDES
Give New Life to Underexposed Photos with This Simple Photoshop/Lightroom Technique (VIDEO)
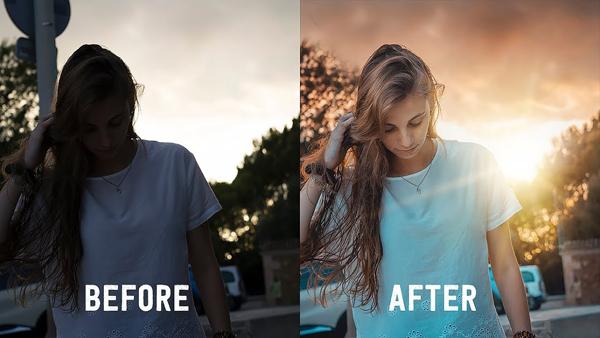
Regardless of what type of photographs you shoot most, a stop or two of underexposure can really mess up an otherwise great image. While Photoshop’s Highlights/Shadows sliders can often rehabilitate a poorly exposed photo, the simple technique in the video below will usually deliver far better results.
Kaiwan Abdulrahman is a photographer and artist from Kurdistan, and in this tutorial he demonstrates how to use Lightroom and Photoshop to turn those underexposed rejects into keepers. The power of Abdulrahman’s method is that it enables you to recover shadow detail without blowing out the highlights in an image.
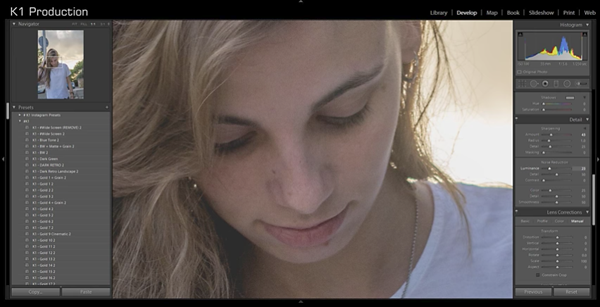
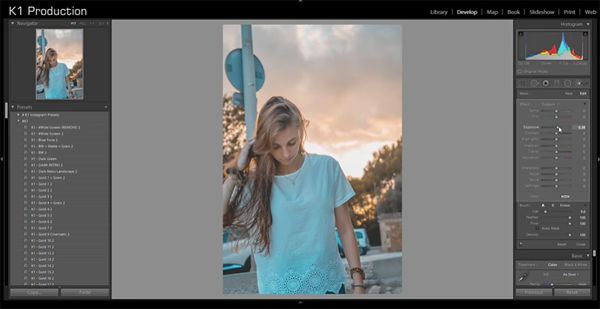
Abdulrahman begins with Lightroom and uses Exposure Sliders and Tone Curves to open up the shadows and add detail to the highlights. He then adds a bit of sharpening, reduces noise, and makes a subtle adjustment to the color of the sky in his image.

All that’s left is to open the image in Photoshop to slightly clean up his initial edits, and remove a distracting traffic sign from the scene. The result is a much-improved photo with a smooth, natural look.
You can find more helpful videos on Abdulrahman’s YouTube channel, and be sure to look at another Photoshop tutorial we posted recently, illustrating the easiest way to remove ugly color casts from photographs.


![]()
Get the Latest Photo Tips, News & Reviews from Shutterbug!
| Camera Reviews Other Reviews | Mobile Reviews Photography Reviews Columns | News | Features | How-To | Resources |
 © 2026 Shutterbug
AVTech Media Americas Inc., USA
All rights reserved