- REVIEWS
Camera Reviews 
More Reviews Mobile Reviews Photography Reviews - GALLERIES
- VIDEOS
- BUYER'S GUIDES
Get AMAZING Colors in Blue-Hour Travel & Nature Photos with a Few Quick Clicks in Lightroom

Outdoor photographers love shooting at “Blue Hour”—that quiet, moody time just before dawn or after sunset. That’s because images take on a soft, ephemeral glow before the sun rises in the morning or drops below the horizon at night.
While images captured at this time often look great straight out of the camera, under certain conditions they will be even more compelling after slightly adjusting the tones. Typically this means intensifying certain colors in the scene, as you’ll see in the quick Lightroom tutorial below.
German landscape photographer Christian Mohrle has a knack for explaining simple processing techniques that make a big difference in his work. He’s not a fan of over-cooked imagery, but rather prefers subtle enhancements that result in a natural looking result.
In this episode Mohrle takes a different approach from one we posted earlier. He walks you the color-grading process from beginning to end, so you can easily employ this method yourself. He believes in making adjustments in a specific order, and he begins with a few basic tweaks to the overall image.
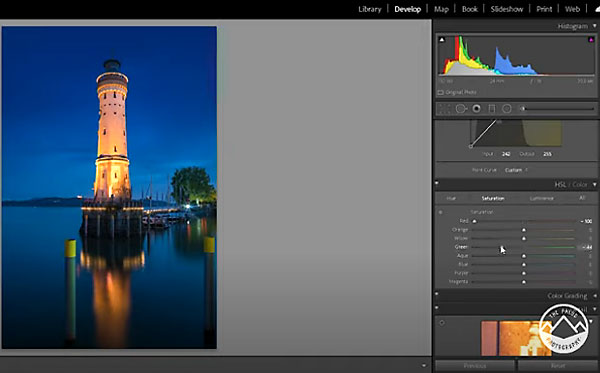
After opening a rather bland Raw file of a lighthouse, Mohrle selects Lightroom’s Adobe Standard profile which is his typical preference. Then he makes a few global adjustments, which include darkening the blue tones, slightly cutting contrast, and pumping up saturation of both the blues and the yellows.
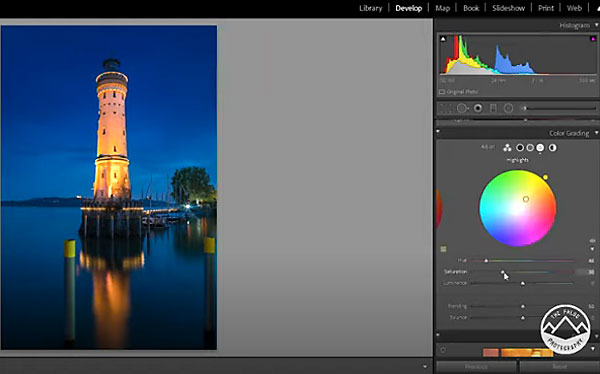
After a quick adjustment to the overall exposure of the shot, Mohrle turns to local adjustments to enhance specific portions of the scene. You’ll see exactly how he does that, and finishes the edit by refining the color grading so everything works together.
After watching this helpful tutorial, be sure to visit Mohrle’s YouTube channel for more shooting and editing tips. And be sure to check out another video we posted recently, explaining an “essential” Photoshop tool that one pro says he can’t live without.


![]()
Get the Latest Photo Tips, News & Reviews from Shutterbug!
| Camera Reviews Other Reviews | Mobile Reviews Photography Reviews Columns | News | Features | How-To | Resources |
 © 2025 Shutterbug
AVTech Media Americas Inc., USA
All rights reserved