- REVIEWS
Camera Reviews 
More Reviews Mobile Reviews Photography Reviews - GALLERIES
- VIDEOS
- BUYER'S GUIDES
Aperture’s Light Table; Layout And Picture Stories: A Newfound Tool For A Lost Art
The old-style picture stories once popular in newspapers and magazines seem to have fallen out of favor. That's a shame, because picture stories remain a very effective and powerful means of expression. When you are preparing pictures for publication, exhibition, or even a personal portfolio, you will need to spend some time comparing, selecting, and juxtaposing photographs so that they will work together. This is a complex and subtle art.
 |
This is what the Light Table feature in Aperture is designed for. It is unique
among image cataloging applications in this respect. Other programs enable you
to assemble and reorder chosen images in "Albums" or "Collections,"
but only as same-sized thumbnail images in a standard rectilinear grid. But
in Aperture's Light Table you can lay them out on a virtual work space
and move them around like prints on a tabletop.
These images can also be re-sized, repositioned, arranged automatically, and
aligned. You can experiment with the visual contrasts to be gained from juxtaposing
images by size, content, and orientation. It's an opportunity to really
explore the visual potential of using images in combination rather than singly.
 |
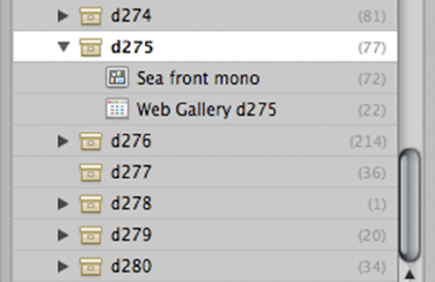
A Light Table can be thought of as a specialized kind of Album. Like Albums,
they can be created within individual Projects. Here, the Light Table is called
"Sea front mono" within the "d275" Project. (This Project
has been given a serial number, but you can, of course, use descriptive names
for your Projects.) Alternatively, Light Tables can be created outside of Projects,
and may contain images drawn from several different Projects. (Projects are
one way to assemble images within Aperture.)
To create a Light Table, use the File>New>Light Table menu command or
select the images you want to include in the Light Table and use the "New
Light Table from Selection" button in the Aperture work space.
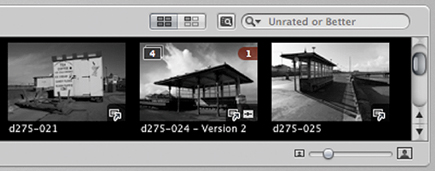
The Light Table work space consists of the Aperture Browser strip at the base,
but with the Viewer area above now given over to the "table." To
add an image to the Light Table, just drag it from the Browser and on to the
Viewer area. When you do this, Aperture marks the Browser thumbnail with a "1"
to indicate that it's been used once in the Light Table. Alternatively,
you can configure the Browser to display only unused photos by pressing the
"Show Unplaced Images" button.
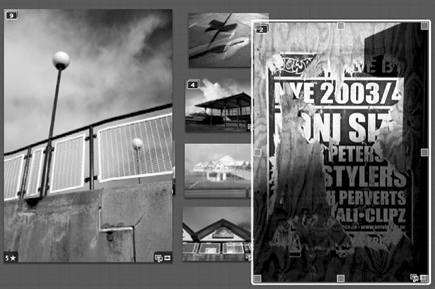 |
Once they've been placed on the Light Table area, photographs can be
dragged into position at will. They can also be re-sized--whenever you
move the mouse pointer over a photo, corner and edge handles appear. The aspect
ratio is maintained regardless of whether you drag the corner or edge handles.
You may find that the Light Table area isn't large enough for your "spread."
There are no commands for increasing its size. Instead, simply drag a photograph
off the edge to expand the Light Table automatically.
In use, the Light Table area is practically infinite. This isn't necessarily
a good thing! If you drag too quickly, or fail to release the mouse button soon
enough, you move the photograph too far away from the rest; increase the Light
Table size by more than you intended and navigation becomes much more difficult.
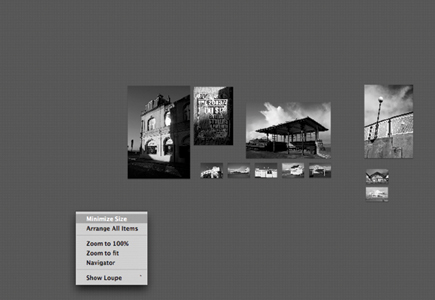 |
If this happens, use the "Scale to Fit All Items" button at the
top right of the Viewer panel, directly to the left of the Magnification slider.
Now you should be able to see all your photographs, and drag the errant image
closer to its companions.
|
| |||||||||


![]()
Get the Latest Photo Tips, News & Reviews from Shutterbug!
| Camera Reviews Other Reviews | Mobile Reviews Photography Reviews Columns | News | Features | How-To | Resources |
 © 2026 Shutterbug
AVTech Media Americas Inc., USA
All rights reserved