- REVIEWS
Camera Reviews 
More Reviews Mobile Reviews Photography Reviews - GALLERIES
- VIDEOS
- BUYER'S GUIDES
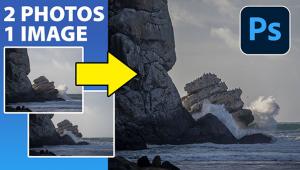
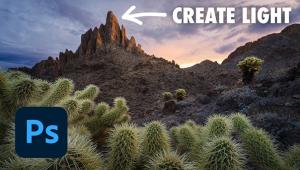
3 Easy Photoshop Tricks for Better Cutouts (VIDEO)

We all like to “get it right in the camera,” but every so often it’s necessary to cut out a portion of an image. Sometimes that’s because we’re working on a composite, like replacing a boring sky, placing a subject against a better background, or eliminating a distracting object.
Whatever the reason, executing a precise cutout can often improve an image. As you’ll see in the video below, the process is far easier than you may think, thanks to a few helpful Photoshop tricks from one of our favorite image-editing experts. Jesus Ramirez is adept at simplifying seemingly difficult tasks and he demonstrates how to quickly make masks for simple cutouts.

Ramirez also has a quick trick for more complicated cutouts, like dealing with flyaway hair and messy backgrounds. He begins the tutorial by explaining why the common technique of using blending modes to execute cutouts isn’t always the best approach. The three tricks Ramirez presents are both easy and effective, and the one you choose will depend upon the image at hand.
As you’ll see, the downside to using blending modes to execute a cutout is that with this approach you’re unable to apply a Layer Style and add certain effects to an object. Instead, Ramirez explains how easy it is to get the job done using Photoshop’s Channels Panel.

When it comes to cutting out people, Ramirez demonstrates a trick for using Photoshop’s Remove Background tool. While this technique often works well, it occasionally results in unsightly white fringing around the edges of your mask. Fortunately, Ramirez has an easy solution for resolving this issue when it occurs.
After watching the 15-minute video for complete details on all three of Ramirez’ tricks, head over to his YouTube channel for more editing tips. And be sure to check out another Photoshop tutorial we posted recently, with five easy Photoshop tips every photographer should know.


![]()
Get the Latest Photo Tips, News & Reviews from Shutterbug!
| Camera Reviews Other Reviews | Mobile Reviews Photography Reviews Columns | News | Features | How-To | Resources |
 © 2025 Shutterbug
AVTech Media Americas Inc., USA
All rights reserved