- REVIEWS
Camera Reviews 
More Reviews Mobile Reviews Photography Reviews - GALLERIES
- VIDEOS
- BUYER'S GUIDES
Use Photoshop's PATH BLUR for Photos with a Soft, Artistic Flair (VIDEO)
We constantly preach the importance of experimenting with new techniques that enable you to create a style all your own and make your images stand out from the rest. There are a variety of ways to achieve these goals—either in the camera or during the editing process,
Earlier this morning we posted a tutorial that took the first approach, explaining how to shoot photos that convey a compelling sense of motion. Now, in the lesson below, you'll learn how create similar effects while processing an image in Photoshop.
Instructor Brian Matiash hosts a popular YouTube channel with this simple motto: "Make Better Pictures" using simple editing techniques that anyone can master. This episode explains how to elevate your creative powers in Photoshop with the easy-to-use Path Blur tools.

The breathtaking images you'll create by following the advice Matiash provides belie how easy they actually are to create. In fact, those you view your results may think you're a Photoshop expert. Moreover, Matiash says, "This is a lot of fun."
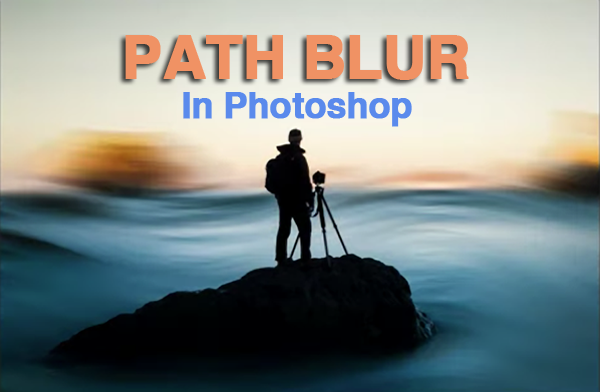
The trick with Path Blur is to use it sparingly with the right type of photo. Matiash explains that by taking this approach you will "completely change the photo and give it a unique artistic look." Before getting started there are a few thing to consider when selecting an image to enhance. First, it helps to have a person (or other prominent subject) in the scene.
Secondly, that object should only occupy a small portion of the frame. It's also advisable to have some separation between your foreground subject and the background—like in the demonstration image of Matiash standing on a frozen lake with slightly out-of-focus mountains as the backdrop. Once you find the right image it's time to get to work.
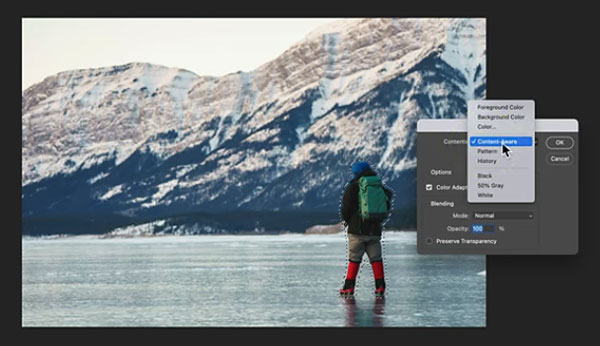
Matiash explains the step-by step process, which begins by preparing layers in Photoshop, both for himself and the background. Here he provides helpful keyboard shortcuts for speeding up the process. As you'll see, Adobe's Select Subject tool gets the job done fast and with precision.
Only two Path Blurs are required for this simple image. The first is a straight one that provides an abstract look to the background. Matiash also adds a curved Path blur to simulate a wave in the water closer to the foreground. This step further accentuates the appearance of motion within the shot.
Now the photo is looking pretty great, but Matiash has one more trick up his sleeve—and it's a powerful one. Here you'll see how Landscape AI presets can add an impressive final touch.
Be sure to pay a visit to the Brian Matiash YouTube channel where's there's much more to learn. And don't miss this morning's related tutorial mentioned above.


![]()
Get the Latest Photo Tips, News & Reviews from Shutterbug!
| Camera Reviews Other Reviews | Mobile Reviews Photography Reviews Columns | News | Features | How-To | Resources |
 © 2026 Shutterbug
AVTech Media Americas Inc., USA
All rights reserved