Use LR's Linear Gradient Tool for Epic Nature & Travel Photos (VIDEO)

Outdoor photographs often need local adjustments to balance a bright sky against a dark background, or when one side of an image is brighter than the other. The trick is using Lightroom's Linear Gradient tool to create soft transitions in a fading pattern to make the necessary enhancements.
This tutorial from instructor Abhishek Mitra demonstrates how easy this is to do in less than seven minutes, and by the time the video concludes you'll want to add this powerful technique to your postprocessing bag of tricks. Mitra is an accomplished travel and landscape photographer, but what you'll learn today will prove extremely helpful for just about every photo you shoot in the great outdoors.
Mitra's demonstration photo is an attractive seascape with mountains in the background and a man in a small boat in the lower portion of the frame. His goal is to balance out the tones to increase details in the sky and draw attention to the subject in the foreground. The rehabilitation process begins by going to Lightroom's Masking panel and selecting the Linear Gradient option. When Mitra applies a gradient to the sky you'll see how the effect is at 100% at the top, while gradually decreasing as you move lower in the frame to create a smooth and realistic transition. And this holds true for all the adjustments you make to exposure, highlights, and other key attributes.

Mitra demonstrates why the size of the gradient is so important, primarily because you don't want it to overlap other key elements in the frame—like the guy sitting in a. He refines the height of the gradient and then decrease overall exposure and further drops highlights.
The next step occurs in the Effects section where Mitra boosts Dehaze which "really helps to bring out details in the sky." He warns not to go overboard with this enhancement "otherwise the image will look artificial."
Mitra provides this very helpful reminder: "Usually when you look at an image your eyes are automatically attracted to the brightest portions of the shot." That why he applies two more Linear Gradients to create a slight vignette in the lower left and right corners of his photograph—explaining the simple process as you watch.

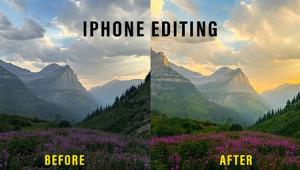
The lesson concludes by demonstrating how Linear Gradients are also useful for selectively enhancing colors without affect other areas in the frame. Mitra's before/after images prove the power of these simple techniques. There's much more to learn by visiting Mitra's new instructional YouTube channel.
Be sure not to miss the earlier tutorial we featured with another post-processing expert, intended for those who don't understand the difference between Lightroom's Vibrance and Saturation tools.


