- REVIEWS
Camera Reviews 
More Reviews Mobile Reviews Photography Reviews - GALLERIES
- VIDEOS
- BUYER'S GUIDES
Turn Day Into Night with This Super-Easy Photoshop Trick (VIDEO)

Yesterday’s Photoshop tutorial was all about beating the summer heat (visually, at least) with a quick method for making images captured in summer appear as though they were shot in winter.
Today, photo-processing expert Jesus Ramirez of the Photoshop Training Channel is back with another three-minute trick—this time demonstrating an unbelievably easy and realistic technique for turning daytime photos into night scenes—complete with a full moon. For this quick-but-powerful trick Ramirez employ’s Photoshop’s Lookup Tables and a Hue/Saturation Adjustment layer to get the job done.
And as with yesterday’s seasonal swap, this video is one of his In-App tutorials that you can access directly within Photoshop whenever you want by following the instructions he provides here. But for now you can watch it below.
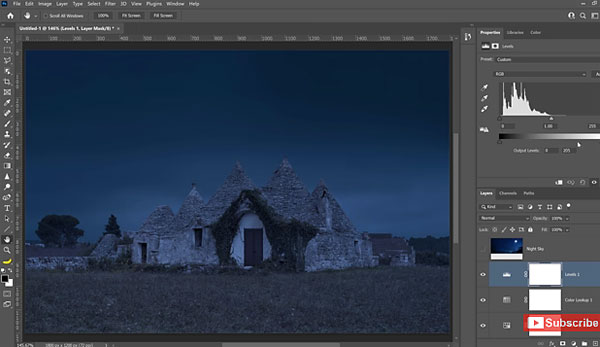
Ramirez begins with two images: his daytime photo and a nighttime image with a full moon that will be composited into the first shot after creating the day-for-night effect. The first step in making the transformation involves clicking on the New Adjustment Layer icon and selecting Hue/Saturation.
Next Ramirez goes to the Properties Panel and drags the Saturation slider to the left for a value of -65 to significantly reduce the saturation in the image. Once that’s done, he once-again clicks on the New Adjustment Layer icon—this time choosing the Color Lookup option.
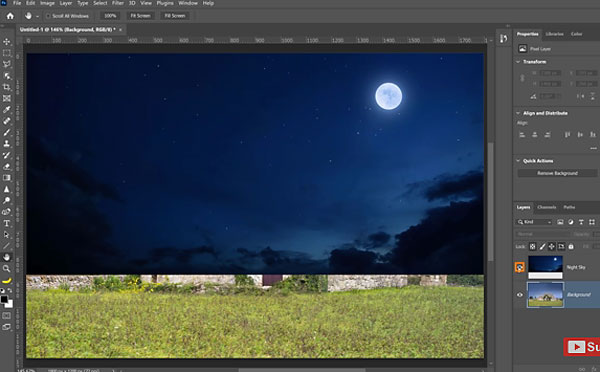
As you’ll see, Lookup Tables enable you to convert the original colors in an image and remap them for different effects. Ramirez demonstrates how to do that, add a Levels Adjustment Layer, and finally replace the sky to achieve the final result.
After watching the video, head over to Ramirez’ YouTube channel for more tips and tricks. And be sure to check out the earlier tutorial we posted, demonstrating how to create a winter scene from an image shot in summer.


![]()
Get the Latest Photo Tips, News & Reviews from Shutterbug!
| Camera Reviews Other Reviews | Mobile Reviews Photography Reviews Columns | News | Features | How-To | Resources |
 © 2026 Shutterbug
AVTech Media Americas Inc., USA
All rights reserved