- REVIEWS
Camera Reviews 
More Reviews Mobile Reviews Photography Reviews - GALLERIES
- VIDEOS
- BUYER'S GUIDES
Straighten Tilted Photos Without Cropped Edges: An Easy Photoshop Trick (VIDEO)

We’ve all inadvertently shot cockeyed photos, and it’s usually because we weren’t paying attention. The most common example is a horizontal landscape image with a tilted horizon, but this problem can also occur with vertical lines when shooting in portrait orientation.
“What’s the big deal?” you say, “it’s an easy fix in Photoshop.” Well that’s true, sort of, because the standard approach results in some cropping to the outer edges of the image. As you’ll see in the quick tutorial below, there is a better way—and it takes hardly any extra effort or time.

As a Shutterbug regular, you’re no doubt familiar with image-editing impresario Unmesh Dinda who has almost four million subscribers to his instructional YouTube channel. In today’s episode he demonstrates how to straighten, rotate, or even expand a photo without losing any portion of the shot.
Dinda begins with a quick review of the conventional approach, in which you first go to the Crop & Straighten tool and then draw a straight line along the tilted horizon. That straightens the shot, but some content around the periphery of the photo is lost in the process. And the more the original image is skewed, the greater the unwanted crop.
As you’ll see, Dinda’s fix is both super-fast and simple, as it only takes him five minutes to explain. The magic occurs when you invoke the automatic Content Aware Fill feature built into the Crop & Straighten Tool. Amazingly, all that’s required to do that is to click a box.
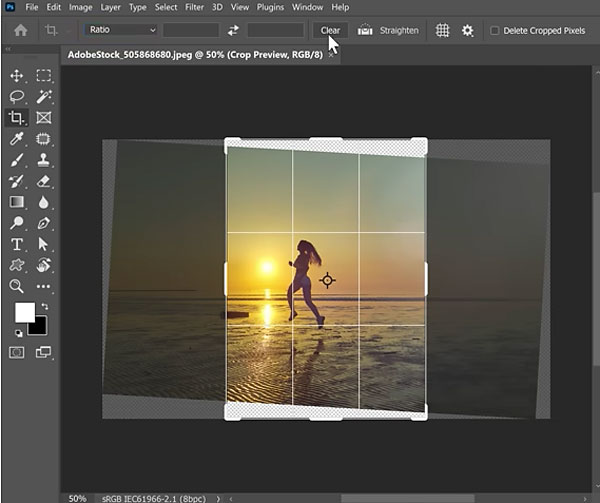
Now when you straighten a tilted image, the cropped-out areas are automatically filled in. This trick also works perfectly when your goal is to rotate or expand a photograph.
After watching the video head over to Dinda’s YouTube channel where you’ll find more tips and tricks.
And if you’re inexperienced with Photoshop, check out our recent post with a Beginners Guide to Photoshop’s powerful Adjustment Layers.


![]()
Get the Latest Photo Tips, News & Reviews from Shutterbug!
| Camera Reviews Other Reviews | Mobile Reviews Photography Reviews Columns | News | Features | How-To | Resources |
 © 2026 Shutterbug
AVTech Media Americas Inc., USA
All rights reserved