Shoot Like A Pro...
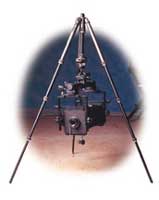
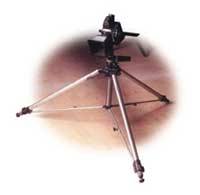
In Your Basement, Bedroom, Or Spare Room

This portrait setup was achieved in a very small amount of space. A small light box to the right, a snooted flash head to the left at about 6' off the ground, and a direct flash on the background. Lighting like this can be achieved in almost any size environment.
Photos © 1999, Jay Abend, All Rights Reserved

One of the most difficult obstacles to overcome for the aspiring studio photographer is the lack of a proper space to shoot. Spare bedrooms, garages, attics, and basements have all been transformed into makeshift studios, and most lack adequate space to really establish a proper lighting setup.

I can recall trying to shoot headshots in my parents' basement years ago, my one silver umbrella digging into the basement ceiling tiles as I tried to use every inch of the 6'10" basement height. In fact, my first professional studio assignment was shot in a basement apartment that I rented from a photographer. The ceiling loomed at an ominous 6'11" high, a mere 7" above my own head. The assignment was a tabletop product shot, the kind of job that should be a rather simple affair. The client wanted the classic fade to black background and some nice soft overhead lighting. Unfortunately I couldn't fit my big Larson Soffbox above the product without having it actually in the frame, quite a problem. My solution was to try and set the tabletop up at a lower height. This proved to be a problem because my tripod could go low enough to shoot at a table height of less than 32", and the product was about 36" high. This left me a total of about 15" from the top of the product to the ceiling. Even the thinnest light box in my arsenal was a hefty 26" deep with a flash head mounted to it. I finally just bounced the light off the ceiling and used a pre-screened black fade background, but I was never happy with the quality of the light, and I don't think the client was thrilled. Later I got the chance to work for the same client after I had moved to a suitable studio with 18' ceilings and I was finally able to show what I could do with the proper amount of space.

Many tripods can flip the center column for floor scraping camera angles, perfect for low ceilings.

While I have always sought out a studio space with adequate ceiling height for my commercial work, there was a period of time when I had no studio, yet often had the need to shoot people or products in my own basement. While it wasn't the most professional atmosphere, the results were topnotch and I am quite sure that the pictures from the basement were no less professional than those from my current studio. Obviously I wasn't anxious to have my advertising clients visit, but at the time it was the best shooting space I had. Years ago I worked for several wedding studios that were located in the lower levels of houses, and we managed to shoot lots of excellent portrait settings in very modest surroundings.
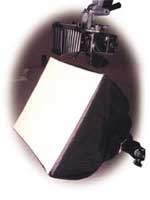
While it is easy enough to set up your lights and cameras and begin shooting in any space, there are some secrets to working in a basement, spare bedroom, or other less than ideal spaces. Here are a few that I've picked up:
Thin Is In. When shooting people, especially fashion/glamour shots, you'll often need to get some light high above the model, especially right over the lens. With a short ceiling umbrellas are definitely out. While their light quality is excellent and the distinctive umbrella shaped catchlight in a model's eyes is still a contemporary look, without enough height you're forced to position the umbrella to either side of the camera at roughly eye level. This is OK for standard senior portrait type photography, but probably not what you're looking for to make a model or piece of clothing really pop on film. A white ceiling or white cards affixed to the ceiling can yield some even lighting above the subject, but as you've no doubt learned from bouncing your shoe mount flash against the ceiling or shooting on a gray cloudy day, big diffused overhead light can often look extremely flat, yielding a dull featureless look. A better solution is to bounce some light off of a small white card affixed to a black ceiling. A medium sized piece of foamcore can be a really effective bounce card on an otherwise dark ceiling.

When you need more control and more light output only an enclosed softbox can do. To have a softbox above a tabletop product shoot you'll have to shop for a box that is thin in depth. The Plume Wafer boxes do a nice job, and the Wafer 75 is a mere 10" deep, yet at 22x30" is big enough for the average small tabletop or headshot.

When trying to achieve the "over-under" approach to fashion lighting, with a softbox above the lens and another one under the lens, you'll need to find a box that is thin in height, and position it directly over the camera. In very tight surroundings your head might even be touching the flash head, but you'll have the light where you need it. While I have usually fashioned such narrow strip lights out of foamcore, there are excellent lightweight commercially available boxes around now, like the Chimera Pro Bank strip light that measures 36' long but only 9" high. If you have to work in a space with a low ceiling height, then you'll definitely want to have at least one of these strip lights in your arsenal, plus they come in handy for interesting still life lighting effects

Even with restricted height, you can squeeze a small light box between your lens and the ceiling for over the lens lighting effects.

Get Low. Obviously if your ceiling is low, you'll want to try and position your camera as low as possible. Since a standard tabletop is 30" to 32" high, you'll want to fashion your own shorter table for product shots. I have had very good luck with a standard 32" wide hollow core door supported by four milk crates.

Once the table is at a suitable height, you've got to deal with the opposite problem--the floor being too close. For instance, how do you position a horizon light just below the edge of your tabletop to yield a nice glow behind a tabletop product if your flash head is taller than your tabletop height? A smaller flash head and reflector are a good start, and you can also do wonders with a few well positioned mirrors. A major problem for users of medium and large format cameras will be camera height. A tabletop 10" off of the ground will make it all but impossible to shoot at "ground level," and you'll always find yourself looking down at your products. A tripod that drops down to ground level is really important. Another neat trick is a tripod with a reversible column. This will allow you to actually position your camera underneath the tripod, but will require you to poke your head through the tripod legs to focus. Less than ideal. I solved that problem by building a low-level camera platform. I simply bolted a Bogen heavy-duty tripod head to a 4x4' piece of 3/4" plywood. A few well placed sandbags and the rig was solid as can be, and at the right height. I could raise the rig as I wanted by stacking 3/4" plywood under the camera platform.

Location, Location, Location. Once you're in the right attitude camera wise, where to place your lights, and how? The location of your light stands and booms is rarely a problem in a well equipped studio, but at home you'll find that you're always tripping over stands, cables, and tripods. A basement or garage studio can be a much more pleasant working space if you can find a way to remove the clutter from the floor. The least expensive and easiest way to get your stuff up and out of the way is to install a series of standard "studs" about your walls and ceilings. This will allow your light heads to simply bolt on, removing the light stands from the picture. The problem with simple stud mounts is that they are never in the right location. They are always too far or too close to the action. The next best thing is the photographer's version of the "plumbers helper," the handy Bogen Magic Arm. Resembling an articulated elbow with a stud at each end, these things have placed lights and cameras in more impossible places than I care to remember. Pair these up with a Bogen Super Clamp at one end and you can clamp them onto your ceiling rafters at will, extremely handy.

Studs and Magic Arms are handy, but nothing beats a boom for putting the light exactly where you want it. I have both Matthews and Bogen boom arms with wheeled stands, and they take up a lot of room. Much of the versatility of these rigs is available with a boom arm that mounts on the wall. This can be a perfect compromise, especially in a small room where a big boom would be impossible to use.

Watch Those Walls. In a small space you'll run into a problem right away--controlling your light. Low ceilings will tend to bounce light back on your subject, whether intended or not. A small room will tend to impart its own character on nearly every lighting setup. While it would be simple to merely paint the entire room black, if this is a den or a guest bedroom, intend on having a very unhappy spouse. In a larger studio you'll often find "gobos," the nickname for movable panels that block light from reaching the subject. You can fashion your own gobos at home out of simple materials like heavy black cardboard and some strips of wood.

Some materials are difficult to shoot in small spaces due to their reflective surfaces. I always kept a few large pieces of black canvas on hand and taped them to the walls and ceiling when I was shooting reflective materials like glass and chrome. A few curtain rods and some inexpensive black muslin can quickly remove objectionable reflections from walls and doors, and it is less offensive than living with a black room.

Hanging The Backgrounds. Assuming that you'll be doing some serious photography in your basement shooting space, you'll need to find a place to hang your painted backgrounds and seamless paper. In many pro studios you'll find a pair of Autopoles propped between the floor and ceiling, with a few background racks hanging from the top. With 15' heights it is no problem to simply hang one roll above the other and pull down what you need, since the rolls themselves are out of camera. In a basement environment you'll find that even clamped to the ceiling joists the seamless roll will intrude into the frame. My early studio had a finished ceiling, into which I screwed two pieces of furring strip with four large yellow "bicycle hooks" screwed in at 6" intervals. This allowed me to hang four rolls of seamless flush against the ceiling, taking up almost no height, and only 2' of depth.

For photographers who specialize in portraiture, I would try mounting various colored seamless papers and 4x4' painted backgrounds on thin pieces of plywood. You can mount a different background on each side of the plywood, with five pieces giving you 10 different backgrounds. A light stand on each edge of the board and a few spring clamps and you're all set. Without having the paper hanging and susceptible to damage you'll find that one short roll will last years, simply replacing the mounted paper as it gets soiled.

The Backlight Dilemma. One of the most dramatic light sources in portraiture and glamour photography is the hairlight or backlight. You'll often notice a hairlight that seems to emanate from behind the model, but apparently from above the model's head. With low ceilings there is no way to hang a light fixture behind the model's head without having it in the frame. If you're really desperate to achieve this effect you can hang a piece of mirror cut for a car rearview mirror on the ceiling and bounce some light off of the mirror onto the subject. Simply position the light on the floor behind the model and adjust the mirror for correct aim. Another way to go is a light on either side of the model with barn doors or a snoot to narrow the angle of the light, or perhaps one light on each side if the effect is not too brutal.

You'll often find that textured products can do with a narrow strip of hard direct light to accentuate the texture, even though the bulk of the object is lit with diffused light. I used just such an effect on some computer peripherals recently, using my focusing spotlight for the highlight. In a small working environment exotic gear like large focusing spotlights is definitely out, so try a honeycomb attachment to your light head. Most of these do a very good job of focusing the light into a well-defined spot, and you can usually mount a barn door unit in addition to further narrow the light.

A tripod that can go low is perfect for shorter tabletop heights.

Where Did I Put That Lens? Working out of your home or a temporary working environment is tough for a lot of reasons, but without a permanent place for your gear you'll spend a lot of time searching for stuff. I have become fond of those big red Craftsman tool boxes that mechanics have. They are metal, can be locked, and offer very heavy-duty draw slides for heavy stuff. I like the base units that come with casters and have deep draws to swallow up medium format bodies and lenses. I store my light heads in the bottom bin, and the computer that drives my digital studio camera sits on top. I can move this rig anywhere in the studio and have my lenses, flash heads, and film at my fingertips.

In the basement studio I tried to work out of a motley collection of gadget bags and different sized photo cases. An excellent idea is a small shelf unit or armoire that can accommodate all of your gear. For security's sake you might want to consider a steel locker that can be bolted to the wall from the inside, then securely locked. Once opened you can arrange all your 35mm gear on one shelf, lighting on the bottom, and medium and large format on another shelf. I find it helps to hang a sheet with my entire equipment list on the inside door, so I can put together a location kit quickly and easily.

The Rental Option. These days with escalating rents and expenses, it doesn't pay to maintain a full-time studio if you don't have the work to support it. If you have the occasional need for a pro studio space, you can certainly rent one if you live in a major city. Even in the suburbs you can often rent some time in a local professional's studio. If you really need the space you can try an unused meeting room in your local hotel or conference center. On location I often rent a small conference room in a hotel to shoot products when the client doesn't have enough room for me at their location. Keep in mind that renting a pro studio for one or two days might equal a full month of rent for a modest studio of your own, but at least you'll have the space you need. Most real big city rental studios have a collection of light stands and tripods that come with the studio for the day, as well as a darkroom, dressing rooms, and the ability to rent equipment as you need it.

Whatever your situation, there will come a time when you'll need to squeeze a photo shoot into a corner or cubbyhole of your home. If you find that it is becoming a regular event, you might want to consider using some of the tricks that I've learned over the years to make your life a little easier and your shooting a little more creative.

X