- REVIEWS
Camera Reviews 
More Reviews Mobile Reviews Photography Reviews - GALLERIES
- VIDEOS
- BUYER'S GUIDES
Remove Haze & Restore Details in Nature Photos with This Easy Photoshop Method (VIDEO)
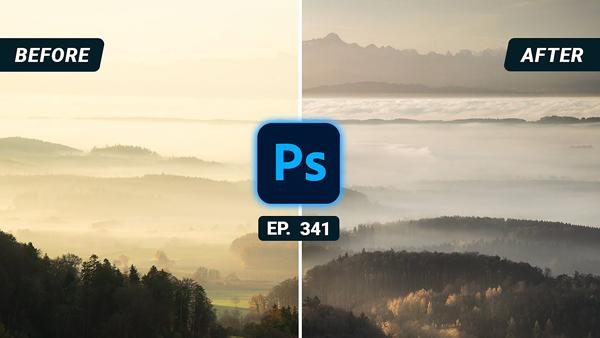
What if you arrive at a location, only to encounter atmospheric that obscures important objects in the background, reduces details throughout the scene, and basically ruins your shot? You can either return on a better day, or take a few photos and fixed them in Photoshop with the simple technique below.
German pro Christian Mohrle is one of our favorite landscape photographers and instructors, and in this eight-minute episode he demonstrates how easy it is to bring hazy outdoor images back to life. Not only can you use this editing technique to improve images you shoot in the future, but you can revisit hazy landscape photos in your library and make them better too.
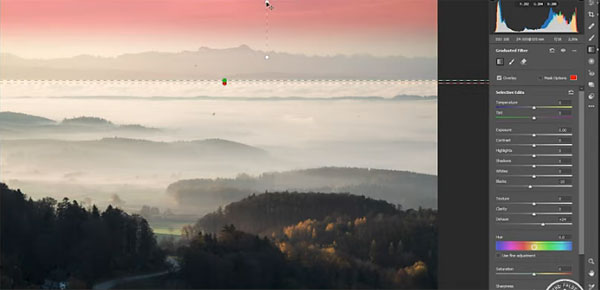
Mohrle’s approach involves both global adjustments in Adobe Camera Raw, and local adjustments in Photoshop to really refine the job. Interestingly, he begins by changing the file profile to Adobe Portrait, which he prefers for adjusting white balance for more natural tones.
The first step in reducing haze is to bring down the highlights, add contrast and shadows, and slightly raise the blacks. Turning to local adjustments, he adds a graduated filter over the background, adds a bit more Dehaze, and further reduces the blacks. Now the distant mountains are much more visible.
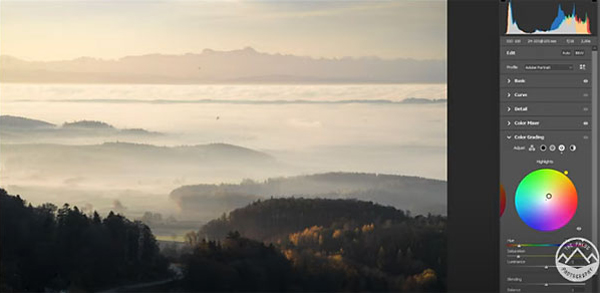
All that’s left is a bit of color grading, a luminosity mask targeting the darker tones, and few quick tweaks to perfect the shot. Bottom line: this is a fast and easy way to turn rejects into keepers, so give it a try. After watching the video, head over to Mohrle’s YouTube channel for more great tips.
And be sure to check out the recent tutorial we shared, explaining when and how to use manual focus for photographing birds in flight.


![]()
Get the Latest Photo Tips, News & Reviews from Shutterbug!
| Camera Reviews Other Reviews | Mobile Reviews Photography Reviews Columns | News | Features | How-To | Resources |
 © 2026 Shutterbug
AVTech Media Americas Inc., USA
All rights reserved