- REVIEWS
Camera Reviews 
More Reviews Mobile Reviews Photography Reviews - GALLERIES
- VIDEOS
- BUYER'S GUIDES
Photoshop Basics: The Easiest Way to Dodge & Burn Images in Just 2 Minutes (VIDEO)
The practice of dodging and burning to manipulate exposure in different areas of an image dates back to the early days of film photography and the wet darkroom. Today we do the same thing in the digital darkroom to add drama and depth to our photos.
The technique of using various overlays to balance exposure can be complicated, but today’s quick Photoshop tutorial demonstrates a remarkably easy technique for getting the job done.
In this episode of the ongoing Sixty Second Sessions instructional series, photographer Gary McIntyre demonstrates how to use Curves for dodging and burning in barely two minutes. Best yet, even beginners will get great results with this simple method.
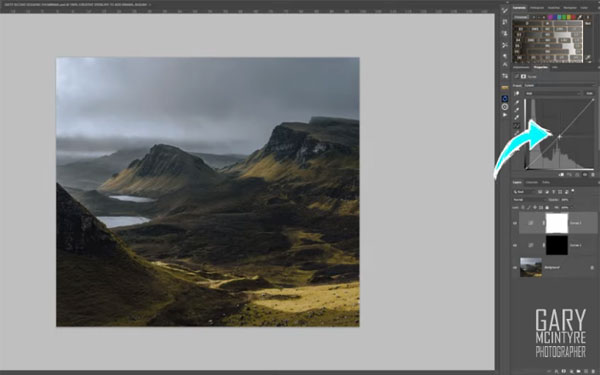
McIntyre begins by opening Photoshop, navigating to the Adjustments Panel, and selecting the Curves option. He then uses a quick keyboard shortcut to create two adjustment layers in different parts of his image. As you might suspect, one layer is for dodging while the other is for burning.
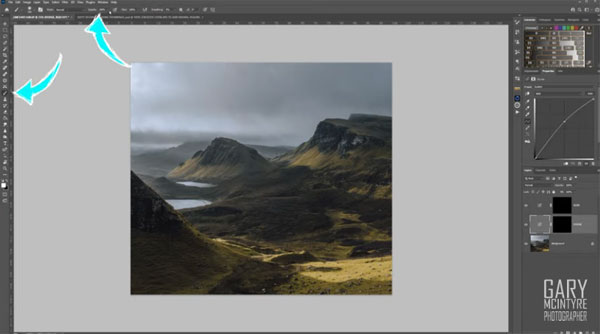
From here he begins painting in white, while explaining the settings he uses for Opacity and Brush characteristics. You’ll see how his results change as he slightly modifies the settings and pushes or pulls the Curve.
That’s about all it takes to use this quick and effective method, so give it a try the next time you want to balance tones in an image.
You can find more helpful advice on McIntyre’s YouTube channel and in a similarly simple Photoshop tutorial we shared from another expert, explaining the difference between Flow, Fill and Opacity.


![]()
Get the Latest Photo Tips, News & Reviews from Shutterbug!
| Camera Reviews Other Reviews | Mobile Reviews Photography Reviews Columns | News | Features | How-To | Resources |
 © 2026 Shutterbug
AVTech Media Americas Inc., USA
All rights reserved