- REVIEWS
Camera Reviews 
More Reviews Mobile Reviews Photography Reviews - GALLERIES
- VIDEOS
- BUYER'S GUIDES
Photoshop Actions; Add Effects With A Mouse Click
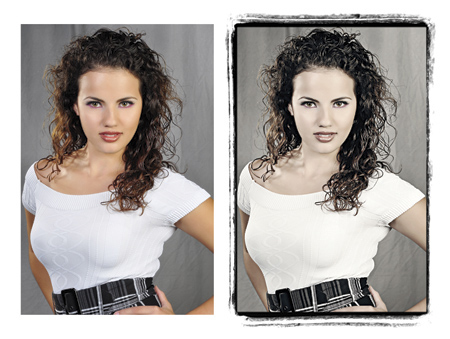
If you would like to create special effects without using plug-ins or following tedious tutorials, you’ll want to explore Adobe Photoshop’s Actions palette. Actions are not applications or even plug-ins; they are simply a series of instructions that store a sequence of image-editing steps that can be applied not only to the file you’re working on but to other, similar files in the future. This makes actions powerful tools for wedding or senior photographers who need to apply an effect or tweak to multiple images in a batch. Tip: The main thing to remember, especially when applying effects-based actions, is that different kinds of images can produce different results, so you should experiment and try the same action with different photos to see what happens.
 |
|
|
The capability to create and work with actions was originally added to Photoshop 4.0 and remains an important part of every update since. Photoshop Elements comes with a set of actions that can be found in the Guided Edits menu as “Automated Actions.” You can run actions in Photoshop Elements that were created in Photoshop as long as they use features supported by Elements. Adobe advised me that “Automated Actions may not work on all file types or layers.” While actions have access to the power of Photoshop, Adobe also told me “Lightroom’s export presets provide a subset of what you could achieve with an action.” Some commercial actions, such as Craig’s Actions (more later on them) provide software “hooks” that allow them to work with Lightroom.
Build Your Own Actions
Actions are cross-platform. If you create an action using a Mac OS computer, then anyone using the Windows version of Photoshop can load and apply your original action to his or her images. Whether in Mac OS or Windows form, all action files use the .atn file extension and can be shared with others by using the Save Actions command found in the Actions palette. Lagniappe: You can download the free Joe’s.atn from the Shutterbug website. It includes the action I’m about to create along with a workflow action that may be useful as a way of looking at steps used to create an action.
The Actions palette (Window>Actions) has List View and Button modes. List View lets you create and edit actions by accessing the New Action command from the fly-out menu in the upper right-hand corner of the palette. Choosing “Button Mode” at the top of that same menu activates playback or Button Mode. Tip: Before you can record an action, the palette must be in List View. To play an action, the palette must be in Button Mode. If you want to apply an effect that will be consistent across many different files you’ll want to create an action, especially if you need to apply it more than once or in a batch. The productivity advantage is to create once, apply many times.
Create An Action
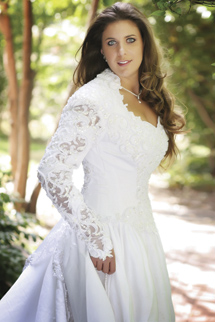
The example that follows was made using the Mac OS version of Photoshop CS4 but the steps would be identical to earlier Mac OS or Windows-based versions of the program. Let’s make an action that converts a color photograph to black and white and then adds a soft focus effect:
Step 1: To create a new action, select New Action from the Actions palette. A dialog box appears that lets you name the action, assign it a location in the palette, a Function key, and even a color for it that will be used in Button Mode. Tip: You don’t have to assign a Function Key. Since keyboards don’t have that many Function keys, I usually reserve them for frequently used actions only. You can then start recording the steps in your action and you will see that the Record button at the bottom of the palette is now red.
 |
|
 |
|
|
Step 2: To convert color images into monochrome, I used Photoshop’s Channel Mixer (Image>Adjustments>Channel Mixer) and tweaked the sliders as shown. Clicking the OK button applies the effect and allows you to proceed to the next step.
 |
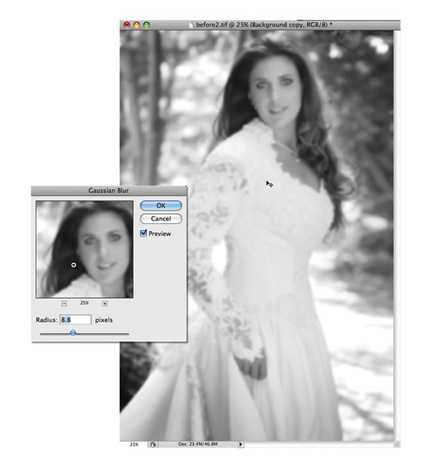
Step 3: Create a new layer (Layer>Duplicate Layer function). Tip: It’s often a good idea to start by creating a new layer. This way the effect is applied to separate layers, giving you more control over how you handle the final application of the effect.
 |
Step 4: Apply Gaussian Blur (Filter>Blur>Gaussian Blur) to the new layer. You can apply any kind of blur effect from Photoshop’s Blur menu and I chose Gaussian but you might like one of the others. Gaussian refers to a bell-shaped curve that’s generated when Photoshop applies a weighted average to the pixels and while the filter adds low-frequency detail it produces a hazy effect that’s ideal for soft focus. You might prefer the Lens Blur filter for a more bokeh-like effect.
 |
Step 5: Change the Blending mode for the new layer in the Layer palette’s pop-up menu to “Overlay.” The Overlay Blending mode preserves the highlights and shadows while mixing the base color and works well in black and white as well. After changing the Blending mode, you can optionally change the overall opacity of the new layer to soften and blend the effect with the background layer.
 |
When you’re finished, select Stop Recording from the fly-out menu and you’re done. The completed action is now available in the Actions palette for application to a single photograph or many image files using a batch operation using the Batch (File>Automate>Batch) command. The order in which tasks are executed can be edited by dragging and dropping in any order you wish. You can also run an action with some of its steps disabled and have it display dialog boxes during playback so you can interactively adjust specific settings.
Although actions can apply creative effects, they are not filters and don’t have to be treated like plug-ins. One of the main attractions of actions is that they’re convenient. Since the palette is scrollable, you can keep your favorite actions stored there ready for use.
 |
Free & Commercial Actions
One of the best web-based sources for finding actions and other software, including plug-ins, is Adobe Marketplace & Exchange (www.adobe.com/cfusion/exchange). Other action sites worth trolling include Jim Lewis’s ActionCentral (www.atncentral.com). Use Google to look for other, newer sites. Since most actions require less than 50K of hard disk space you don’t have to be worried about download time. In addition to freeware and shareware actions there are several collections of commercial actions that are worth a look.
 |
 |
|
|
||
|
| |||||||||


![]()
Get the Latest Photo Tips, News & Reviews from Shutterbug!
| Camera Reviews Other Reviews | Mobile Reviews Photography Reviews Columns | News | Features | How-To | Resources |
 © 2026 Shutterbug
AVTech Media Americas Inc., USA
All rights reserved