- REVIEWS
Camera Reviews 
More Reviews Mobile Reviews Photography Reviews - GALLERIES
- VIDEOS
- BUYER'S GUIDES
Photographing Yosemite: Tips For Capturing One Of The Country’s Most Beloved Parks

(Editor’s Note: Destination Travel is a new Shutterbug column that offers tips on how to capture popular photo destinations. This month, outdoor photographer and workshop leader Josh Miller preps you for a photo trek to Yosemite.)
There is no place on the bucket lists of more landscape photographers than California’s Yosemite National Park. Nowhere else in the world can a photographer find such a concentration of waterfalls, dramatic rock formations, enormous trees, great light, and easy access shooting. Who hasn’t seen amazing shots of El Capitan and Half Dome and thought, “I need to shoot there someday.”
Originally established in 1864 as a smaller state park, Yosemite has become the crown jewel of the National Park System, drawing more than four million visitors each year. Yes, this makes for a very busy park, but photographers who plan ahead can easily find solitude and new compositions even during the busiest summer months.

When To Visit
Timing your visit to Yosemite is key to getting the most out of your trip.
Winter: Many photographers consider winter the best time to photograph Yosemite. January through March offers the chance of fresh snow, dramatic light, waterfalls, and fewer crowds. Personally, I try to plan a trip every year during March when the setting sun shoots up the valley, lighting both El Capitan and Bridalveil Fall at the same time.
Spring: This is a great time to visit for big roaring waterfalls, blooming dogwood, and lush green meadows. Plan your visit around the full moon and you might even have a chance to catch the moonbow on Yosemite Falls.
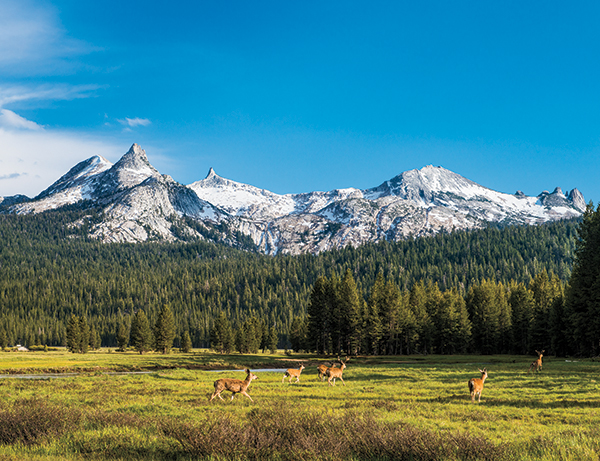
Summer: If there is a time to avoid Yosemite Valley, this is it. The crowds are huge and the waterfalls have dried up. This is a great time to head to the high country and explore Tuolumne Meadows.
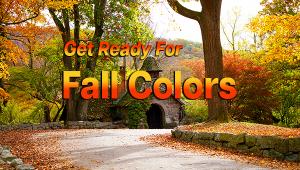
Fall: The crowds have left and the trees start to change. Typically Tioga Pass closes with the first major snowstorm, but until this happens photographers are able to enjoy the valley as well as shoot the high country. Motivated photographers might even drive over the pass for a chance at shooting sunrise at Mono Lake.
Best Spots
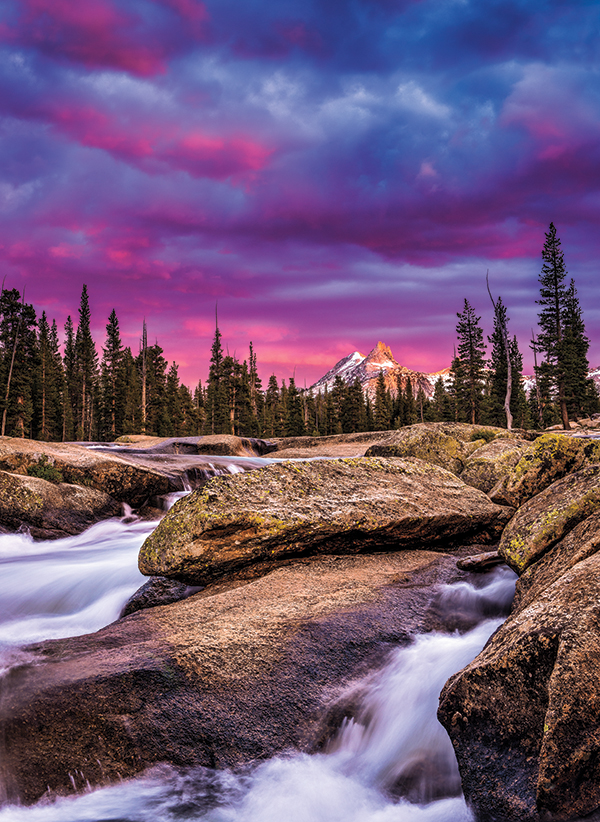
Tunnel View: Without a doubt the most classic location to shoot Yosemite Valley is Tunnel View, which is along Highway 41 as it leaves the valley. You won’t be alone but there is plenty of room to set up your tripod and park your car. This spot gives photographers a grand view that includes El Capitan, Half Dome, and Bridalveil Fall. Made famous by the Ansel Adams photo “Clearing Winter Storm,” it is not only a great place to photograph clearing storms, but it is one of the best sunset locations in the park. You can never go wrong by heading up to Tunnel View. Just remember to pack a snack and adult beverage to enjoy while shooting the sunset.
Cook’s Meadow: Cook’s Meadow is a great location any time of day because it offers great views on so many classic Yosemite landmarks. Nowhere else can you shoot Upper and Lower Yosemite Falls, dramatic and stark oak trees, reflections of Half Dome, and the classic elm tree and Half Dome. Cook’s Meadow is a great spot to watch a storm break up because you can take advantage of any storm light that falls on all the dramatic features surrounding you. This is also one of the locations for the famed Yosemite Falls moonbow.
El Capitan Meadow: If you were to survey longtime “local” Yosemite photographers many of them would say that their favorite place to shoot in the valley isn’t Tunnel View, or Half Dome, but rather El Capitan Meadow. While the meadow doesn’t offer any of the “classic” Yosemite views, it does offer a unique mix of photogenic oaks and pines with dramatic backgrounds of El Capitan and Cathedral Peak. Most photographers stop here for a few quick shots of El Capitan on their way to the more “classic” views, but most miss the more subtle images that the meadow has to offer. If you are willing to spend the time, there is something about the way the light hits the meadow and cliffs surrounding it, especially during a clearing storm, that keeps photographers who already have the “classic” shots coming back for more year after year.
Shooting Tips
Best Light: Yosemite Valley faces toward the west so it is typically more of an afternoon/sunset location, but great photos can be made all day if you read the light. Just remember that Half Dome faces the setting sun, so if you want the “classic” Half Dome shot be ready at dinner time.
Vernal Equinox: Want the best light for that amazing shot from Tunnel View? Visit the park during the vernal/spring equinox in March. While normally the setting sun only hits Bridalveil Fall or El Capitan, for a few weeks around the spring and fall equinox the setting sun shoots directly up the valley, hitting both the falls and El Capitan. Unfortunately, during the fall equinox there usually isn’t much water flowing in Bridalveil Creek, so it is better to shoot the spring equinox when the falls are pumping and the crowds are much smaller. Another plus of shooting in March is you have a greater chance of getting a clearing winter storm to add drama to your photos.
Explore during bad light: Without a doubt Yosemite is the most photographed natural wonder in the world. We have all seen thousands of images from the standard roadside viewpoints, and while as amazing as they are, it is very hard to rise above the crowd with something new or unique. So once you have captured the “classic” image, take advantage of poor midday light to explore and look for the lesser known but perhaps even better views than the ones found along the road.

If You Go
Photo gear: A solid tripod is key to shooting sharp images of changing landscape light. Packing your gear in a high-quality photo backpack will allow you to lose the crowds and shoot farther from the road. Bringing a high-quality mirrorless or DSLR camera with a range of lenses between 16-200mm+ will allow you to shoot the grand landscape as well as more intimate tight scenes.
Lodging: Booking early is the name of the game, especially in peak season. Most photographers stay either in the valley at places like the Yosemite Lodge, or just out of the park in the town of El Portal at places like the Yosemite View Lodge. Us cheapskate photographers choose to stay at the Pines Campground in the valley. Also don’t forget the classic yet pricey tent cabins in Curry Village.
Clothes: The weather in Yosemite Valley has a strange habit of changing quickly, so it is best to pack layers that can help you adjust for any conditions. In the winter temperatures can range from chilly to subfreezing. Considering parts of the valley never get any direct sun during the winter, it is always good to bring warmer clothes than you expect to need. In the summer it is typically hot, but thunderstorms have been known to drop hail and lead to hypothermia so always bring your rain jacket.
Side trips: While most visitors spend their entire visit just in Yosemite Valley, the truth is the valley is only a tiny part of what the park has to offer. Photographers are well served to avoid the crowds by exploring the high country in Tuolumne Meadows, or one of several groves of giant sequoias in the park. Not only will these locations have fewer visitors, but they offer a wide range of new material that fewer photographers have explored. Just remember that Tioga Pass is closed during the winter so you can only visit Tuolumne Meadows in the summer and fall.
Josh Miller’s images have been featured in publications throughout the world and his work is represented by Aurora Photos. To see more, follow Miller on Instagram @joshmillerphotography or check out his website, joshmillerphotography.com.


![]()
Get the Latest Photo Tips, News & Reviews from Shutterbug!
| Camera Reviews Other Reviews | Mobile Reviews Photography Reviews Columns | News | Features | How-To | Resources |
 © 2026 Shutterbug
AVTech Media Americas Inc., USA
All rights reserved