- REVIEWS
Camera Reviews 
More Reviews Mobile Reviews Photography Reviews - GALLERIES
- VIDEOS
- BUYER'S GUIDES
Photo Basics: 8 Facts About ISO To Help Photographers Take Better Pictures

Here is everything you need to know to harness the power of ISO and take full control of your camera.
1. Simple Definition
For photographers, ISO is the numeric value of the sensitivity of an imaging sensor. The sensitivity can be adjusted to match shooting conditions, either automatically by the camera or manually by the photographer. For most cameras, the possible ISO values range from 100 to 6400 or higher.

Compared to higher ISO settings, lower ISO settings A) require more light to properly expose the image, B) produce less extraneous noise and C) on the whole, deliver better pictures. Better in this case means richer, more natural colors with better saturation and proper contrast. The imagers in many DSLR and mirrorless cameras are optimized at the baseline ISO of 100.
Because this setting is widely misunderstood, many photographers set the ISO to Automatic and get good results, by and large. Cameras do a reasonable job of using an appropriate ISO setting. But more experienced users prefer to set the ISO to suit the situation. Outdoors in bright light, ISO 100 is a good choice. In very dim light, advanced photographers usually set the lowest ISO that’s possible without dropping to a shutter speed that’s too slow to handhold. Setting a very low ISO, like 50, on a camera designed to be shot at ISO 100 or 200 can cause increased contrast in the image. But try it, and make the comparison to ISO 100.
In the definition above I wrote, “For photographers…” because ISO is a much bigger universe than our little photographic corner. ISO is the abbreviation for International Organization for Standardization, iso.org, a multinational group headquartered in Switzerland that was formed in 1946 to agree on technology and manufacturing standards.

Although it may seem that the abbreviation for the group should be IOS instead of ISO, in truth the name is derived from the Greek “isos” which means “equal” in recognition of the equal status of all participating nations. Wait, what? It’s just a coincidence that the letters are the same? That’s what I read on their website, so it must be so. In any event, it vindicates the folks who annoying insist on pronouncing the word “eye-so” instead of articulating the three letters. Read my rant on acronyms here.
Some cameras offer ISO settings of 51,200 or even higher. But very few amateur cameras can actually deliver acceptable results at those inflated settings. There is only one way to find out, and that way should be obvious: try it.
2. ISO vs. ASA
Back in the days when cameras digested silver-coated celluloid, the primary yardstick used for film sensitivity was adopted from the American Standards Association, and was abbreviated ASA. Rather ethnocentric, but that was consistent with the era. And no one pronounced it “ass-uh.” Europe marched to the beat of a different drummer, as usual, and used their own numeric system established by the Deutsches Institut für Normung. As you might guess, we knew it in the USA as DIN. There were other systems, too, but none survived.
Some old timers and wannabe old timers still use ASA and ISO interchangeably. To really confuse the issue, many people refer to the ISO setting as the “speed.” This is another throwback to film photography where we often spoke of “film speed.” Bad word choice, looking back at it, because “speed” is already overused to describe large f/stops (“fast, high-speed f/1.2 lenses”) and shutter speed.
A more proper term for sensitivity adjustment, scientifically speaking, is “gain.” Audiophiles and people who dig shortwave radios are already familiar with this expression as the technical term for an amplifier’s output/input magnitude ratio.

3. Relationship Between ISO and Exposure Settings
ISO 200 makes the image sensor 2X as sensitive as ISO 100. ISO 400 is 2X as sensitive as ISO 200 and 4X as sensitive as ISO 100. See a pattern developing here? Double the ISO value and you increase imager sensitivity by 100%, or 2X. We call that 100% difference “one stop.”
“One stop” is the difference in exposure you get when you change, for example, from f/1.4 to f/2 or from 1/500 sec to 1/1000. Or vice versa.
Since you already understand the relationship between aperture opening and shutter speed, and know that an exposure of f/2.8 at 1/500 sec is equivalent to an exposure of f/5.6 at 1/125 sec you can easily imagine where ISO fits into this picture.
The balance between aperture setting, shutter speed and ISO becomes most critical in two situations. In very bright light, it’s important to use a low ISO setting so that proper exposure can be made within the shutter speed range of the camera. That is, if you shoot outside on a bright, sunny day at ISO 6400, your camera may not be able to set an aperture small enough and shutter speed fast enough to achieve correct exposure.
 The opposite problem is more common. Using an ISO setting that’s too low when shooting under very dim ambient light can require a shutter speed so slow that it’s impossible to shoot handheld without a tripod. Cameras and/or lenses with Image Stabilization technology can help by counteracting the fractional camera movement. Cameras and lenses that offer IS lower the shake threshold, so you might be able to shoot at—say—1/15th of a second instead of 1/250th. That’s a difference of four stops and the same stability as increasing the ISO from 200 to 3200 (without increasing noise). This gives you an idea of how important image stabilization is.
Years ago (2009) I wrote an article for Shutterbug magazine titled Do You Know Your SBA? The “Shake Begins At” Level And Image Quality. The advice given there is still valid because, thankfully, the laws of physics haven’t changed over the past 12 years.

4. High ISO and Weak Signal Cause Noise
Noise is the random, colorful set of dots that appear in an image but did not exist on the subject. Extreme noise is often accompanied by banding, a set of disruptive dots that are aligned like stripes across the image, usually along the longest edge. These facts clarify why clowns and zebras are never used in ISO tests.
Noise is not the same as grain. Some mistakenly conflate digital image signal noise with its nearest analog counterpart—silver halide grain. Understandable error, but they are in no way the same. Film grain particles are the building blocks of silver halide-based images. Digital noise just plain doesn’t belong in the image—it’s 100% random and extraneous, not an elemental component. Understanding that will reduce your tolerance for noise.

The degree of digital noise that appears when a high ISO sensitivity setting is used depends partially on the physical measurement between photo sites (pixels) that engineers call “pitch.” Pixels that are packed very densely together have a very small pitch and are noisier, and it worsens as the ISO setting is increased. This is why some high-megapixel point-and-shoot cameras with small imagers produce images that are very noisy. This applies to cellphone cameras in particular.
The image sensor in a low to mid-range point-and-shoot (usually a CCD but sometimes CMOS) is measured diagonally and the dimension is expressed as a fraction. To confuse you, the fraction contains a decimal in the denominator. A sensor that’s 1/2.5 inches is actually equal to 1 divided by 2.5 inches, or 0.40 inches. A sensor that’s 1/1.6 (which may seem smaller) is 0.625 inches and—all else being equal—will produce images with less noise. See? And you thought there was no pixel conspiracy.
The argument that cameras with full frame sensors are superior to those with sensors that are APS-C size is generally true when it comes to noise. I’m not saying it’s true in all situations, because I don’t agree with that contention. But where noise is concerned, full frame cameras usually rule. Small sensors tend to be noisier, which is also why some cellphone images—that may look great on the phone’s optimized LCD—stink up the place when they’re enlarged or carefully examined.
No one especially likes how noise looks, so camera makers nowadays build in firmware-based countermeasures to suppress noise at low shutter speeds. An ASIC (Application Specific Integrated Circuit) or the camera’s primary signal processor cleans the noisy digital image signals with noise filters and noise suppression algorithms. And I must say, some do an amazing job.
All camera makers handle noise suppression in their own way, so even if two brands of cameras use the same sensor (which is very common) the results can be quite different because the signal processing engines are different. The noise suppression process often reduces image sharpness, so we can say that every low-light image is a compromise between noise and sharpness.
5. Light Level Matters
Light level contributes to noise level. Many folks don’t realize this, but shooting at a high ISO like 800 in bright light will yield better results than shooting at the same ISO in near darkness. Don’t misunderstand—it’s always better to use the lowest ISO that conditions allow. But it’s important to recognize that noise is a product of high ISO and low light. In most cases results are better from shooting at ISO 400 in bright light than ISO 100 in the dark. That’s because noise can increase as a function of time, also, and lower ISO settings require longer shutter speeds.

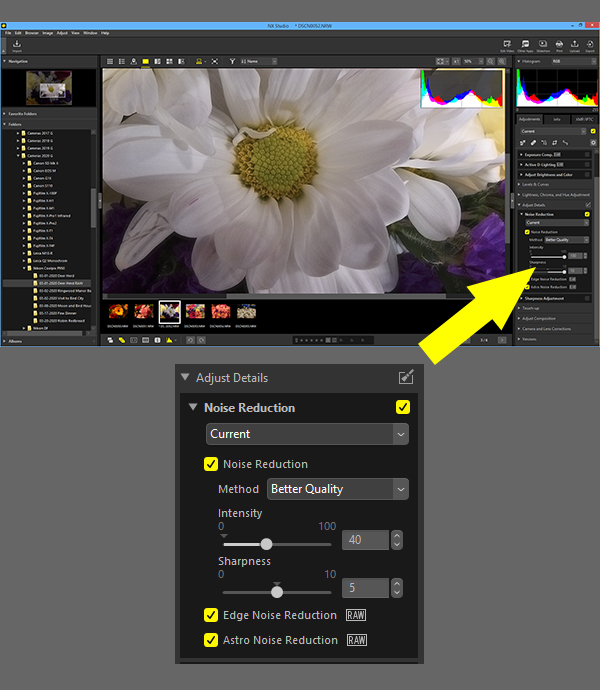
6. Software (Post-Processing) Countermeasures for Noise
The impact of digital noise can be mitigated in post-processing. Adobe Photoshop has powerful noise reduction capabilities, and plug-ins like Nik Dfine are very potent. In most instances, after-shot remedies cannot suppress all of the noise without smudging some of the fine, sharp details in the process. It’s sort of like sanding the splinters off of a piece of wood. Like many other aspects of our sport, you must find the balance that satisfies you.
One exception I’ve found is DxO DeepPRIME. How it works on Raw images is nothing short of mind blowing. DeepPRIME also superbly performs demosaicing. Demosaicing technology recreates complete colors based on the pixels from a photo sensor that initially only receive one of three basic colors. Performed together, denoising and demosaicing can output phenomenal results. Rather than dig deeper here, I refer you to our review of DxO PhotoLab 4 where the miracle noise killer DxO DeepPRIME resides.
![]()
7. Camera Performance at High ISO Keeps Improving
You might say ISO 3200 is the new ISO 200. Digital cameras keep getting better and better. Case in point, my Fujifilm X-H1 which is as noise-free as I can ever expect to see. Better performance at high ISO settings means A) smaller apertures are possible, so depth-of-field can be extended, B) faster shutter speeds can be used in dark situations, so handheld shooting opportunities are expanded and C) there’s less annoying noise to deal with in post-processing.
8. ISO is Now the 3rd Exposure Variable
When film ruled our world, a photographer couldn’t change the inherent ASA sensitivity between photos. Load up ASA 32 Panatomic X film and you were stuck with that ASA until you finished the 36-exposure roll. Consequently, there were only two exposure variables: the size of the aperture (f/stop) and how long the aperture was open (shutter speed). In the early days of digital photography, high ISO performance was so poor that most photographers abided by the same rules.
Now that modern cameras have more-or-less overcome the noisy high ISO barriers, we can add Imager Sensitivity to the list of exposure variables, giving us three. In other words, in limited situations you can manually set the aperture, manually set the shutter speed, and let Auto ISO do the rest. Try it.
—Jon Sienkiewicz
(As an Amazon Associate, Shutterbug earns from qualifying purchases linked in this story.)


![]()
Get the Latest Photo Tips, News & Reviews from Shutterbug!
| Camera Reviews Other Reviews | Mobile Reviews Photography Reviews Columns | News | Features | How-To | Resources |
 © 2026 Shutterbug
AVTech Media Americas Inc., USA
All rights reserved