- REVIEWS
Camera Reviews 
More Reviews Mobile Reviews Photography Reviews - GALLERIES
- VIDEOS
- BUYER'S GUIDES
The Nikon R1C1; A Close-Up Speedlight Commander Kit
Let's begin by saying that I'm primarily a nature photographer and have used flash very infrequently, that is, up to now. When I first received the unit it was in a black case and on first look I thought, "This is a lot of stuff. How am I going to use all of this, much less carry it in my camera bag?" Well, it isn't quite as much as it seems. Actually, the essential elements are quite compact: There is a set of five lens adapters, ranging from 52-82mm, which screw in the front of the lens. The SX-1 attachment ring is clipped onto the adapter rings. Then the two small, but powerful, SB-R200 flashes are snapped into the SX-1, but can be moved around on the SX-1 to create sidelighting, top lighting, bottom lighting, and backlighting.
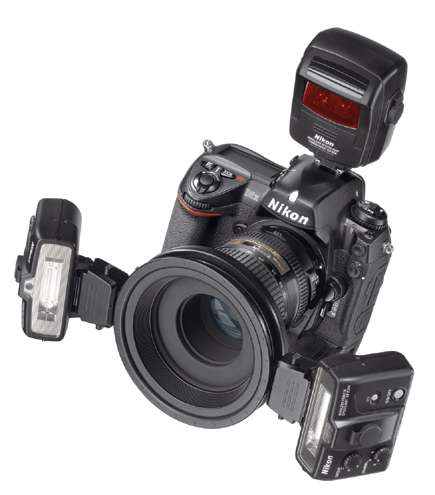 |
The two flash units are wireless slaves, and can be removed and handheld or
placed on the Speedlight stand for remote operation. I find that having one
flash on the camera and hand holding one for different lighting effects, including
backlighting a macro subject, is particularly effective. It's like being
your own assistant! A great option is the ability to add more SB-R200 flashes
to the SX-1 adapter ring--up to eight for a complete ring of flashes!
The SU-800 Commander is a non-flash module, which goes into the flash shoe.
It has manual flash and TTL modes. It also sets flash output level compensation
and flash exposure.
Macro Studio In A Box
The R1C1 is a true macro studio! As with traditional portraiture, one of the
flashes can be set at full power and the second one can be set at -1 to create
a modeling look for macro subjects. Fill flash can be achieved using this setting:
a 1:1 ratio and a -1.7 flash exposure.
One of the great benefits of digital is the ability to see the results quickly
and to make adjustments on the fly. This frees us to try anything we can imagine
and then see the results and compensate immediately. Using TTL, Aperture Priority,
and Matrix Metering worked quite well. Any issues with exposure can be adjusted
by setting the exposure compensation dial or by adjusting the flash exposure.
As I began testing the unit, I found that I was using it mostly for extreme
macro, backlighting, sidelighting, and spotlighting.
 |
|
|
Anything I'd improve? The only thing missing is the ability to swivel
the SB-R200 units. On several images I wished I could have twisted the flash
a bit upward or downward, but could not.
However, this is an outstanding addition to a creative and photographic arsenal.
It's compact and easily manageable. The mounting process is quick and
easy as there are five adapter rings for various filter sizes. The ability to
remove the flash units and place them manually adds to the flexibility of the
R1C1.
The best way to illustrate the facility of the setup is by example.
 |
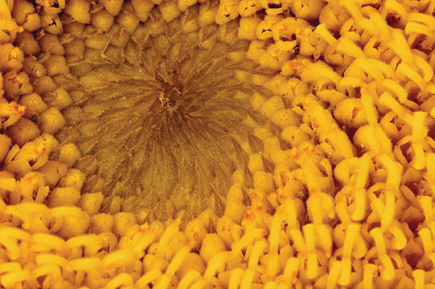
Create Texture And Depth
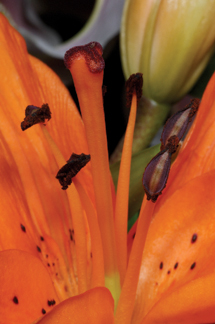
The first image I made was an extreme close-up to see how the flashes reacted.
I was really inside of this flower's center and had both flashes mounted.
At first I had the flashes set to 1:1 and the resulting image was a bit flat.
However, after setting the left flash cutting across the image at 1.5 and the
right flash cutting across the image to a setting of 1, a little shadow was
created at the top left, rendering more of a feeling of depth. I found this
interesting since I expected to have the image blowout because of the very close
proximity to the subject. But, by using the Extreme Close-Up Positioning Adapter
SW-11, the light was sufficiently softened, creating a natural appearance.
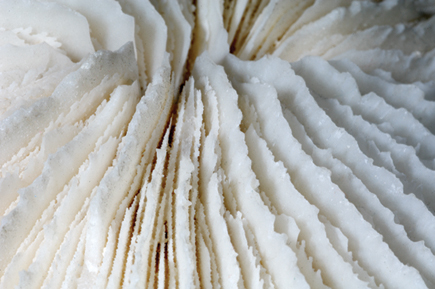
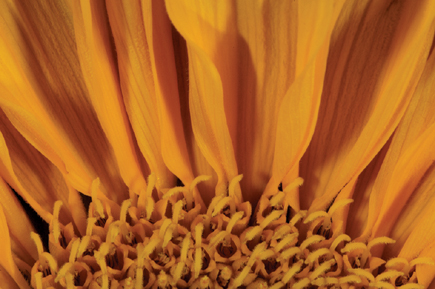
This image was taken because of the texture and white tonality. I used the same
setup as in the previous image. That is to say that the left flash was at 1.5
and the right flash was at a 1 setting, creating the bright light coming in
from the left and soft light coming from the right, accentuating the texture.
Again, the light looked natural with no telltale harsh shadows or light falloff.
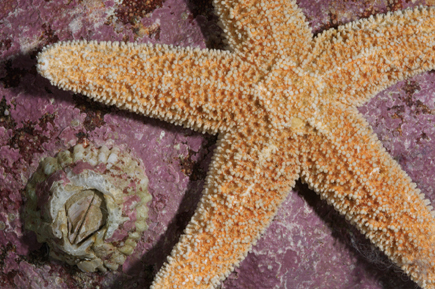 |
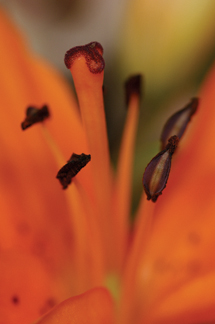
Handheld Control
On this image, I removed the right flash and handheld it at an acute angle to
simulate natural sidelighting. The right flash stayed on the camera. Both flashes
were dialed back to -1.7 and the handheld flash was held at different distances
until the right look was achieved.
 |
 |
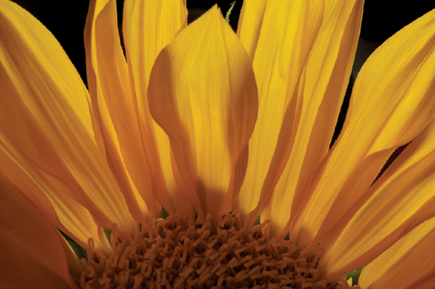
"Natural" Light
One of the true tests of a macro flash is its ability to give a smooth, warm,
natural look working on extreme close-up work. The first image was shot at f/22
with the flashes set to a 1:1.5 ratio and dialed back to -0.7. The second image,
which is the more impressive, is shot at f/4, nearly wide-open, and maintains
a natural look with no telltale flash harshness!
 |
 |
|
| |||||||||


![]()
Get the Latest Photo Tips, News & Reviews from Shutterbug!
| Camera Reviews Other Reviews | Mobile Reviews Photography Reviews Columns | News | Features | How-To | Resources |
 © 2026 Shutterbug
AVTech Media Americas Inc., USA
All rights reserved