- REVIEWS
Camera Reviews 
More Reviews Mobile Reviews Photography Reviews - GALLERIES
- VIDEOS
- BUYER'S GUIDES
Multiple Exposures: Why You Should Double Up & Then Double Down
(Editor's Note: You can read "On the Road" columnist Deborah Sandidge's other columns here).
The idea here was...well, there were a few ideas. First, I wanted to do photography that was bright, cheerful, colorful—and different. With times being a bit harsh and stressful for many, I was looking for something light-hearted and, frankly, far from reality. Dreamy and summer-like came to mind.
Then there was my keen interest in the in-camera multiple-exposure overlay capabilities of my Nikon Z7II, which I knew had the built-in ability to take the guessing game out of the process of positioning and controlling multiple images. Over the years I’ve had an ongoing interest in multiple exposures, and lately have been thinking about how I could create something unique that would be colorful and whimsical, based equally on reality and imagination.
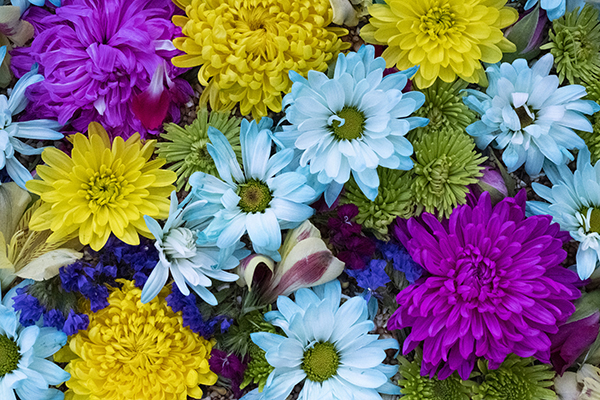
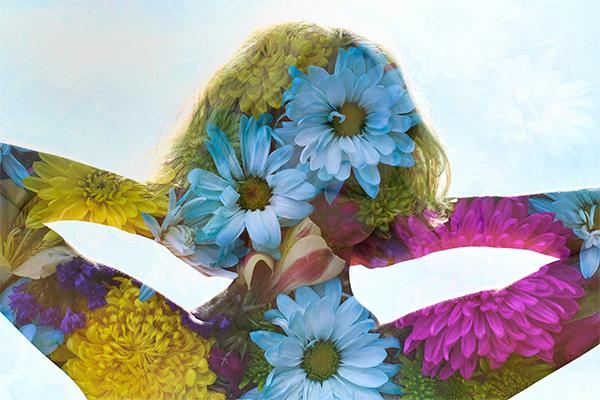
I put these two inspirational ideas together and added two more elements: I’d get the brightness and color from flowers, and the main subject would be me. While I don't normally like taking self-portraits, here was a distinctive way of doing them for an artistic result that would be a lot of fun to create.
Read All About It
If you're inspired to give this a try, the basic methods will be similar for most mirrorless cameras, though it's likely the specifics of menus and the names of modes and settings will differ, so it's best to consult your manual. After that I'd recommend some trial-and-error learning-curve experimentation to get confidently familiar with the process. My camera's manual was clear on the basics of the settings and the modes, but experimenting turned out to be the best way to see what was going to happen when I used the settings and took the pictures.

Not all my double exposures are as fanciful as the flower image. Some are more straightforward and traditional, but what they have in common is the fact that I made them with a mirrorless camera. Simply, mirrorless means a lot more control and creativity than the best-guess double-exposure imagery possible with a DSLR or, further back, a film camera.
The Essential Steps
For my overlay self-portrait, the key is that the first image—me, facing away from the camera—was shot as a silhouette with a clean, no-distraction background; strong sunlight was the light source. The second shot was flowers, which I positioned over my silhouette so that the silhouette fills with flowers and the bright surrounding background shows just a hint of flowers—an effect that in itself can be quite beautiful.

The technique is possible, and works so well, because with a mirrorless camera I can see the first shot and control exactly where the second shot—the flowers—will be placed.
After shooting the silhouette, I chose Multiple Exposure from the Z7II's shooting menu. That allowed me to choose the silhouette and determine how to place the flower shot for the multiple-exposure image. The process then allows me to choose from one of four overlay modes the camera offers: Add, Average, Lighten, or Darken. Each will create a different effect and a different look for the final image.
I primarily work with Add, which means I'm just adding a second image to the first without any treatment or modification. Average means the camera's program will balance both images. Lighten or Darken overlay modes will favor either the brightest or darkest pixels in the final composite.
While it's a fairly simple process, there is a little more to consider. When shooting a silhouette for a multiple exposure, I have the option of making a very high-contrast silhouette or one that retains detail. It's an important decision because it will affect the mood of the final image because the density of the silhouetted subject will determine how translucent or solid the second shot will be.

If you're thinking it's a good idea to experiment with the choices your camera offers to see how each one influences the multiple exposure, I couldn't agree more.
The End Result
I ended up with just what I'd hoped for: fun, playful expressions of ideas, plus the opportunity for some creative, imaginative imagery. Actually, I got even more. Once I started to enable the fantasy, I just kept on going, picture after picture. Let's just say that for a time the house was filled with flowers.
To view more of Sandidge’s fine work, visit her Instagram page, Twitter feed, Facebook page and website.


![]()
Get the Latest Photo Tips, News & Reviews from Shutterbug!
| Camera Reviews Other Reviews | Mobile Reviews Photography Reviews Columns | News | Features | How-To | Resources |
 © 2026 Shutterbug
AVTech Media Americas Inc., USA
All rights reserved