- REVIEWS
Camera Reviews 
More Reviews Mobile Reviews Photography Reviews - GALLERIES
- VIDEOS
- BUYER'S GUIDES
Make the Most of Photoshop's UPDATED Gradient Tool (VIDEO)

Photoshop’s easy-to-use Gradient too is useful for a wide variety of purposes when editing an image. It enables you to create gradual changes in color and exposure, and there are different type of gradients from which to choose. The popular tool recently received an update, making it faster and more effective than ever.
From a practical perspective Adobe says “Gradients can help draw focus to a point in your image by creating a glint of light or color that gradually fades into shadow.” You’ll see how this works in the tutorial below from one of our favorite image-editing experts.
Instructor Julieanne Kost is a photographer, author, self-described “digital-imaging evangelist,” and an expert at all things Adobe. In this quick episode she walks you through the step-by step process of using the Gradient tool and taking advantage of everything it offers
As Kost Says, “You’ll discover a variety of tips and tricks to master the new non-destructive Gradient tool, including how to make the most of on-screen editing controls, and working with Gradient Fill layers. She also demonstrates new options in the Properties panel, how to use Layer Masks, and the method for changing Gradient types.
The episode also includes timesaving keyboard shortcuts, several Quick Actions, and other helpful tips and tricks. Kost dives right in, skipping the small talk, and covers all these topics in barely 10-minutes. So be sure to have pen and paper handy and jot down a few notes.
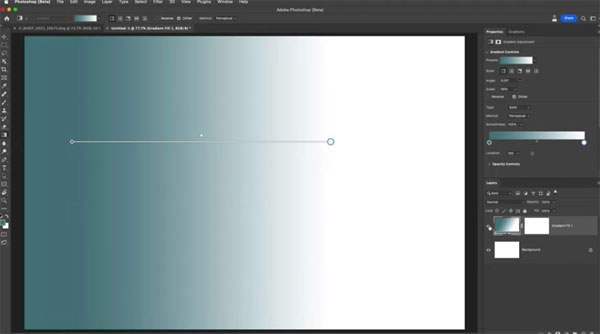
To create a Gradient you can either tap the “G” key or select Gradient from the toolbar. You’ll then see that Photoshop ships with a variety of Gradient presets. Rather than choosing one of these at the onset Kost uses the Photoshop’s Basic’s panel to select the Foreground-to-Background option to demonstrate how to make adjustments yourself.

This approach uses the foreground and background color swatches found in the toolbar. Then you can select a Gradient style by either choosing one of the icons in the Options bar, or by clicking the right bracket key to cycle through the Linear, Radial, Angle, Reflected, and Diamond gradients.
Now it’s time to get busy, and Kost provides the straightforward steps for getting the job done. It’s all pretty simple to understand and accomplish by following Kost’s advice. Once you experiment with her instructions you’ll quickly become proficient at using the versatile new-and-approved Gradient tool for a variety of image-editing tasks.
Kost’s YouTube channel offers an abundance of Photoshop and Lightroom lessons, so take a look and check back often whenever you find yourself in a bind.
We also suggest you watch the tutorial we posted recently from another expert, explaining how to quickly improve photos with five easy Photoshop tips and tricks.


![]()
Get the Latest Photo Tips, News & Reviews from Shutterbug!
| Camera Reviews Other Reviews | Mobile Reviews Photography Reviews Columns | News | Features | How-To | Resources |
 © 2026 Shutterbug
AVTech Media Americas Inc., USA
All rights reserved