- REVIEWS
Camera Reviews 
More Reviews Mobile Reviews Photography Reviews - GALLERIES
- VIDEOS
- BUYER'S GUIDES
Lightroom Tips: How to Eliminate UGLY Noise in Just One Minute (VIDEO)

One sure way to create quality images with good color and maximum detail is to banish ugly noise artifacts that occur when shooting in low light, at high ISO settings, and under certain other situations.
In this episode of the popular “In a Lightroom Minute” series from the Adobe Photoshop Lightroom YouTube channel, you’ll learn a simple process for getting rid of both luminance noise and color noise with a few quick clicks in Lightroom.
Tobi Shinobi is an architectural photographer who splits his time between London and Chicago. He’s also an inexperienced instructor with a calming, reassuring approach and a knack for simplifying shooting and editing techniques. And that’s exactly what he does here with a quick and effective noise reduction method.
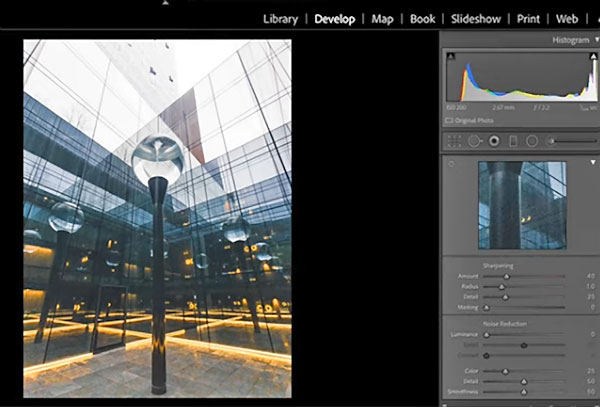
Using the Details panel in Lightroom’s Develop module, Shinobi enlarges an image to 300% and shows how Lightroom does a bit of default color noise reduction when working with Raw images. He then demonstrates how to make further adjustments as needed according to personal taste.
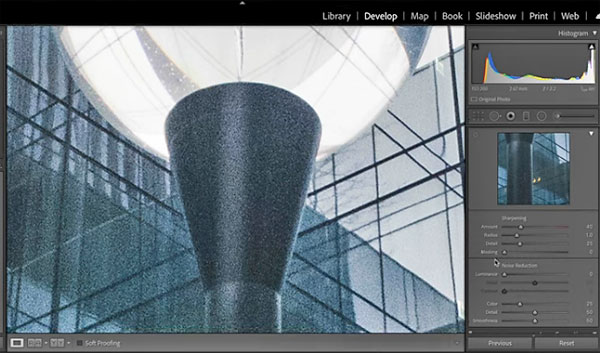
While luminance noise shows up as a grain pattern, color noise looks like multi-colored pixel areas that should appear as smooth color. You’ll see how to identify which type of noise is most problematic in an image, and how to use simple sliders to fix one or both problems.
One trick is examining your photo as a gray scale image while examining the affected areas. He demonstrates the different results achieved, depending upon whether you use the Detail Slider or the Contrast Slider. The best bet is often making a compromise and using both tools in tandem. And as with most editing techniques, it’s important to take a subtle approach for natural looking results.
After watching the tutorial, head over to the Adobe Photoshop Lightroom YouTube channel for more helpful editing tips. And check out Shinobi’s website to see his compelling imagery.


![]()
Get the Latest Photo Tips, News & Reviews from Shutterbug!
| Camera Reviews Other Reviews | Mobile Reviews Photography Reviews Columns | News | Features | How-To | Resources |
 © 2026 Shutterbug
AVTech Media Americas Inc., USA
All rights reserved