- REVIEWS
Camera Reviews 
More Reviews Mobile Reviews Photography Reviews - GALLERIES
- VIDEOS
- BUYER'S GUIDES
Interfit Flat Panel Electronic Flash
A Perfect "Fit"
It is rare that I have so
much fun using studio strobes. But such was the case with the Interfit
cyberFLASH 300 ($449.99) and digitFLASH 1000 ($899.00) lights from Paterson
Photographic, rated respectively at 300 and 1000 ws. And the battery-driven
eFLASH ($89.99) came into play as an adjunct to the studio lights, while
also performing admirably on its own as a hot shoe (or bracket) mounted
flash. |
|||
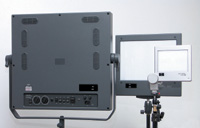
The 5400K flash tubes are encased behind a milk-white Plexi-like diffusion surface that produces that beautiful glow. These tubes, in contrast to conventional flash tubes, are linear and arrayed along the length of the housing. Surrounding these linear tubes are modeling lights--also linear. And here, too, there is a difference, because the modeling lights are not halogen or incandescent or flood--but flicker-free fluorescent (daylight by definition). It Gets Even Better |
|||
These studio strobes are self-contained,
meaning they are powered directly from an AC outlet without resorting
to an external power pack. That also means that all controls are found
on the unit. There is also a photocell-mounted front and back, for wireless
sync, so it doesn't miss a beat, with an on/off switch to control
the optical sensor's operation. |
|||
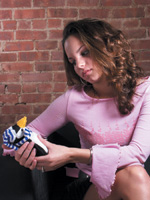
The Portrait Shoot |
|||
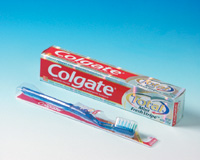
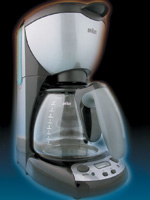
The Tabletop Shoot:
Starting Simple |
|||
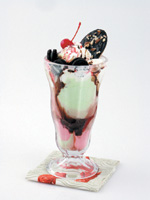
Adding A RedWing Cocoon The Final Test: An
Ice Cream Sundae |
|||
Again, because I was dealing
with reflective surfaces--the dessert glass--I chose to use
a diffusion housing. This time I opted for the more spacious Photek digital
LightHouse model DLH-24/36, a cocoon-style fabric light tent, which afforded
plenty of breathing room for the tall sundae. The LightHouse comes with
a fabric sweep, but is also supplied with a milk-white plastic sheet.
I chose to work with the plastic, edging it backward so that it formed
a sweep (why ruin fabric with dripping ice cream?). |
|||
I must admit: These lights gave me a taste for more than the ice cream. I finally found what was missing in my studio still life studies: Interfit flat panel lights. And I loved being able to keep my portrait sessions that much simpler, no longer a slave to encumbering softboxes and umbrellas. Useful ResourcesPaterson Photographic--Interfit cyberFLASH/digitFLASH/eFLASH (www.patersonphotographic.com) Minolta--DiMAGE A1 digital zoom-SLR (www.minoltausa.com) RTS--RedWing Cocoon light tent (www.rtsphoto.com) Photek--digital LightHouse light tent (www.photekusa.com) Noho Productions--12 rental studios, New York City (www.nohoproductions.com) And a special thanks to New York photographer Rafael Fuchs (www.rafaelfuchs.com) for his invaluable guidance in this project. |


![]()
Get the Latest Photo Tips, News & Reviews from Shutterbug!
| Camera Reviews Other Reviews | Mobile Reviews Photography Reviews Columns | News | Features | How-To | Resources |
 © 2026 Shutterbug
AVTech Media Americas Inc., USA
All rights reserved