- REVIEWS
Camera Reviews 
More Reviews Mobile Reviews Photography Reviews - GALLERIES
- VIDEOS
- BUYER'S GUIDES
How to Use Polarizers to Enhance Color & Cut Glare (VIDEO)

Many experienced outdoor photographers never leave home without a polarizing filter, whether they’re shooting landscape, nature, or travel photos. In fact, some experienced shooters claim this affordable tool is number one on their list of affordable photo accessories.
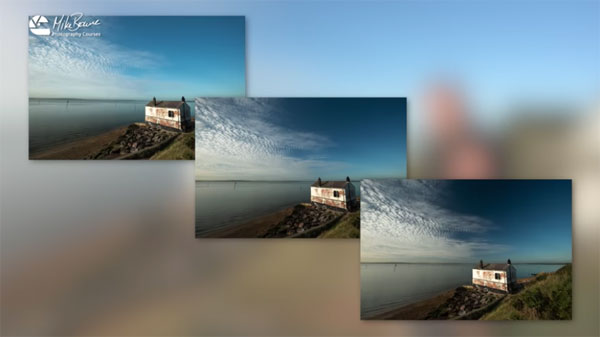
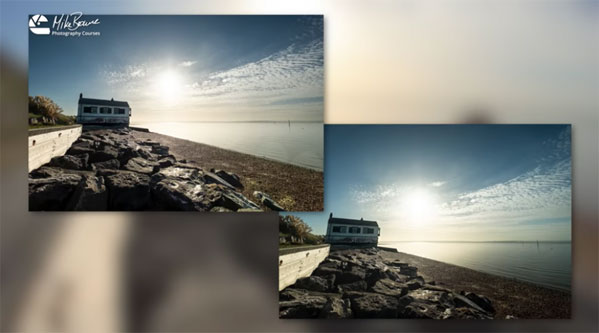
The polarizing filter accomplishes two major tasks; 1) removing glare from non-metallic objects like water in a lake or stream, and 2) dramatically increasing saturation with pale blue skies, and colorful subjects bathed in sunlight like colorful fall foliage.
Here’s the catch: The powerful polarizer only works it’s magic if you use it properly—otherwise you’ll simply cut exposure by up to two stops. It’s also important to avoid overdoing the effect if you’re after natural-looking results.
“Photo Biker” Mike Browne is a professional British travel and nature photographer who is so known because he frequently travels to locations on his motorcycle. He’s also an adept instructor, and in this episode he explains everything you need to know for harnessing the power of a polarizer.
Unlike other filters, the strength of a polarizer is controlled by rotating its front ring: Turn it in one direction and the effect is gradually increased, while rotating the filter the other way provides a more subtle look.
If you’ve been unsuccessful using a polarizing filter in the past, it’s likely because you didn't realize that they only do their job when you’re camera is positioned at certain angles to the sun. Browne explains how polarizers work, and the proper way to employ them to darken skies, reduce reflections and glare, and more.
You can find more helpful tips on Browne’s popular instructional YouTube channel, so be sure and take a look.
And on a related topic, check out the tutorial we posted recently with several simple tips for using ND filters for long-exposure photography.


![]()
Get the Latest Photo Tips, News & Reviews from Shutterbug!
| Camera Reviews Other Reviews | Mobile Reviews Photography Reviews Columns | News | Features | How-To | Resources |
 © 2026 Shutterbug
AVTech Media Americas Inc., USA
All rights reserved