- REVIEWS
Camera Reviews 
More Reviews Mobile Reviews Photography Reviews - GALLERIES
- VIDEOS
- BUYER'S GUIDES
How to Fix Landscape Photos with Lifeless Skies in Lightroom (VIDEO)

How often have you arrived at a favorite location for a day of landscape photography, only to confront a dull, uninspiring sky? If you’re like most of us, the answer is “more than once or twice.”
So you do the best you can, pack up your gear, and return home to evaluate the images on the computer. Unfortunately, they look just as unremarkable as you expected due to the drab, nearly colorless sky. Thanks to the quick Lightroom tutorial below you’ll know how to transform these rejects into winners the next time Mother Nature doesn’t cooperate.
Photographer Anthony Morganti is an image-editing wizard, and this quick episode demonstrates how he often rehabilitates images like those described above. The easy and effective Photoshop technique takes barely four minutes to explain.
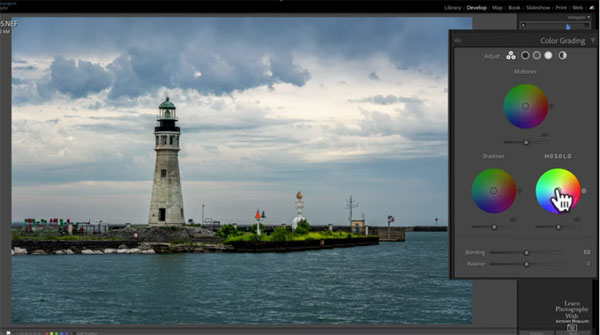
Morganti begins with a seaside photo of a rather pretty scene. As you’ll see, the sky does have a few clouds with some detail, but it’s almost totally devoid of color. Another problem is that the overall tones in the shot are a bit too cool.
The solution involves adding warmer tones to the brightest areas of the sky to offset the coolness of the water. Morganti opens Lightroom’s Basics tab, noting that he’s already made a few adjustments that weren’t sufficient to deliver the impact he desires.
Morganti explains that there are several common methods for warming up the sky, one of which is to simply drag the Temp slider to the right. By doing this, however, you’ll end up adding yellow tones to the entire image. So this isn’t the right solution. After illustrating how using the Color Grading panel provides equally disappointing results, Morganti’s demonstrates a straightforward method for getting the job done to perfection.
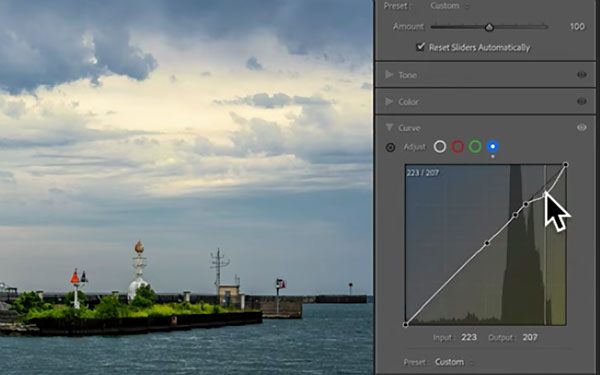
This approach involves creating a mask for the sky, and opening up the Curves panel. Once he selects the blue curve you’ll notice that the left portion of the graph represents blue tones while the right side controls yellows.
Since he only wants to warm up the brightest areas in the sky, which are represented in the upper right of the graph, he creates a couple anchor points and pulls that portion of the graph down. Voila! This quickly does the trick. Now the highlights are a nice and warm, while the blue water and green foliage on the horizon remain unaffected.
If you like this simple and effective trick head over to Morganti’s popular YouTube channel where you’ll find more of the same.
And don’t miss the video tutorial we posted earlier, explaining how to edit photos ten times faster by using a straightforward pro technique.


![]()
Get the Latest Photo Tips, News & Reviews from Shutterbug!
| Camera Reviews Other Reviews | Mobile Reviews Photography Reviews Columns | News | Features | How-To | Resources |
 © 2026 Shutterbug
AVTech Media Americas Inc., USA
All rights reserved