- REVIEWS
Camera Reviews 
More Reviews Mobile Reviews Photography Reviews - GALLERIES
- VIDEOS
- BUYER'S GUIDES
Here's How to Capture Gorgeous Fall Foliage Photos: 6 Autumn Color Tips
(Editor's Note: David Long is a landscape photographer and a member of Datacolor's Friends with Vision.)
With the changing of the leaves from green to a wide spectrum of warm colors ranging from bright reds and oranges to deep crimsons and gold, fall is an amazing time of the year for landscape photography. This color change occurs all over the world and I am lucky to live in New England where we have a wide variety of deciduous trees, perfect climate and wonderful elevation changes that provide ideal conditions.
Mix this with numerous barns, white churches, farmhouses, covered bridges and quaint villages and you have the ideal recipe for iconic autumn images.
Depending on the location, the first leaves begin to change by early September in low-lying areas. This gradual process starts in the higher elevations with peak colors usually occurring in the first week of October. The color moves south in mid-October and usually ending along the seacoast and southern states in late October to early November.
The following are some key points to help you capture dynamic images with fall foliage.
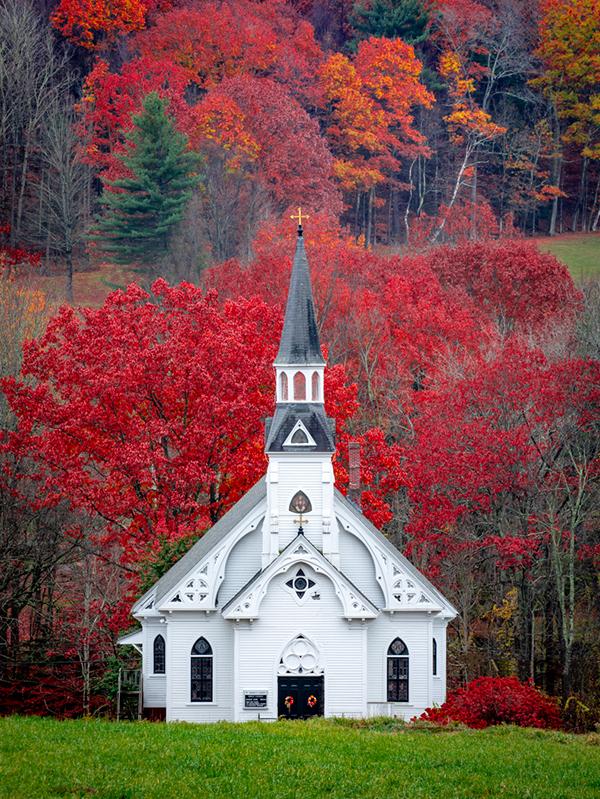
#1 Composition – Focal Point (image at the top of this story – St. Mark’s Church, Conway, MA)
The key point when shooting landscapes in the fall is to remember that the foliage just adds color. You still need a strong composition to create interest for the audience.
• It is almost always essential to have a focal point
• The focal point is the anchor of your photo
• If the scene does not have a main subject, the audience does not know what to look at and quickly loses interest
• Effective composition is how you place the different elements relative to each other while using light and other techniques for a smooth, visually pleasing transition to the focal point
#2 Composition – Depth (image 2 below – Sleepy Hollow Farm, Woodstock, VT)
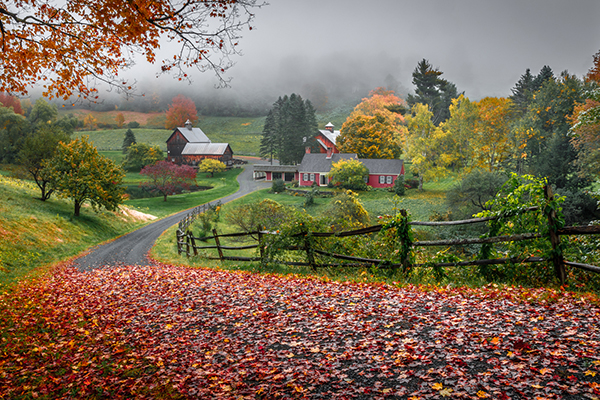
Layers create depth and interest in a fall image. Look to use the foliage to give distinct layers to your scene.
Unlike summer, where green dominates, fall provides many different colors, sometimes within the same tree, to bring your viewer into the photo.
• Foreground can provide framing and leading lines with fallen leaves covering roads and fences or rocks in streams and in still water
• Midground is usually where the focal point is and can make or break the picture. Surround the focal point with foliage for framing.
• Background is usually the sky or some other landscape element. If you are able to shoot down at the focal point, the foliage can provide a wonderful background on a rainy or foggy day and can add mystery, atmosphere and depth.
#3 Weather (image 3 below – E. Topsham Overlook, VT)

Weather plays a huge role in the look, the atmosphere and the vibrancy of the colors in your fall images. While we have little control of the weather, we can pick the best days and times to shoot.
My favorite days are cloudy ones as they have no harsh lighting and shadows and allow you to shoot all day. In the magic hour after sunrise and before sunset, you get rich colors, but even midday shots can be dynamic with some minor post processing techniques.
Adding fog, mist and even light rain can provide the optimal conditions. Along with the benefits described above for cloudy days, the moisture brings out deep, rich colors. This type of weather also adds atmosphere to the image making it more dramatic and interesting.
But fall is filled with many sunny days. You can still get great shots if you shoot early in the morning or late in the day.
If you are shooting midday, look for scenes where the sunlight provides positive light on the scene or backlighting of the leaves. One other technique is to look for interesting cloud formations and wait for the sun to duck under one of them to avoid disturbing shadows.
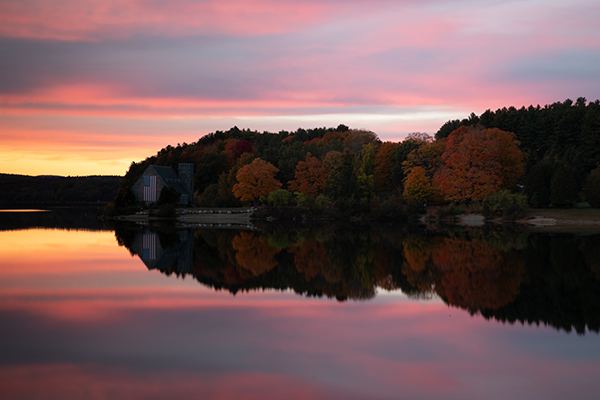
#4 Water (image 4 & 5 below - Eaton, NH & Ricketts Glen, PA)

There are so many great scenes in the fall season, but many of my favorites involve water. A very common autumn scene is around small ponds or lakes, especially in the early morning when the cold air hits the warm water to create low fog and mist.
These scenes really appeal to the human eye that’s prewired to look for symmetry and mirror images. A little bit of distortion in the reversal creates interest and if it is windless, the mist/fog can hang for a good hour.
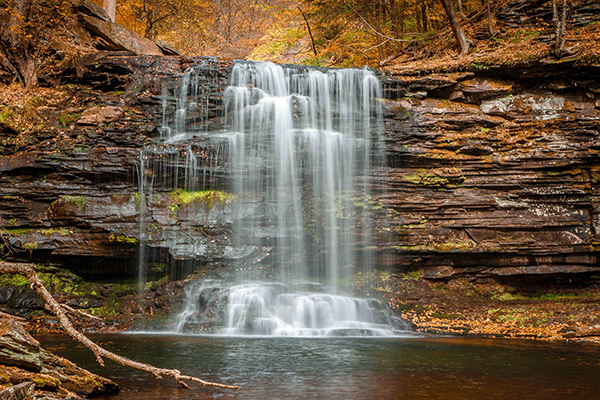
Another key subject involving water are waterfalls. Be advised that waterfalls are bright and interesting and will always be a focal point of your image, so you have to decide if you want it to be a major or a minor part of the scene.
Another key decision you want to make is whether you want to use a fast shutter speed to freeze the water or a slow one to show movement. Most of the waterfalls I shoot are small, so I use neutral density filters to slow the shutter speed to give them a sense of flow, but not too long to lose the definition of the flow.
Here are my recommended shutter speeds:
¼ - ½ second for faster water
½ - 1 second for slower water
One final recommendation is to always shoot waterfalls on cloudy days to avoid harsh light and shadows.
#5 Camera Settings
One of the great things about shooting fall landscapes is no special equipment is needed for most shots besides a DSLR or mirrorless camera body, a reasonably wide-angle lens and a tripod. Here are my recommendations for cameral settings when shooting fall folliage:
• White Balance - if shooting in Raw (recommended), shoot in auto WB and you can change this in post-processing. I prefer cooler tones around 5000-5500 k.
• ISO - use a tripod and go as low as possible to avoid noise in the image
• Aperture – a good starting point set is f/8 for wide angle and f/11 for telephoto. Adjust depending on the depth-of-field needed for the scene.
• Shutter speed - as long as you are on a tripod, this can be any speed. Wind is the major enemy that you have to be aware of in order to “freeze” the leaves.
• Exposure compensation - I usually shoot 1/3 to 2/3 of a stop underexposed to deepen the colors and ensure that none of my highlights are blown out.
A reminder to use your histogram and not your thumbnail image to judge light to avoid blowing out the highlights.
#6 Post-Processing - Adobe Lightroom or Equivalent (images 6 & 7 below – Old Stone Church, West Boylston, MA)
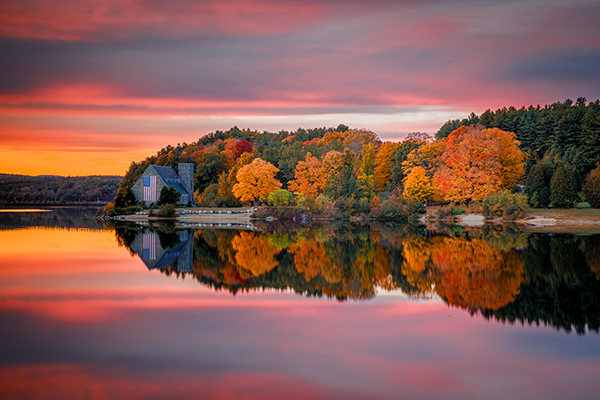
Because a camera can’t capture what your eye sees, I recommend post-processing your image. While the eye can see approximately 24 levels of dynamic range, the best cameras can handle about 14 levels.
So, by learning the Lightroom (or equivalent) “Basic” panel you can dramatically improve your finished landscape images as you can see from the initial and finished images.
The first step in post-processing is to have a good monitor calibration system so that what you see on the screen accurately represents the scene. I recommend Datacolor’s SpyderX for fast calibration and accurate color and light levels.
Conclusion
From beginning to end, you can squeeze about six weeks of fall color shooting so get out and start using some of these tips to capture the beauty and splendor of this wonderful season.
To view more of David Long’s photography check out his Instagram page: https://www.instagram.com/davidlong3653/


![]()
Get the Latest Photo Tips, News & Reviews from Shutterbug!
| Camera Reviews Other Reviews | Mobile Reviews Photography Reviews Columns | News | Features | How-To | Resources |
 © 2026 Shutterbug
AVTech Media Americas Inc., USA
All rights reserved