- REVIEWS
Camera Reviews 
More Reviews Mobile Reviews Photography Reviews - GALLERIES
- VIDEOS
- BUYER'S GUIDES
Give Sultry Portrait Photos More Depth & Dimension with This Simple Photoshop Trick (VIDEO)

Editing portrait photos often involves some rather sophisticated skills and techniques. But there are also several Photoshop tricks that yield dramatic results with a few simple clicks. We’re going to show you one of those today.
In the 11-minute episode below, image-editing expert Unmesh Dinda demonstrates two ways to add incredible depth and dimension to a subject’s skin using Photoshop’s “Zones and Blend-If tools. You’ll also learn how to add a greater sense of shape to your portraits.
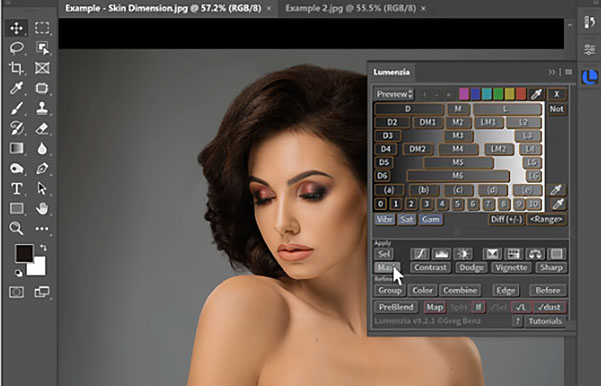
As Dinda explains, these methods are particularly important when editing portraits with flat or dull skin. He begins the tutorial with an automated process using the popular Lumenzia Photoshop Panel, and he provides a download link with a 25% discount code in the description beneath the video.
As you’ll see, Lumenzia really simplifies and accelerates the process by automatically creating Zone Curves with Blend-If, enabling you to quickly take control of different zones of Luminosity.
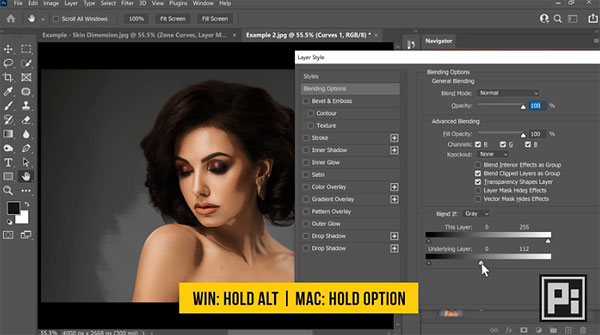
The second portion of the video is for those who prefer to take a manual approach. Dinda walks you through the process from beginning to end, and it’s still very easy to accomplish with Photoshop’s Curves and Blend-If tools.
Whether you decide to use the automated Lumenzia method or make the adjustments yourself, we suggest downloading the sample image in the description below the video so you can follow along as Dinda illustrates the techniques.
After watching the video head over to Dinda’s YouTube channel where you’ll find more image-editing advice. And don’t miss another tutorial we posted recently, with five Photoshop hacks that will transform your portraits.


![]()
Get the Latest Photo Tips, News & Reviews from Shutterbug!
| Camera Reviews Other Reviews | Mobile Reviews Photography Reviews Columns | News | Features | How-To | Resources |
 © 2026 Shutterbug
AVTech Media Americas Inc., USA
All rights reserved