- REVIEWS
Camera Reviews 
More Reviews Mobile Reviews Photography Reviews - GALLERIES
- VIDEOS
- BUYER'S GUIDES
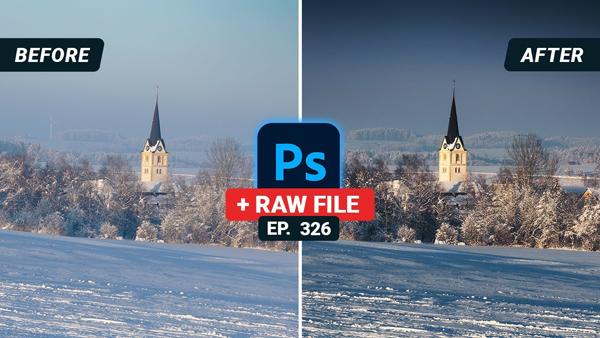
Give Photos a BIG Boost in Color & Contrast with This Simple Photoshop Technique (VIDEO)
Everyone seems to have their own approach to editing images in Photoshop, and some are more complex than others. But if you’re looking for a simple technique that will make a big difference in your results, this tutorial is for you.
In the video below, German landscape photographer Christian Mohrle of Phlog Photography explains how to quickly enhance colors and contrast in Photoshop. His method takes barely six minutes to demonstrate, and it’s even faster to accomplish.
Mohrle begins with what he says, “I hope is the last winter image of this season.” It’s actually a pretty nice shot right out of the camera, but Mohrle’s goal for the fast edit is to make it even better by enhancing color and contrast.
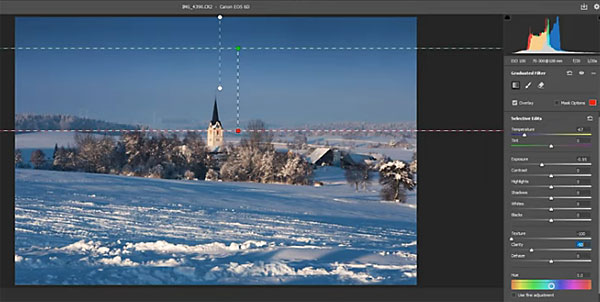
He also intends to boost the blue tones, warm up the highlights and give the shot a Golden Hour look. You’ll see him add drama to the sky by darkening it quite a bit. Beginning with basic adjustments, Mohrle adjusts white balance to his liking while increasing the whites for more brightness and boosting contrast.

The next step is implementing a few local adjustments. To make the sky more dramatic he dropped the exposure, color temperature, and texture, while adding a graduated filter to accentuate the effect. To lessen contrast in the center portion of the image he added a radial filter with increased shadows.
All that’s left is a bit of cleanup with the Spot Healing Brush and some minor adjustments to get the exact look he was after. This technique is far more basic than some others, but if you compare Mohrle’s before and after images we think you’ll agree that it makes a big difference.
You can find numerous editing tips on Mohrle’s YouTube channel, and in another of his quick tutorials we posted with a simple Photoshop tip for turning daylight scenes into dramatic sunset images.


![]()
Get the Latest Photo Tips, News & Reviews from Shutterbug!
| Camera Reviews Other Reviews | Mobile Reviews Photography Reviews Columns | News | Features | How-To | Resources |
 © 2026 Shutterbug
AVTech Media Americas Inc., USA
All rights reserved