- REVIEWS
Camera Reviews 
More Reviews Mobile Reviews Photography Reviews - GALLERIES
- VIDEOS
- BUYER'S GUIDES
Give Outdoor Photos Awesome Deep Blue Skies with a Quick & Easy Lightroom Fix (VIDEO)

So you forgot to bring a polarizing filter, and the blue sky in your photograph doesn’t look as awesome as it did when looking through the viewfinder. This is a common concern that can be easily fixed with a few quick clicks in Lightroom, as you’ll see below.
This tutorial from German landscape photographer Christian Mohrle explains how to use Lightroom’s Color Range Masks to pump up a pale sky while retaining a natural looking result.
Morhle demonstrates how easy it is to make local adjustments using Lightroom and Adobe Camera Raw to begin the process. He employs Color Range Masks to target blue tones in an image to achieve a polarization effect in the sky.
As usual, it’s important to make adjustments in the correct order, and Mohrle begins by perfecting the overall exposure. Once that’s done he covers the sky with a graduated filter to balance the tones.
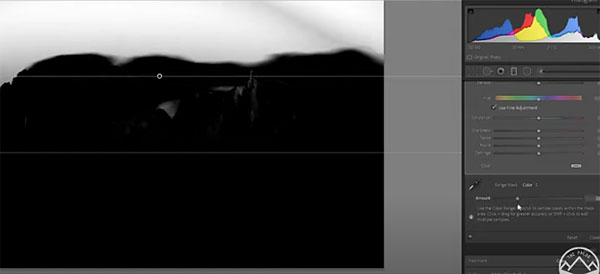
The next step is to activate the Color Range Mask, use the Eye Dropper Tool to select the blue, and simply drop the exposure. Then it’s time to enhance foreground detail by increasing Clarity and adding another graduated filter.
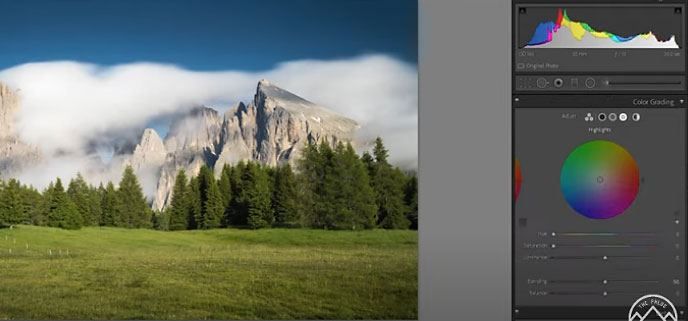
Now that local adjustments are complete, Mohrle does a bit of color grading in the HSL tab—boosting saturation in the yellow and green tones. After removing a distracting foreground element with the Spot Healing Brush, the job is complete!
There’s a lot more editing advice on Mohrle’s YouTube Channel, and in another article we posted recently—explaining a new Photoshop tool that quickly blurs backgrounds and sets focus points.


![]()
Get the Latest Photo Tips, News & Reviews from Shutterbug!
| Camera Reviews Other Reviews | Mobile Reviews Photography Reviews Columns | News | Features | How-To | Resources |
 © 2026 Shutterbug
AVTech Media Americas Inc., USA
All rights reserved