- REVIEWS
Camera Reviews 
More Reviews Mobile Reviews Photography Reviews - GALLERIES
- VIDEOS
- BUYER'S GUIDES
Create a Magical Glow in Highlights of Travel & Outdoor Photos (VIDEO)

Every so often we come across a really nice scene, compose it properly, and nail both focus and exposure. Yet we're left with a feeling that by adding "a little bit extra" we can transform the image into something super special.
That's exactly what you'll learn how to accomplish today in this quick-and-easy Photoshop tutorial from the Lou imag'in YouTube channel—a popular resource for learning the basic of post processing. In just seven minutes you'll see how create a magical golden glow in the highlights of a photo that appears realistic and enchanting.
The Instructor named Lou is an adept travel photographer and image-editing expert, and she's also a very popular educator. In just seven minutes you'll learn her straightforward technique for making it appear as though the sun is enhancing key portions of a shots to accentuate details in various areas within the frame.
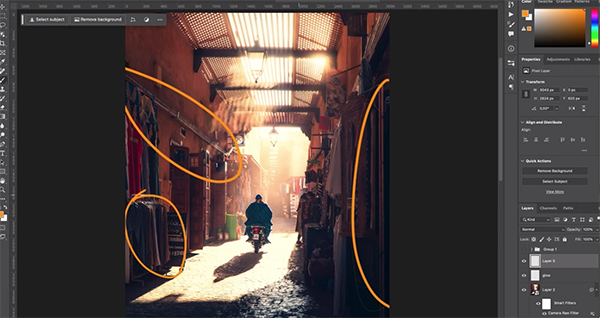
The process begins by adding a new layer and changing the Blend mode to Overlay. Then Lou grabs her brush and chooses a Flow setting of 7%. The next step s selecting a warm color that mimics sunlight—in this case an orange tone that's not overly saturated.
Now you're ready to carefully paint this color into the scene, and Lou explains the process like this: "I'm going to brush everywhere that I see the light is shining a little bit so I can emphasize the effect." She notes that you can subtly brush over adjacent areas that aren't being kissed by the light if you want to slightly broaden the glow.
Optimum results require a light touch. Thus, if you feel the 7% setting is a bit too much you can always dial it back depending upon the image at hand. You'll also want to keep your brush strokes small so that you don't inadvertently wipe away important details within the glowing areas you create.
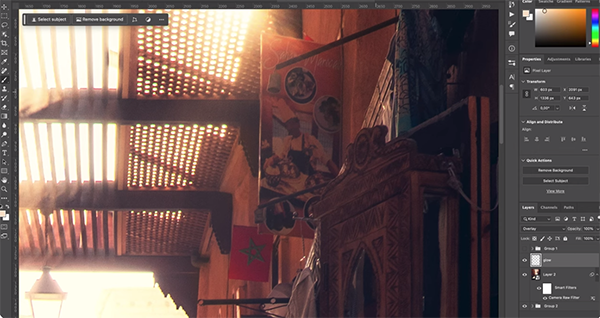
You'll notice how Lou works on small areas one at a time while using the Hand tool to gradually move around the frame. It helps to think of the technique like this: "We are emphasizing—not changing—the light." That's because everything you brush should already have a bit of shine, and your goal is simply to heighten that look.
Lou imparts a few more tricks for getting the job done to perfection. You'll understand the concept by comparing her before/after images. There's nothing bombastic about the transformation she creates, but the subtle difference adds significant impact to her final image without hitting you over the head.
There's much more to learn on Lou's instructional YouTube channel, so be sure to pay a visit.
We also suggest checking out an earlier tutorial we posted with another image-editing expert who demonstrates how to take advantage what he calls the "three best ways to use Photoshop's updated Gradient features."


![]()
Get the Latest Photo Tips, News & Reviews from Shutterbug!
| Camera Reviews Other Reviews | Mobile Reviews Photography Reviews Columns | News | Features | How-To | Resources |
 © 2026 Shutterbug
AVTech Media Americas Inc., USA
All rights reserved