- REVIEWS
Camera Reviews 
More Reviews Mobile Reviews Photography Reviews - GALLERIES
- VIDEOS
- BUYER'S GUIDES
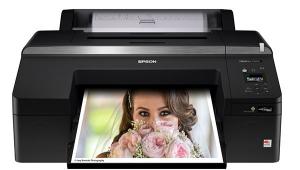
The Epson Stylus Pro 7900; A 24” UltraChrome HDR Ink Set Printer
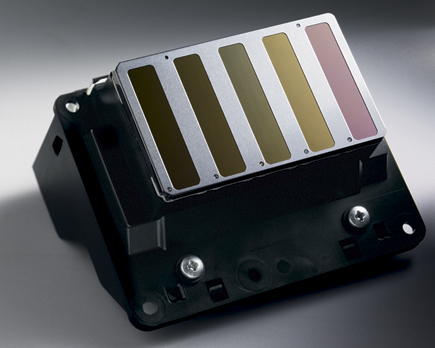
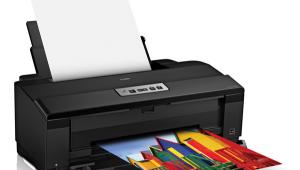
Among digital photographers who are looking for quality prints with a good archival life, odds are that you’ll hear the Epson name mentioned, including the 13” R2880 and 17” and larger Stylus Pro printers. The Epson line is known for excellent quality output on a variety of media types, as well as a long archival life through their pigment inks. Recently, Epson added two new models to their large format line-up, the 24” Stylus Pro 7900 ($3995) and the 44” Stylus Pro 9900 ($5995). What’s interesting is that rather than replacing the existing 7880 and 9880 models, the 7900 (#1) and 9900 are additions to the line.
 |
|
|
In the new printers, Epson has changed the traditional eight-color ink set used in the UltraChrome K3 printers (all the x880 models) with a new 11-color UltraChrome HDR ink set. The new ink set includes: photo black, matte black, light black, light light black, cyan, vivid magenta, yellow, light cyan, vivid light magenta, orange, and green. All 11 inks are now on-board (the 7880 and 9880 required you to swap the photo black and matte black inks and wasted quite a bit of ink in the process), but you’ll be printing with a maximum of 10 as either photo black or matte black are used depending on the media selection.
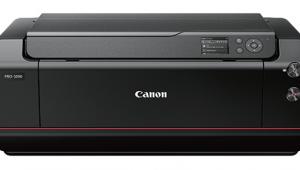
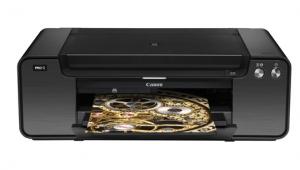
The new printer is significantly “beefier” than the 7880—comparing them side by side (#2) shows a much larger profile for the 7900. Inside this new shell are a number of changes, all of them leading to improved performance and output.
 |
|
|
Outside of the ink change, the new models have replaced the print head with the MicroPiezo TFP head (#3). This adds an ink-repelling coating to the head to help prevent clogged nozzles, which have been an issue for some users in the past. Taking it a step further, there is also an auto nozzle verification routine to further improve reliability. As part of my testing, I left the printer unused for four weeks to see how it would respond. With the 7880, I would typically do a nozzle check and head clean if it had been setting for this amount of time. The 7900 produced a top-quality print immediately, with no nozzle issues at all.
 |
|
|
Setup
If this is your first large format printer, be prepared to wonder what you’ve gotten yourself into. These are big packages, delivered on a palette. Don’t plan on unpacking and setting it up all by your lonesome. While the 7880 is large (about 110 lbs), the 7900 is a monster that weighs about 190 lbs. You need two or more to get the printer assembled and on the stand. I spent about an hour and a half unpacking and assembling the printer, including ink installation. As usual, Epson’s documentation is excellent, making it easy to assemble the stand and printer. Once you have the stand assembled, you’re ready to put the printer on the stand and begin charging the ink lines. The color LCD control panel walks you through each step of the process, making it nearly foolproof to set up. With all 11 inks installed, there’s no more switching cartridges out or dealing with levers, making this a start it and walk away process. The printer ships with a 110ml starter set of inks. About half of this is used during the initial setup process, so you’ll be well served to pick up additional inks. The 7900 and 9900 support 150ml, 350ml, and 700ml cartridges.
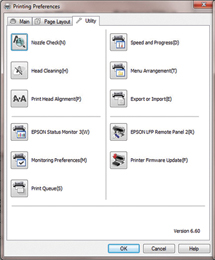
After setup, you’ll install the software for your system. Epson includes drivers, a network configuration program, and utilities to update firmware and manage paper, and to perform maintenance like nozzle cleaning. These are all accessed through the Epson Printer Utility (#4).
 |
|
|
I tested the 7900 in the standard configuration. Epson also has a Proofing Edition that includes a copy of EFI RIP for PostScript output and improved proofing accuracy that will appeal to the graphics professionals, but for photography, the standard edition is the way to go. Also available for the Proofing Edition is a new SpectroProofer developed with X-Rite. This option ($1495 for the 7900) lets you perform precise color measurements in the printer.
While the SpectroProofer does give you the option of doing critical color calibration, for photography it isn’t really needed. Unlike the HP Designjet Z3200, the SpectroProofer does not create ICC profiles for media, so you would still need an external device for this work. Even Epson recommends the SpectroProofer option for graphic artists and not photographers.
Using The 7900
Epson has everyone beat with media loading. Sheets can be dropped in from the top and loaded with a single button press, or you can release the pressure and manually load and align your media. Both options work very well; the only skew issues I had were due to uneven edges on the paper.
When printing to sheets, the printer will hold the page at the end of the print job rather than releasing it to the basket. If you prefer to let your sheets dry, you can leave it there until you’re ready to print again, or work with the sheet.
New to the 7900 is a truly innovative roll system. In the past, Epson has been criticized for not having a true roll feed, but rather a simple roll holder. The 7900 can now track paper use, printing a small code on the roll when changing media to indicate how much is left on the roll—no more accidentally trying to print a 60” long print on 54” of paper (yes, I have).
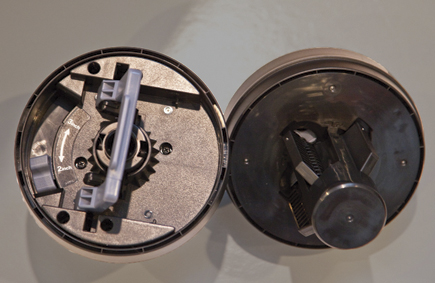
The innovative portion of the roll feed system though is the holder that doesn’t use a spindle for support. The printer instead uses roll media adapters at each end (#5). You can switch between 2” and 3” cores with a simple lever. To use an adapter, simply put it in the end of the roll and twist the handle to lock it. Then move the left roll holder over to the roll and lock that down. Epson has additional media adapters available, but they’re so quick and easy to change that I didn’t see a need for more than the included pair. The 44” 9900 also has an optional take-up reel system for printing from roll to roll in high-volume settings. The roll cutter has been improved as well with a new rotary design that can handle almost any thickness media and is virtually maintenance free according to Epson.
 |
|
|
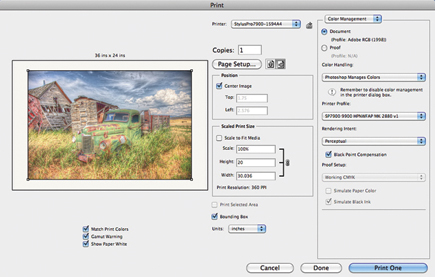
Printing to the 7900 is very much like any other Epson printer you might have used. If you’re printing from Photoshop, you should let Photoshop manage color (#6), and select the appropriate paper profile there. The profiles provided with the 7900 were extremely high quality, matching or exceeding the custom profiles I created.
 |
|
|
|
| |||||||||


![]()
Get the Latest Photo Tips, News & Reviews from Shutterbug!
| Camera Reviews Other Reviews | Mobile Reviews Photography Reviews Columns | News | Features | How-To | Resources |
 © 2026 Shutterbug
AVTech Media Americas Inc., USA
All rights reserved