- REVIEWS
Camera Reviews 
More Reviews Mobile Reviews Photography Reviews - GALLERIES
- VIDEOS
- BUYER'S GUIDES
Do This in Photoshop for More Alluring Portrait Photos (VIDEO)

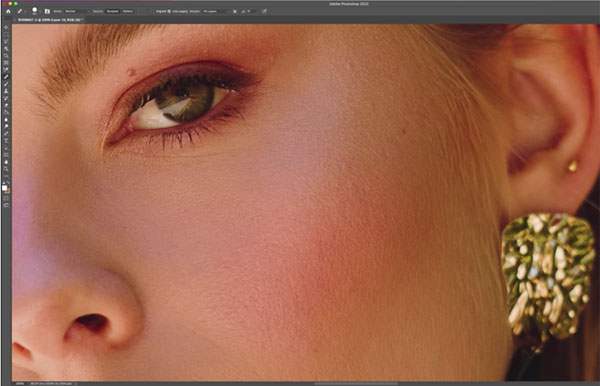
Skin retouching is an essential task to master if you want to create alluring portrait photos, whether your model is a man or a woman. That’s because you can have beautiful light, nice composition, and an inviting pose, but all that’s for naught if the subject’s skin is unappealing.
There are a number of ways to clean up a model’s skin in Photoshop—some more complicated than others. The step-by-step process you’ll learn today takes a bit of patience to master, but once you get the hang of what’s called “Frequency Separation” it will become your go-to technique.
Julia Trotti is an Australian pro specializing in fashion photography—a genre in which beautiful looking skin is a must. In this episode she walks you through her step-by-step process for making models look their best, and she provides the link to a free Photoshop action in the description beneath the video.
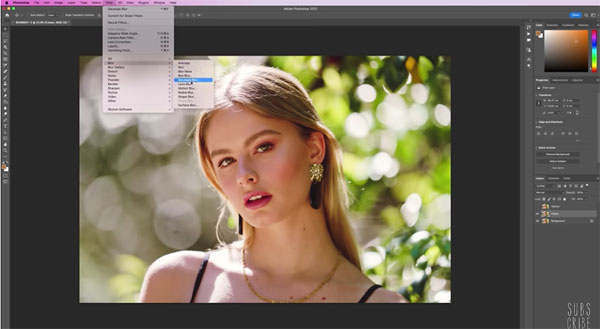
Trotti begins the demonstration by duplicating her image twice, naming one layer “Color” and the other “Texture.” She makes a quick adjustment to the former, adding a subtle Gaussian Blur.
Trotti then selects the Texture layer, navigates to the Apply Image option, and explains the best settings to use. The final important configuration is changing the Layer Blending mode to Linear Light. Don’t be confused if the photo now looks exactly like the original image; if it does, that means you’ve done everything correctly so far.
The rest of the episode is where the real retouching magic occurs, so follow along closely. And remember, you can always use Trotti’s free Photoshop action to automate the process if you don’t want to do it yourself
There are more helpful shooting and editing tips on Trotti’s You Tube channel, so be sure to pay a visit and subscribe.
And check out the tutorial we posted from another expert recently, explaining how he captures interesting celebrity portraits with natural light.


![]()
Get the Latest Photo Tips, News & Reviews from Shutterbug!
| Camera Reviews Other Reviews | Mobile Reviews Photography Reviews Columns | News | Features | How-To | Resources |
 © 2026 Shutterbug
AVTech Media Americas Inc., USA
All rights reserved