- REVIEWS
Camera Reviews 
More Reviews Mobile Reviews Photography Reviews - GALLERIES
- VIDEOS
- BUYER'S GUIDES
Capturing The Beauty In Ice: Cold Water, Hot Shots
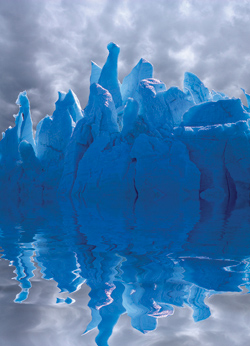
One of my favorite details to photograph is ice. It is as artistic and intriguing as anything you’ll encounter, and I never tire of the beautiful patterns and shapes I find. From ice crystals on a window (#1), to the impressive formations of glacial ice, such as (#2 and #3), the abstracts in ice that nature generates has been a life-long fascination for me.

All Photos © Jim Zuckerman

Lighting
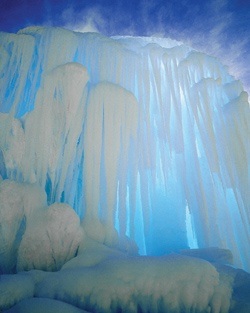
By far, the best pictures you’ll take of ice will be in overcast light. The blue color that makes ice so beautiful is most pronounced when photographed on a gray day with a thick cloud cover. This seems counterintuitive, but nevertheless it’s true. There are a couple of notable exceptions to this, such as when sunrise or sunset lighting is backlighting ice crystals on a window or when the sun is penetrating thick ice and it seems to be glowing from within, such as (#4) but these are not the norm.
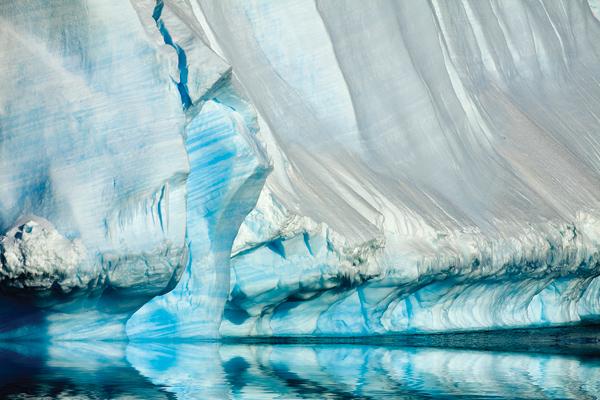
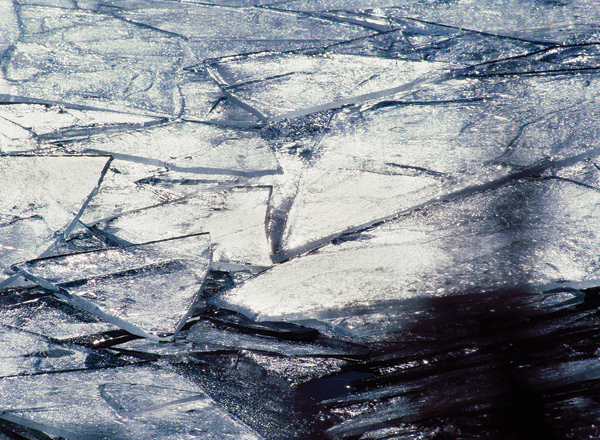
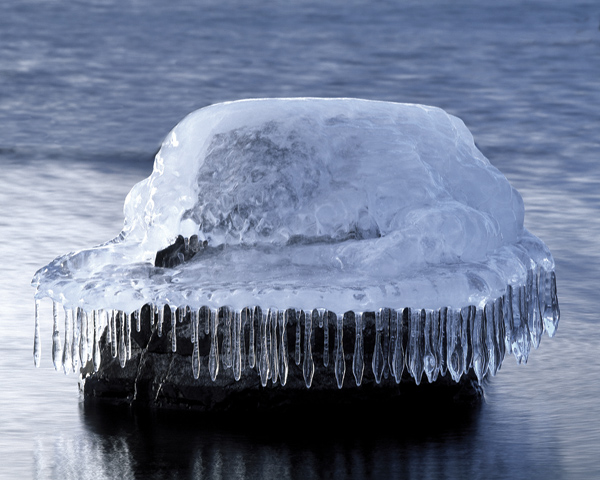
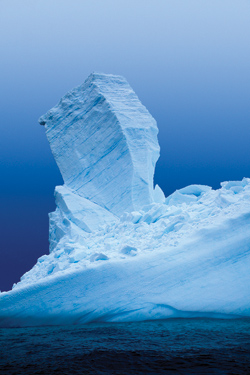
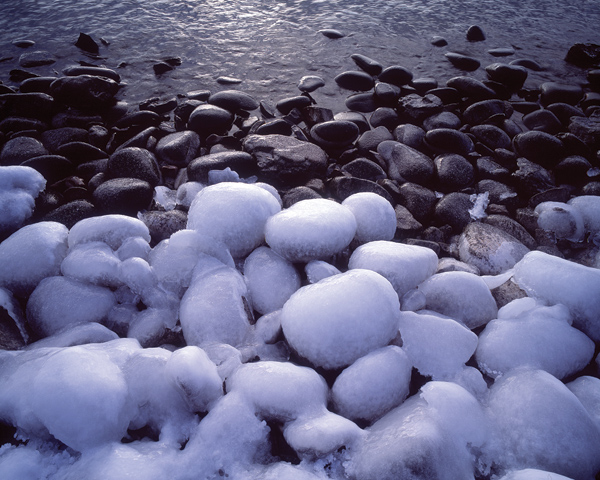
Contrasty lighting presents a problem for shooting ice. Specular highlights become so brilliant, and they are so many f/stops lighter than the darker portions of the ice formation, that in extreme conditions the picture can end up looking black and white with very little detail, such as the chunks of ice on a northern California lake (#5). Ice will appear much more attractive even in deep overcast, such as the unique formation at the shore of Lake Superior in Wisconsin (#6), and the iceberg in Antarctica (#7). The light was significantly diffused and about two f/stops darker than typical open shade, and yet the images look good.
White Balance
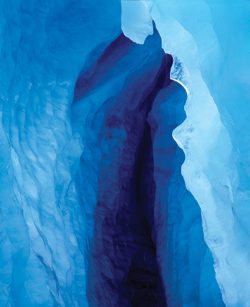
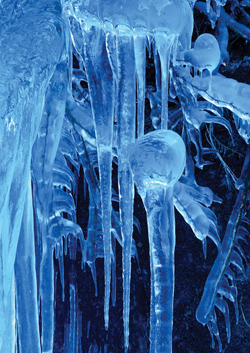
I shoot all of my outdoor pictures with a daylight white balance. The deep blue color that most ice pictures have is more saturated when shooting in overcast conditions because the blue color cast is higher in shade. I would dissuade you from using auto white balance or “cloudy” as the white balance setting in this case. This would dilute and de-saturate the images, and this is not what you want. One of the reasons why the ice cave I photographed in Alaska (#8) is such a dynamic image is because of the rich color. The icicles I shot in Yosemite (#9) were photographed under a rock overhang, and it was this kind of deep shade that was responsible for the supersaturated cobalt blue. If I used “cloudy” white balance, the blue would not be nearly as intense since this adds a light yellow to the image being processed in the camera.

Depth Of Field
As I have discussed thus far, my feeling about shooting nature’s details is that complete depth of field is ideal. This way we can see and appreciate the beauty in these subjects. The same applies to shooting ice. In a picture like (#10) shallow depth of field where some of the detail was rendered soft would ruin the photograph.
All of the pictures in this section where taken with a tripod, a low ISO setting (100 or 200), and a lens aperture of f/32. I used Aperture Priority as the Exposure mode, and I constantly checked the LCD monitor to make sure my exposures were correct. If the specular highlights adversely influenced the meter and the images weren’t perfectly exposed, I used the Exposure Compensation feature on the camera to tweak the images in 1/3 f/stop increments.
In a picture like (#11) the meter can be very easily fooled because the ice-covered rocks were juxtaposed against shiny black rocks. A light meter, whether hand-held or in-camera, tries to make this middle gray and usually it’s going to fail. This is why it’s so important to monitor your exposures as you shoot. Only a hand-held meter, like the Sekonic L-358 (www.sekonic.com), used on Incident mode will give you an accurate reading because it reads the light falling onto the scene, not the light reflected from it. Therefore it’s not influenced by specular highlights or dark shadows.
Protecting Your Camera
When shooting in the cold, you have to protect your camera. When I spoke to the tech support people at Canon about using cameras in extreme cold, they told me their equipment had been tested to 32˚ Fahrenheit. They didn’t guarantee anything colder than. This wasn’t very reassuring for winter photographers. One of the potential problems they told me is that the liquid crystal display on the back of the camera can freeze, and when liquids freeze they expand—meaning the glass can crack. This would definitely ruin your day, so take serious precautions.
I don’t know if there have been tests done (I think not) regarding what temperatures will cause the LCD to freeze, but it must be well below 32˚. Water freezes at this temperature, and other liquids freeze at different points. Nevertheless, I don’t want to find out.
When I’m shooting in winter, I carry chemical heat packets. I usually use these for my fingers, but you can also use hook and loop fasteners and press one or more of the heat packets against the camera body. This is useful in keeping the battery compartment warm as well as protecting the LCD monitor.
In addition, it’s a good idea to keep the camera against your body, inside your parka, when not shooting. Even though you may feel cold when shooting in winter, compared to the outside temperature your body is like a furnace. It will keep the camera warm and functioning properly.
Alternatively, use the hood from another jacket to cover the camera. With hook and loop fasteners or even pins or clips you can affix one or more chemical heat packets inside the hood, and this will keep the camera warm. This arrangement will also keep wind-blown snow and ice off the camera and lens.


![]()
Get the Latest Photo Tips, News & Reviews from Shutterbug!
| Camera Reviews Other Reviews | Mobile Reviews Photography Reviews Columns | News | Features | How-To | Resources |
 © 2026 Shutterbug
AVTech Media Americas Inc., USA
All rights reserved