- REVIEWS
Camera Reviews 
More Reviews Mobile Reviews Photography Reviews - GALLERIES
- VIDEOS
- BUYER'S GUIDES
Breathe New Life Into Dull, Underexposed Photos with These Simple Photoshop Tricks (VIDEO)
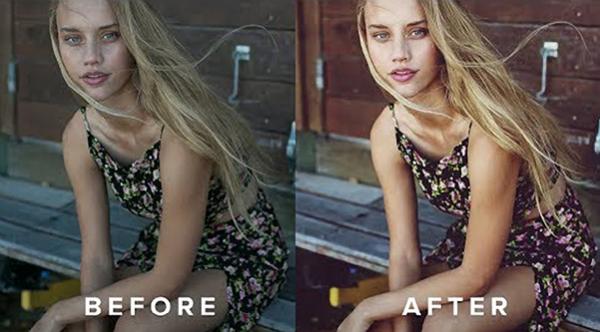
Whether we blame it on laziness, bad light, or operator failure, sooner or later all of us screw up and come home from a shoot with dull, underexposed photos. But all is not lost if you watch the quick video below, explaining how to bring those images back to life.
Julia Trotti is an Australia-based fashion photographer who knows her way around Photoshop. And in just six minutes she demonstrates how to rehabilitate an uninspiring photograph, by brightening it up, restoring detail, and adding cinematic tones to achieve a very impressive result.
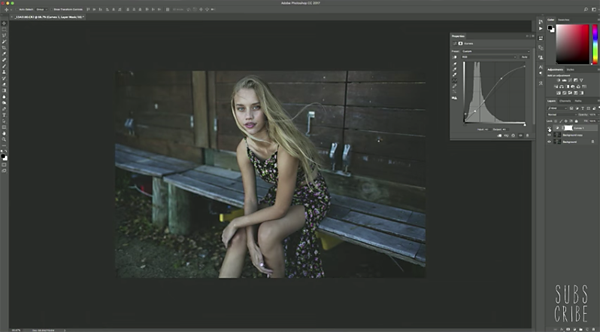
Trotti begins by using Photoshop’s Tone Curve tool to balance the tones in the image. With that as a base for further adjustments, she creates a separate layer for working on the colors. She says she does this because manipulating colors can often affect the tones of an image if you handle both tasks on a single layer.

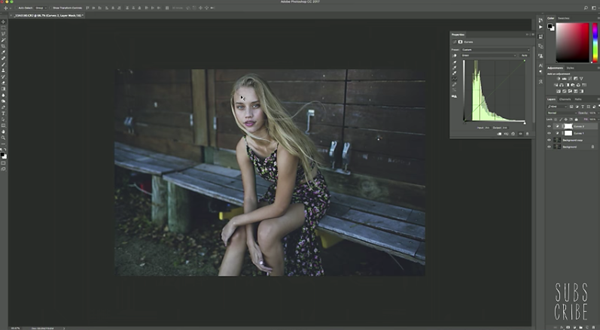
The original photograph was somewhat green and muddy, so Trotti begins by using Photoshop’s Color Curve tool to adjust the blues. She then brings down the greens to eliminate an unsightly tinge in the subject’s hair. That adjustment slightly affects skin tones, so she quickly corrects the whites for a more natural look.

In the remainder of this simple tutorial, Trotti demonstrates how to experiment with color balance, filters, highlights and shadows, to create a final image that expresses your personal style. It’s a quick, effective method for keeping your dull images out of the trash.
There are more helpful tips on Trotti’s YouTube channel. And if you missed yesterday’s tutorial explaining how to use Photoshop’s Blend modes, be sure to take a look.


![]()
Get the Latest Photo Tips, News & Reviews from Shutterbug!
| Camera Reviews Other Reviews | Mobile Reviews Photography Reviews Columns | News | Features | How-To | Resources |
 © 2026 Shutterbug
AVTech Media Americas Inc., USA
All rights reserved