B&W Film Developing Made Easy
Do-It-Yourself Tips& Techniques

Photos © 2004, Frances E. Schultz, All Rights Reserved

If you enjoy black and white photography you might question whether you need a traditional darkroom at all. Maybe you would be happier shooting black and white with a digital camera, and printing digitally. But many photographers still feel that film gives results that digital can't. It's also a better archival medium. Try printing from a 50- or 100-year-old negative. Then try to read a 20-year-old floppy disk. Or a Syquest. Or a Zip. Or...

But maybe you still don't need a darkroom. Chromogenic films such as Ilford's XP2 Super or the new Kodak CN film can be processed at any lab that can handle color negatives. You even get monochrome prints right from the lab.

Chromogenics are also good if you want to print in a traditional darkroom. Ignore the gurus who tell you that they aren't "real" black and white: XP2 in particular has enormous latitude and lovely creamy tonality, and prints very well. The main reason I don't use lab-processed XP2 is that the nearest good lab is 35 miles away: it's more cost-effective (and quicker) to process it myself. It's even quicker to get my husband to do it...

So how can you make film processing easier with traditional films?

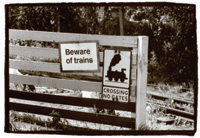
Sittingbourne-Kemsley Light Railway, England. Ilford's XP2 Super looks more like a conventional black and white film than Kodak's chromogenics, and behaves rather more conventionally, though it still requires a fairly hard grade of paper for many images. Don't worry. It's the nature of chromogenic films. Ilford's Multigrade Warmtone at Grade 3. (Voigtländer Bessa-T, 50mm f/1.5 Nokton, B+W light yellow filter.)

The Tools
Begin with a hard look at your developing tank. Plastic reels are easier to load (as long as they are bone dry), but stainless reels are easier to keep clean. Whichever you use, try the other. Load a scrap film. With my "benign essential tremor" (shaky hands), I find it virtually impossible to load a stainless reel: plastic is easier for me. But it might not be for you.

If you've been using old reels, you may be amazed at how much quicker and easier it is to load clean, new plastic reels or stainless reels that aren't bent. I also find that plastic reels last a lot longer (without getting rough, scratchy, and hard to load) if I transfer the processed films to stainless reels for the final rinse: there is apparently something in wetting solutions that gets to plastic reels after a while. New tanks and reels are expensive, but if you look after them, they last for years.

Chemical Mixing
Look at how you measure your chemicals, too. Cloudy, stained, semiopaque measures are much harder to use accurately than clear ones. Also, what sizes do you have? To mix 600ml of developer, 1+7, you need 75ml of developer and 525ml of water. The easy way to do this is to measure the 75ml in a small graduate (100ml or 150ml), then tip it into a 600ml graduate and top up to 600ml.

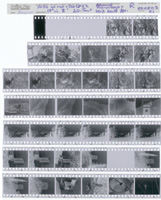
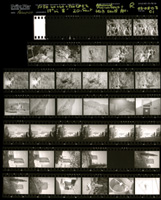
Although I am firmly wedded to the wet darkroom, I make almost all of my contact prints electronically. I scan them in their Print File sleeves, which means losing a little sharpness but gaining a lot of speed and exposing the negatives to the minimum of handling. Because my scanner cannot handle the whole sheet at once, I scan the first four rows of negs, then the last three rows, and then stitch them together. Not only is it faster and easier than "wet" contacts, but I can also lighten any dark frames and darken any light frames.

Maybe you're still wedded to fluid ounces. Believe it or not, metric can be easier. Most new graduates have metric markings as well as avoirdupois. Use these to give yourself a feeling for the metric units. If you measure out 8 oz, check to see how that translates into milliliters (225ml). If you can learn to internalize these measurements it makes life much easier when you have to deal with metric packaging. The above example--600ml of 1+7--is a nightmare in avoirdupois.

But equally, if you always use metric, remember that a lot of tanks are still in ounces. My small stainless tanks are 8 oz and 16 oz. This makes 1+7 easier than metric. Be ready to use either system, if it makes life easier or quicker.

I use clear Paterson graduates from 150-1200ml, and I even have separate graduates for the different chemicals, clearly marked "Developer," "Fixer," and so forth (with Dymo labels). This costs more than using just the one graduate, but it also reduces the chances of cross-contamination to virtually nothing (making life easier again).

Temperature, Too
What about thermometers? Mercury thermometers are accurate and reliable, but hard to come by and hard to read. I keep one that I bought at a camera fair, and calibrate my other thermometers against it. Digital and dial thermometers are convenient and easy to read, but some are horribly inaccurate, and all may drift as they age. But as long as you check them frequently against a reference thermometer, they are fine.

If the mercury thermometer is not perfectly accurate it doesn't matter. It's consistent, and because all my other thermometers are checked against it, they are consistent, too.

Developing Timer
Next, timers. Sure, you can use your watch or the kitchen clock. But a purpose-made stop clock is easier to see, more reliable, and doesn't require calculations such as, "Well, it's 3 minutes past now, and I need to give it 81/2 minutes, so that's 111/2 minutes past." A good, new stop clock isn't cheap but it should last for a decade or more.

Portugal. When testing a new developer, it is a good idea to use a film you are familiar with. Ilford's HP5 Plus is one of my standard films. This image came from a roll which was developed in then-new Paterson FX-50. I love the tonality. Printed on Ilford's Multigrade Warmtone. (Voigtländer Bessa-T, 50mm f/2.5 Color-Skopar, B+W light yellow filter.)

Notes For Consistency
Do you keep notes of how you develop your films? I note the developer; the dilution; the temperature in; and the temperature out. The last can be revealing! I also note whether I used the Jobo CPE-2 (a wonderful time-saver if you have a lot of film to develop) or a hand tank, and in the latter case, the agitation.

A typical lab notebook entry in the film notebook will therefore be "Ilford HP5 Plus--Ilford DD-X 1+4--20.4Þ in--10 minutes--20.8Þ out--hand tank--agitation 10 sec/minute." I also date the process run, and mark that on the negative sleeves, along with a film number. Thus, 03-10-09-03 is film No. 3 from the 9th of October, 2003. This allows me to check the development data if a negative prints unusually well or unusually bad.

Keeping Film Safe
Store the films in transparent archival sleeves, so you can make contact prints and reference scans through the sleeve. I have used Print File for years. If you really want to make sure that your negatives stay clean and unmarked, get some white cotton or antistatic gloves from a lab supply house. Store the sleeves in archival boxes or folders to keep the dust off.

Chemical Check
So far, I have only talked about equipment. What about chemicals? First and foremost, don't let your developer go stale. Decant liquid concentrates or stock solutions into smaller bottles with no airspace. Brown glass bottles are best, as they are completely impermeable.

For example, I have just opened a liter of Ilford Ilfotec DD-X. I immediately decanted part of it into two 300ml bottles, filled to the brim. These will keep for a year or more. Remember to label the bottles!

Liquid chemicals are easier and more convenient than powders, and there's no risk of breathing dust when you mix them. They are more expensive, but as I have already said, we are looking at making life easier, not at saving money.

Fixer will go on fixing long after it is overloaded with silver salts--which will destroy your film in the long run. Stick to the manufacturer's recommended capacities.

Distilled or de-mineralized water will also make your life easier. A final rinse with distilled water and wetting solution helps prevent drying marks on your film.

Drying cabinets are expensive and bulky, but if you can spare the space, you can sometimes find secondhand ones quite cheaply. You are still looking at $200+ but I'd say they are worth that, easily.

An excellent and easy alternative, though, is to dry films diagonally in a door frame (or between two battens fixed to the wall). Pick a room that will not have traffic in and out. Before hanging the film find a paper clip, a rubber band, and two drawing pins. Bend the paper clip into an "S" shape and fasten the rubber band to it. Pin the top end of the film to the door frame (or batten) then put the paper clip in the rebate at the other end and pin the rubber band to the other side of the door frame (or the other batten) so that the film is stretched firmly.

There are many pleasures to be found in black and white film photography. Making it easy to develop film, and getting consistent results, will only add to your enjoyment.

Manufacturers/Distributors
Eastman Kodak Company (film)
(585) 724-1004
fax: (585) 724-0670
www.kodak.com

Ilford Imaging USA Inc.
(chemicals, film)
(800) 631-2522 and
(201) 265-6000
fax: (201) 265-3443
www.ilford.com

Kinetronics Corporation
(antistatic wisks, cloths, and gloves)
(800) 624-3204 and
(941) 951-2432
fax: (941) 955-5992
www.kinetronics.com

Paterson Photographic Inc.
(graduates, dev. tanks, and reels)
(770) 947-9796
fax: (770) 949-5917
www.patersonphotographic.com

Print File, Inc.
(archival storage)
(407) 886-3100
fax: (407) 886-0008
www.printfile.com

COMMENTS
LaxRomwe's picture

typically,most people would opt to just hire or let photographers or any other photography developing companies develop their photos but you have a solution to this. - Integrity Spas

X