- REVIEWS
Camera Reviews 
More Reviews Mobile Reviews Photography Reviews - GALLERIES
- VIDEOS
- BUYER'S GUIDES
Apple’s Aperture 3; Organize, Edit, And Adjust (Too Bad It’s For Mac Only) Page 2
Location data is also a minor—and probably superfluous—addition. Microsoft offers a free GPS-aware app called Pro Photo Tools 2 that accomplishes the same goal. (See my review of that app on the Shutterbug homepage at: www.shutterbug.com; enter “Microsoft Pro Photo Tools 2” in the Search box.)
Also, many D-SLR cameras do not add GPS data automatically, so it adds a manual step where you have to choose the location using a built-in map in Aperture 3. These new location features worked well, and I suppose you could use a consumer camera such as the Samsung CL80 on a photo shoot—which tags photos with GPS data—and then sync these images to your real Raw images, but that’s cumbersome. I’m sure location data is important for some photographers, but as an organizational tool and as part of a photo workflow, GPS data would be more helpful if more cameras added locations on the fly.
Slide Show |
|
 |
|
|
Metadata
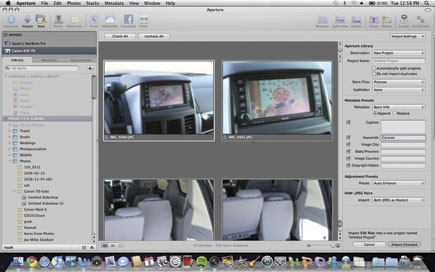
Apple has added some serious metadata improvements to Aperture 3. For this part of the workflow, after importing images, you click on the metadata tab at the top of the screen. You can add IPTC data, deep captions, copyright, and any other pro-level data. I love the new LCD-style Metadata Inspector tool that shows you a detailed breakdown of which camera you used, the settings for ISO, f/stop, and exposure, and even an icon that shows the focus setting. Aperture 3 includes a powerful and brand-new feature for working with metadata, something Apple told me that pros have requested for some time: you can now edit IPTC metatag data for an image and write the changes to the master Raw file. In my car example, this meant I could add the term “Caravan” as a keyword and write the tag to the Raw file, and not just use it as part of my Aperture workflow. Aperture also provides a quick way to add custom metatag fields and reorder these fields any way you want.
Of course, once you tag images and inspect them for detailed camera info, you can search using any of this criteria: for example, you can find only shots that used ISO 200, search by face or location data, find all photos marked with a red label, or find only TIFF images. Aperture 3 adds a few new tweaks: you can find only images that were edited by an external program, for example.
Movie |
|
 |
|
|
Editing For Pros
Apple has taken Aperture one step closer to becoming redundant with Adobe’s Photoshop. The major editing addition is that you can now perform spot-editing fixes using a brush. Obviously, these mostly optical and exposure-level fixes are nowhere near as powerful as Photoshop’s bevy of pixel-editing options, but Aperture 3 does make the workflow faster for some operations. The best example: in some portrait shots where skin tones where just a tad dull, I used the new Curves adjustment settings to apply some spot editing on the subject’s face for a dramatic color improvement. There is also a skin tone adjustment that works well. Brushes can be “feathered” so the effect is gradual and subtle.
I wasn’t overly impressed with the Adjustments options, though—Apple seems to have left the door open for plug-ins to fill in the gaps for lens corrections and color enhancement options. Photo Tools 2 from onOne Software has more immediately impressive optical adjustment options, for example. And, I prefer ACDSee Pro 3’s method of applying exposure and white balance effects to an image where you can select the editing option and then click and drag up and down on the image itself to see how that effect changes the image. This keeps your focus on the image and not on the tool slider.
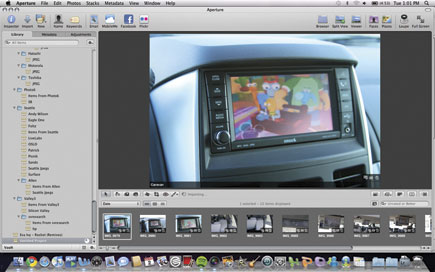
What I did find useful was Aperture 3’s radically improved Full-Screen mode. In this view, which obfuscates the extraneous background material, including the Mac OS interface itself and the Mac desktop, you can really focus in on an image. For example, you can view a photo without any other toolbars, but if you move the mouse up to the top of the screen, you can access all of the editing tools. Even when you pull up the editing palettes, you can refocus your attention on the image at hand by pressing Shift, which hides the tools temporarily as you make adjustments on the photo.
There’s another question about the effectiveness of some of the Adjustment options in Aperture 3. For example, noise adjustments just did not have quite as much of an impact as the one in the Adobe Lightroom 3 beta I tested or in ArcSoft’s PhotoStudio 6, which I reviewed in the September 2009 issue of Shutterbug. Apple has now improved their Raw engine support—in its third version—to support deeper-level optical enhancements that did work as advertised, and I appreciated the speedy performance for most editing functions—especially when working on a series of 5000-pixel images in Raw.
Image Enhancement |
|
 |
|
|
|
 |
|
|
Exporting And Printing
To say that Aperture 3’s exporting and printing options are not that impressive is a bit incongruous. In reality, Apple has seriously improved many of these features, but they appear to be less stellar at first glance compared to all of the other improvements, such as the new Full-Screen mode.
Without going into great detail, a few that I used and found valuable include the ability to adjust print borders just by dragging sliders in the print preview window, exporting to Flickr or Facebook directly from Aperture (which worked flawlessly without any bugs), and the new ability to create photo books with third-party suppliers such as Leather Craftsmen and Queensberry. Apple sent me one finished photo book showing pictures from the Pacific Northwest that seemed like a book you’d buy at Borders. (You can even create a journal photo book that includes your observations as deep captions.)
The new Slide Show mode is a PowerPoint killer as well. This is not just a minor addition—you can add audio clips as a background soundtrack and adjust slide timings and transitions endlessly. The app runs in 64-bit (requires Snow Leopard and a dual-core processor) so these slide shows run smoothly and never have the annoying slowdowns of other slide show tools, even for Raw images.
Conclusion
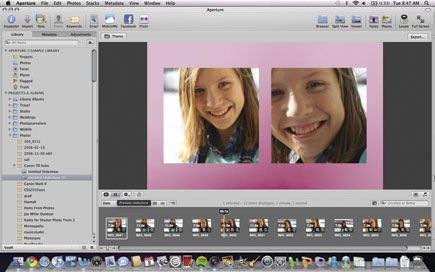
Just when you think there might be some drawback to using Aperture 3, you realize that the feature is not only implemented in the software, but is implemented really well. For example, I had a hard time finding an option that was similar to the Variations feature in Photoshop that shows a series of images side by side so you can see how the changes will look in comparison to one another. Sure enough, Aperture 3 has this comparison view, and even adds the ability to make adjustments in this view. I thought, okay—what about syncing changes you make to a JPEG with the original Raw master? Yes, not only possible but automated. The only minor complaints I had were the less than powerful noise filter, questioning whether pros would need the Faces or Places additions, and the simple fact that you need a Mac to use this workflow tool. Otherwise, Aperture 3 is an amazingly useful photo app.
For more information, contact Apple Inc. at: www.apple.com.
|
| |||||||||
- Log in or register to post comments


![]()
Get the Latest Photo Tips, News & Reviews from Shutterbug!
| Camera Reviews Other Reviews | Mobile Reviews Photography Reviews Columns | News | Features | How-To | Resources |
 © 2025 Shutterbug
AVTech Media Americas Inc., USA
All rights reserved