- REVIEWS
Camera Reviews 
More Reviews Mobile Reviews Photography Reviews - GALLERIES
- VIDEOS
- BUYER'S GUIDES
5 Ways to Shoot Stunning Portraits in Landscapes
(Editor’s Note: This portrait and landscape photography how-to story is by Olympus Visionary photographer Tracie Maglosky, who recently returned from a photography trip to Iceland. In the story, Maglosky offers five tips for shooting powerful portraits in landscape settings. You can see more of her photography on her website.)
1. Use Natural Light to Your Advantage
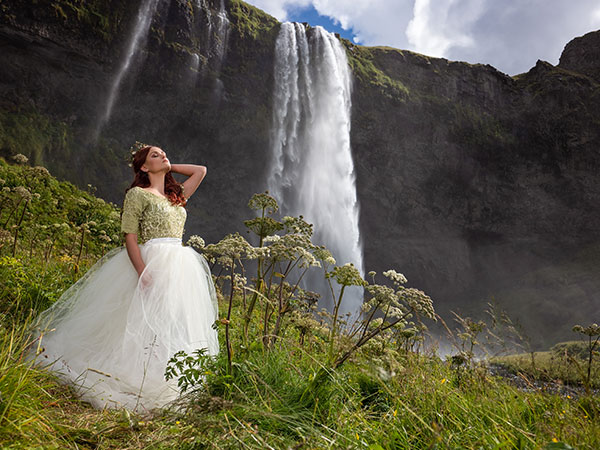
Sometimes working with natural light is the best way to create a stunning portrait. I love lighting, don’t get me wrong and I use artificial light almost always. However, sometimes, the opportunity is right to allow natural light to be the only source. Identifying the best placement of the subject in these opportunities is key. Where is the light falling on the subjects’ face? Can I balance the sky and surroundings while keeping the viewers’ focus on the subject? This image was created with natural light, showing the clarity, color and dimension that can be achieved with natural light alone using the Olympus EM-1 Mark II with the M.Zuiko 25m Pro f/1.2. Settings: ISO 200, f/2.8, 1/8000th, 25mm
2. Carry the Stuff You Need

There is nothing more frustrating than getting to the perfect location, having the perfect model with the light just right and realizing you forgot something essential. Whether it’s a modifier or a specific lens, think through what you will need and be willing to take it with you! I’ve never regretted taking “too much” with me given the lightweight nature of my Olympus setup, portability was easy to achieve while on assignment with Olympus in Iceland. I chose the Pro series of lenses because they afforded me incredible output along with weatherproofing which proved to be invaluable in waterfalls and rain. Each opportunity presented with a different exciting landscape or lighting challenge. Having thought through the scenarios and planned ahead in regards to what we would likely need, we found success in nearly every landscape.
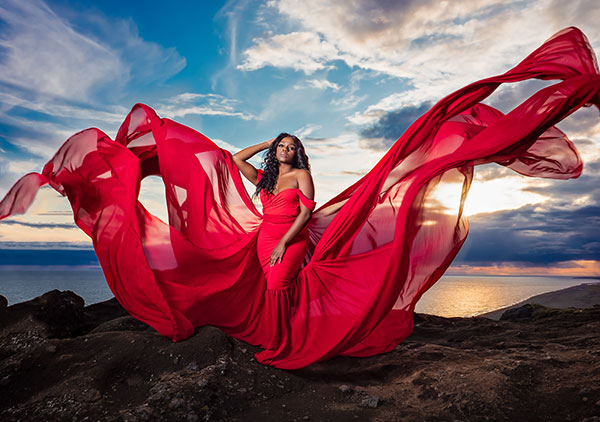
3. Angles Are Everything
A landscape will yield to you a different wonder from every angle much like a human subject. Take advantage of trying different vantage points—get high, get low, move left and move right. Using angles to your advantage will make you see the composition in the most powerful possible way. One of the challenges in shooting iconic places is that there are people everywhere. Getting a super low angle on this image allowed us to not only include the sky and eliminate the tourists from the walkway but also made the flowers seem larger than life in perfect juxtaposition to our fairy (Model: Hannah Grabowski) in the image. This image was made with the M.Zuiko 17mm Pro f/1.2. Settings: ISO 400, f/2.8, 1/1600th, 17mm
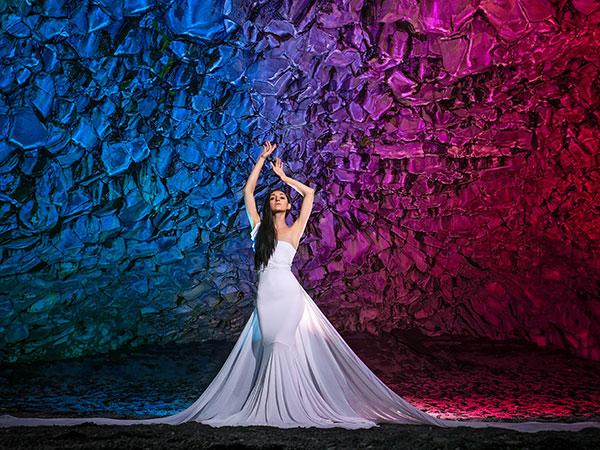
4. Create Movement
Images are still. However, I am intrigued by implied movement. Making the viewers’ mind imagine the wind whipping through the model’s hair or a gown or even a delicately flowing scarf offers more of the story and creates impact and interest. Try creating movement in your next landscape portrait. You can freeze movement two ways—using light to freeze or using your shutter speed. In this image, we used a Profoto B-1x with a XL Silver Umbrella with a diffuser to light our model (Sali Kamara) along with the EM-1 Mark II and the M.Zuiko 17mm Pro f/1.2. Settings: ISO 200, f/10, 1/125th, 17mm
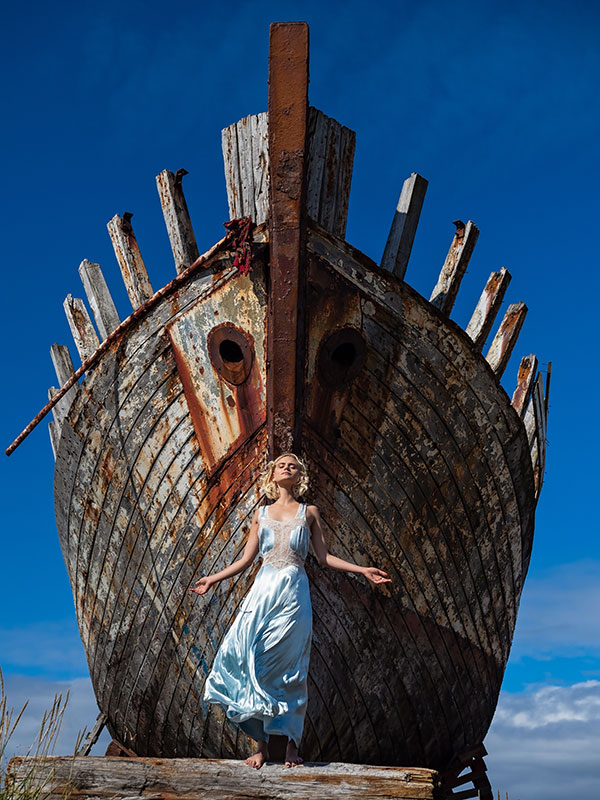
5. Don’t Be Afraid to Stop Down Your Aperture
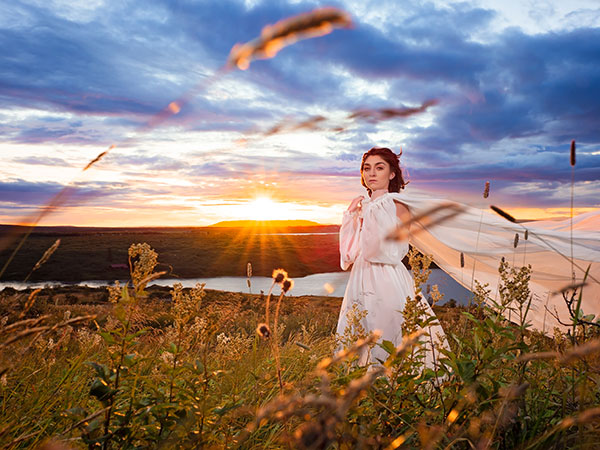
You can stop down to f/5, or even all the way to f/16, to capture the beauty of the sun in your composition. Stopping down creates that beautiful starburst and keeps the sun from becoming a giant ball of light with no definition. You’ll need more light for your subject but it’s totally worth the tradeoff for the awe-inspiring capture. This image of our model (Alison Lowery) was shot with EM-1 Mark II and the M.Zuiko 17mm Pro f/1.2. Settings: ISO 200, f/5, 1/160th, 17mm


![]()
Get the Latest Photo Tips, News & Reviews from Shutterbug!
| Camera Reviews Other Reviews | Mobile Reviews Photography Reviews Columns | News | Features | How-To | Resources |
 © 2026 Shutterbug
AVTech Media Americas Inc., USA
All rights reserved