- REVIEWS
Camera Reviews 
More Reviews Mobile Reviews Photography Reviews - GALLERIES
- VIDEOS
- BUYER'S GUIDES
5 Ways to Get Stunning Light in Your Landscape Photos
(Editor's Note: Chris Crosby is a landscape photographer and a member of Datacolor's Friends with Vision.)
One of the things that most budding photographers forget to focus on is light. When we are beginning our photography journey there are many things to be learned. We have to learn how to use our camera, understand the exposure triangle, master camera settings and composition to name but a few.
However, one of the most essential contributors to creating great photographs is light. Light plays an essential role in composition and should be one of the things that people focus on more as they grow as photographers. In this article I’m going to share five things to help you master the use of light in your landscape images and beyond.
#1 Recognize the Types of Light
There are several types or directions of light that can be used in photography, such as directly above, below, reflected, and any other angle that can be imagined. However, in most landscape situations you typically deal with direct light, which is when you face directly towards the light source, side light, when the light source comes from either the side or from at a 90 degrees from your viewing direction, and back light when the light source is coming from behind.
When you are out next time with your camera, look around and find the direction of your light source. Then I encourage you to take a photo in each direction.
As you move from direct to side and then back light you should notice some changes. First, you should notice that your exposure changes drastically if you don’t adjust the settings. Second, you should also notice that the contrast in each direction is very different. Direct light creates a higher contrast because the sun is very bright and therefore any subject will have lots of shadow creating a large tonal range of light. Side light creates a lower contrast and usually the best light to help emphasize subject and depth in the image. Back light ensures an even lower contrast and oftentimes is flat in tonality because there aren't many shadows.
Another way to think about it is to pay attention to the histograms of each image. As you go from direct, to side and to back, you should see the histogram go from very spread to somewhat narrow. Choosing the correct lighting direction will factor into how well you can expose your image.
#2 Light Creates Composition!
Light is an essential factor to all six components in composition. For those that don't know, those six components are shape, form, pattern, texture, color and lines. Let's take a look at these six components and how light factors into each.
Shape - Shape is best identifiable when it is free of clutter surrounding it. Light can be used as a tool to identify shape and in turn help create depth.
Form - Form is the 3-dimensional shape and is best accentuated by side lighting because light and shadow give better illustration to the depth of the shape. If you think back to your first art class where you draw a circle, then add a shadow to the circle to create a ball. Without the shadow there is no ball, only a circle.
Pattern - Patterns aren’t reliant on light, but we can use light to help accentuate a pattern of interest or to break it. Think of the overhead shots you see of a crosswalk in a big city. The pattern of light and dark bars of light is a great example.
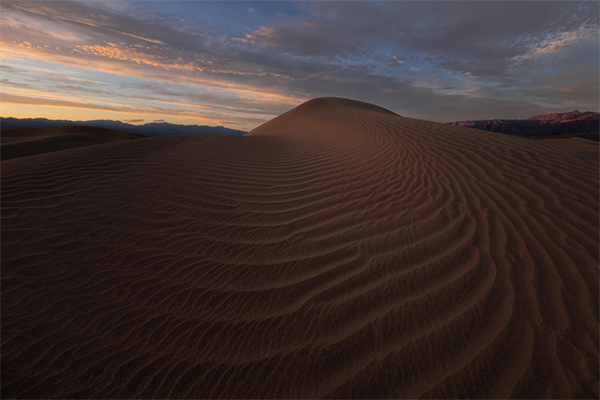
Texture - Light is essential to capture textures and are best seen using side light or direct overhead lighting. Textures help to bring a photograph to life. Think of the textures of a wooden fence, a stucco wall or the ripples on a sand dune.
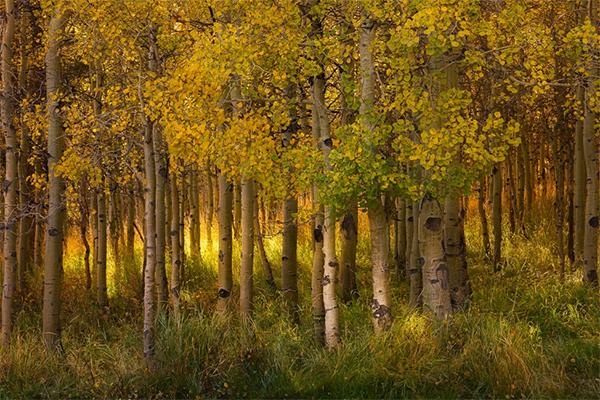
Color - Color is created from different waves of light. Color can become a complex subject, but it is important to first remember the basics such as color value, hue and saturation. Color should be considered when creating a feeling in your images. Reds and yellows are vibrant colors and are energetic, interesting and active. Where blues and greens are more soothing, comforting or sometimes sad. The direction and amount of light that are in a scene can have a direct relation to mood, but also can factor into the colors which can change as the light does.
Tip: For warm lighting, shoot during golden hour, which is the first and last hour of sunlight in the day.
Line - Line isn’t dependent on light but using light can help to create lines. Think of a shadow from a sharp edge or light rays from a window in the trees. Lines help to lead a view to a point of interest and can alter the overall mood or feel of an image. Lines can be used to lead away or forward and can help to convey power or restfulness depending on direction.
Most of these six components are engrained deep into our subconscious. I don’t actively think about all six when shooting, they seem to just fall into place. I usually tell my students that if you can include as many as possible, you're beginning to create a more interesting and artistic composition. Have you noticed any of these six components while composing your shots? Look for ways to bring them out in your photos and pay attention to how light affects them during your next outing.
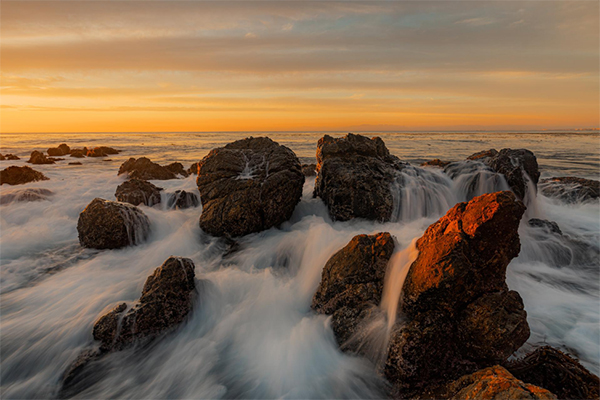
#3 Expose for the Light
Once you’ve found the right light, it’s very important that you expose it correctly to capture all the dynamic range or tonality of any scene. Sometimes you might find a situation that you just can’t fully expose correctly.
You might have some of the blacks or highlights that are “clipping.” Clipping is when a part of the image is not exposed correctly and the information is lost, especially in the highlights. It is very important to ensure that both the brightest and darkest parts of the image are exposed. For example, I'm sure you've noticed shooting towards the sun at sunset can be very difficult to expose correctly. You usually end up with either highlight clipping or black clipping, unless you utilize exposure bracketing or graduated filters to help neutralize the lighting difference.
If you shoot using side light or backlight, you'll find that your histogram is much more manageable, and your exposures are much better. Regardless of the direction of the shot, paying more attention to the histogram while you are shooting will help you to ensure you’ve captured the complete tonality of the scene. Having a better tonal range will translate into better information when you go home to post process.
#4 Plan for Light
Planning is one thing that most amateurs don’t take seriously, and pros know how to do really well. Planning for light will help you to be in the right position at the right time for more interesting shots.
Before you go out on your next trip, use a solar positioning app to help you see where the sun rises and sets in the areas your wish to visit. This will help you to know when and where will be the best place to be for each golden hour. When exploring areas, I’m always thinking about how the light will change at different times of the day and even different times of the year. The sun is always changing through the year, in some places more than others, depending on your distance from the equator.
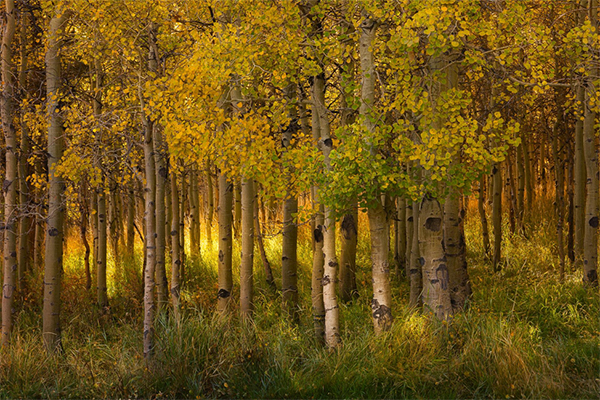
Another way to plan for light is to wait for what I call “Special Light.” Dappled light is a good example of special light. Dappled light is when a small piece of light seeps through a cloudy day to shine on the landscape. Dappled light when on a key subject can really help to bring a composition to life. Waiting for these conditions requires patience, planning, and a bit of luck.
Getting the clouds to move just right so your magic moment happens can be a painful experience, but as rewarding as landing on the moon when it happens.
Alpenglow is another special light. Alpenglow is warm reflected light that bends around the earth to hit mountain peaks before sunrise or after sunset. This isn’t direct sunlight but reflected light that is soft. If you’ve ever seen a clear sunrise at the Alabama Hills in California, then you’ve probably seen this before.
Plan your next trip around the direction of the light and special lighting conditions. Don’t always think about shooting towards the sun, but use side or back light to help you create more interesting and better exposed captures.
#5 Post-Processing Tips
Bringing your capture to life at home is probably the most important part of the creation process. This is where you are going to make your capture shine by bringing the most out of it as you can.
To ensure you get the best tonality, contrast and colors out of your images I highly recommend that you calibrate your monitor professionally. Most of the amateurs, and even some pros, that I run into do not calibrate their monitor professionally. However, having a correctly calibrated monitor will ensure that you are seeing the most correct versions of contrast and color that your monitor will produce.
Have you been struggling with colors in your images? Are you images too dark, too light, or just just not looking right when you post to the Internet? This is most likely because your monitor is not calibrated correctly. When your white balance is off it affects all the colors of the image. If your monitor is not calibrated, you’ll never have the correct white balance in your images.
I personally used to take hours calibrating my monitor. I would adjust my monitor’s white balance using many different images for both color and tonality and it was very difficult to get just right. Now I use the SpyderX by Datacolor to calibrate my monitor and I love the results. It makes sure that I’m seeing the best color and contrast from my monitor and only takes less than two minutes to use. You simply place the calibration tool on your monitor and the software does most of the work for you.
I’ve noticed an improvement in both my color and contrast correctness in my images that any photographer would enjoy. I’m more confident knowing that what I’m seeing on my monitor is what is going to be correct for both print and online viewing. I would highly recommend that any digital editor use a SpyderX to ensure that you're getting true to life vision in your studio.
To learn more about Chris’s photography visit www.chrisewencrosby.com or follow him on Instagram.
To find out more about Datacolor’s SpyderX visit https://spyderx.datacolor.com/.


![]()
Get the Latest Photo Tips, News & Reviews from Shutterbug!
| Camera Reviews Other Reviews | Mobile Reviews Photography Reviews Columns | News | Features | How-To | Resources |
 © 2026 Shutterbug
AVTech Media Americas Inc., USA
All rights reserved