- REVIEWS
Camera Reviews 
More Reviews Mobile Reviews Photography Reviews - GALLERIES
- VIDEOS
- BUYER'S GUIDES
5 Lightroom SECRETS for Photos with PERFECT Color (VIDEO)

Color adjustments are among the most important edits we make when processing our photos. For most images the goal is to take a subtle approach to achieve a realistic look that mimics what we saw through the viewfinder.
As you’ll see in the eye-opening tutorial below, the conventional approach to editing color in Lightroom and Adobe Camera Raw (ACR) doesn’t always deliver optimum results. And there are few unfamiliar tricks you can use to achieve the best color possible.
Image-editing expert Blake Rudis of f/64 Academy says, “Color processing is one of the most important things for you to master in your Raw workflow.” In this episode he shares five very helpful secrets that will help you understand the basics of color theory and what’s happening in ACR when you use specific tools.
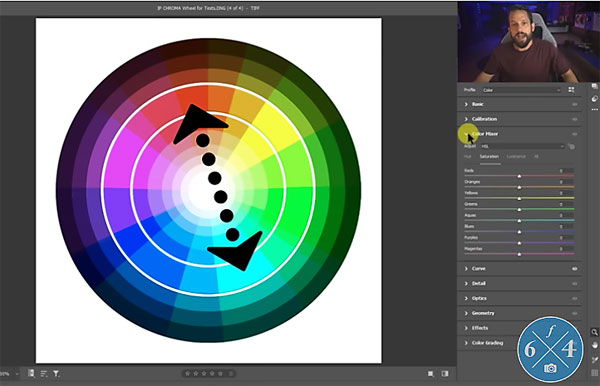
Rudis begins by explaining why the Calibration tool is a better choice for adjusting saturation that the more commonly used HSL Color Mixer. In fact, Rudis considers this so important that he moved the Calibration tool immediately beneath the Basic tab in his Lightroom workspace.
Another quick trick demonstrates how to rotate the Hue Mixer for quick-and-easy tonal adjustments. Rudis also explains how using profiles and presets makes editing color at the Raw level easier than you may think. As he says, “I use profiles and presets that talk to each other to target specific areas of color in an image to make them more vibrant and rich.”
Rudis insists that “color grading is above all edits,” and he reveals a few unfamiliar tricks he employs to get the job done. You’ll also see how to “tame the Curves tool” by using the color theory tips he reveals in the video.
You can find more editing tricks on Rudis’ You Tube channel, so be sure and take a look.
And for more Lightroom tips check out the tutorial we posted from another expert, explaining how to use.


![]()
Get the Latest Photo Tips, News & Reviews from Shutterbug!
| Camera Reviews Other Reviews | Mobile Reviews Photography Reviews Columns | News | Features | How-To | Resources |
 © 2026 Shutterbug
AVTech Media Americas Inc., USA
All rights reserved