- REVIEWS
Camera Reviews 
More Reviews Mobile Reviews Photography Reviews - GALLERIES
- VIDEOS
- BUYER'S GUIDES
10 Ways to Get Sharper Photos Every Time You Shoot
Sharpness in photographs has long been a topic of debate among photographers. Once it was about the sharpness of film and formats, but today it’s about things like sensor size and shooting Raw vs. JPEG files. I find these discussions pretty quickly become esoteric and pixel picky. I prefer a hands-on approach to improving sharpness in photos and that’s what these tips are all about.
To make my point clear let me begin with a particular demonstration of sharpness. Several years ago, I photographed the 18th and 19th century ceramic pottery collection of a local museum. They used one of the photos to produce the poster in an advertising panel. The panel is about 4 by 6 feet. The photo in the panel is very sharp. However according to the sharpness debaters this photo shouldn’t be this good.
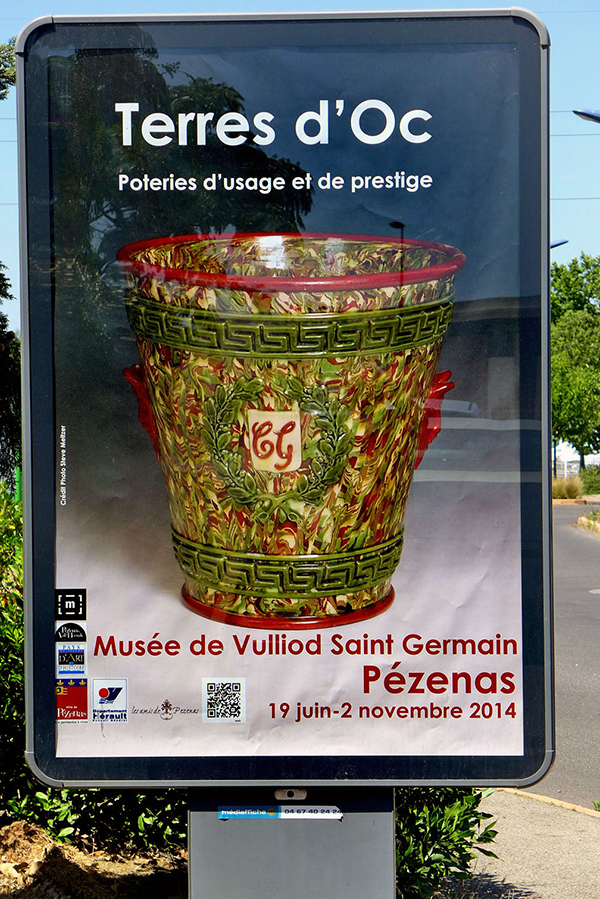
It was actually a lighting test shot made with a small 12MP Fujifilm X10 compact camera before I shot with a large DSLR. As luck would have it, the museum chose this one to use and it’s not even the full frame but a crop out of its middle. For such a small file to be enlarged to this size without loss of sharpness or tonality is quite amazing. And it helps make my point that all digital cameras are capable of extraordinary sharpness and the tips I’m offering are to help you get the most out of them.
Here are my ten ways to get sharper images every time you shoot. Try them today!
#1 Use a Small Aperture for Sharpness
The lens aperture is a diaphragm made of moveable blades that controls how much light enters the lens and reaches the sensor or film.
When the blades are fully retracted, the aperture is “wide open” and it allows light coming from all directions to enter the lens. This light is very disorganized and that makes it hard to focus. Activating the blades to make the aperture opening smaller – “stopping down”— blocks much of this chaotic light. This leaves the more coherent light rays that are coming straight into the lens to reach the glass. These rays are easier to focus, and you get sharper pictures.
Most lenses are their sharpest at about three stops down from wide open at settings like F/11 or F/16. Using these apertures gets you the sharpest images from the lens.
#2 Adjust Depth of Field to Increase Sharpness
The depth-of-field (DOF) in a photo is the area of sharpness in front of and behind the thing you are focused on and it is controlled by the aperture. When the lens is "wide open," the DOF is shallow and only a small area around the point of focus will be sharp. To increase DOF you reduce the size of the aperture opening to block more of the chaotic light thus reducing blur and widening the DOF.
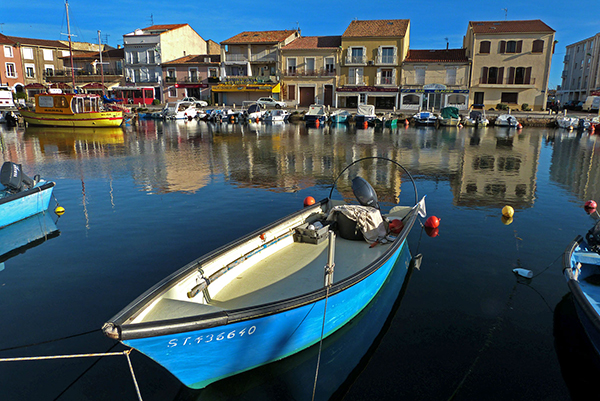
To illustrate what a large DOF looks like, look at the photo below of the port of Méze, France. My 24mm F/2.8 lens was stopped down to F/11 and the result is a sharp DOF that goes from the prow of the blue boat all the way to the restaurants across water.
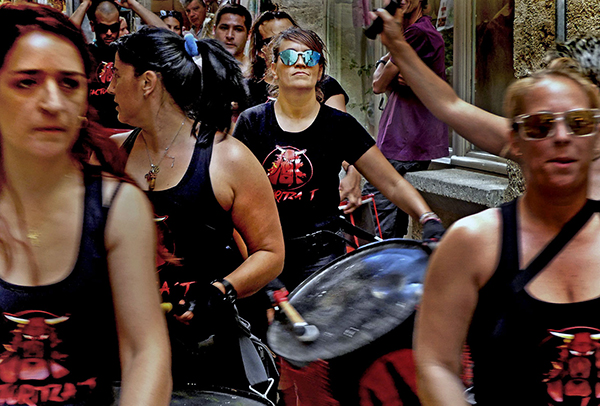
With telephotos lenses, DOF is shallow and can be used to your advantage to make interesting images. With a telephoto lens wide open, the narrow DOF lets you isolate subjects from their surroundings. I used this technique with my telephoto lens aperture wide open in the below image. I focused on the drummer with the blue sunglasses and let the shallow DOF isolate her from the others in the marching band
#3 Focus Up Front for Sharper Close-ups
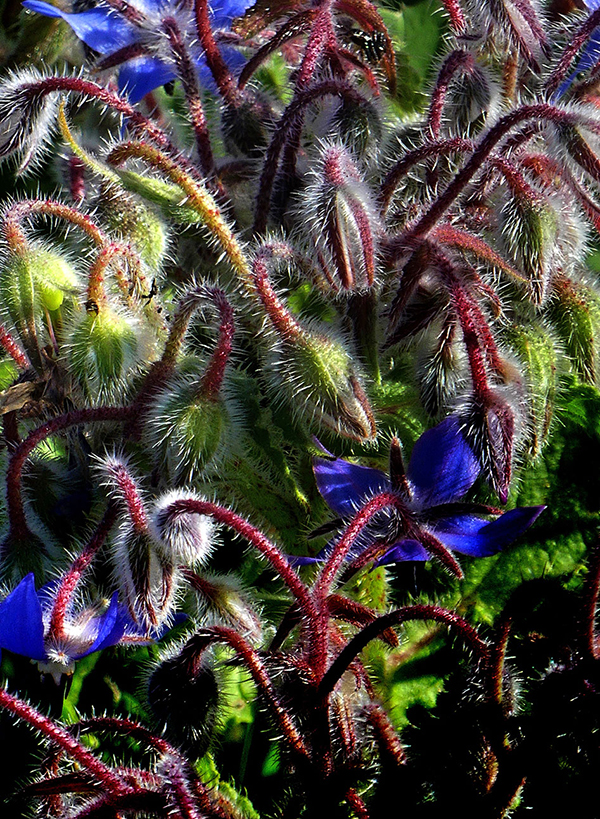
When shooting close-ups, here’s another sharpness tip. DOF is larger behind the point of focus than it is in front so focusing on the nearest part of the subject helps to ensure that most of the subject will be in sharp focus. For the photo of a borage plant below, I focused on the bristles nearest my macro lens (at F/16) and let the DOF do its job.
#4 Switch to Single Point Autofocus
Cameras and phones use sophisticated multipoint autofocus systems that measure dozens of image points to find the “correct” focus. But because they have no idea of what I’m shooting, they often pick the wrong place to focus on. Having gotten tired of fighting this I switched to single point autofocus.
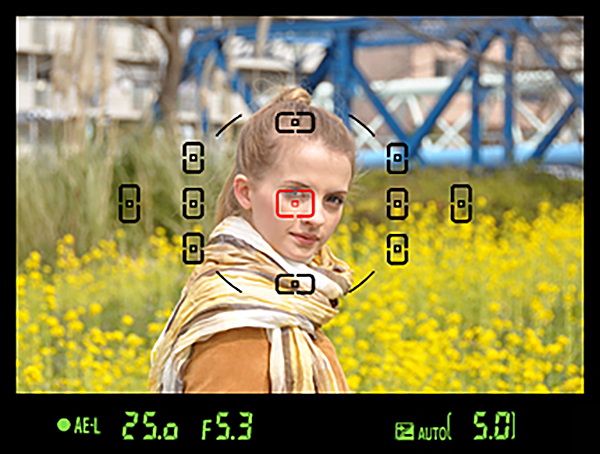
This lets me control exactly what I want to be sharpest. It means fewer photos of blurred people in front of sharp backgrounds. To switch to single point autofocus look for a control on the camera body or on a menu page in the program.
#5 The Eyes Have It
Single point focus is especially useful for getting sharp portraits. We tend to judge portraits by the sharpness of a subject’s eyes and if the eyes aren’t sharp, the whole face looks wrong.
Since eyes are a small part of the face, even sophisticated single point auto focus can miss focus and give sharply focused noses in front of blurry eyes. When I shoot portraits, I check the LCD monitor often to make sure that I’ve got the eyes sharp in the shot.
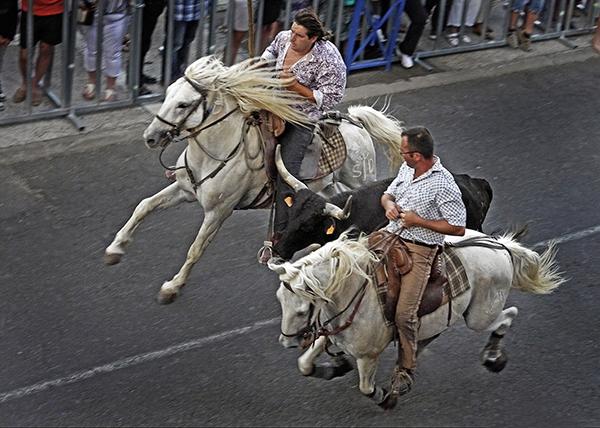
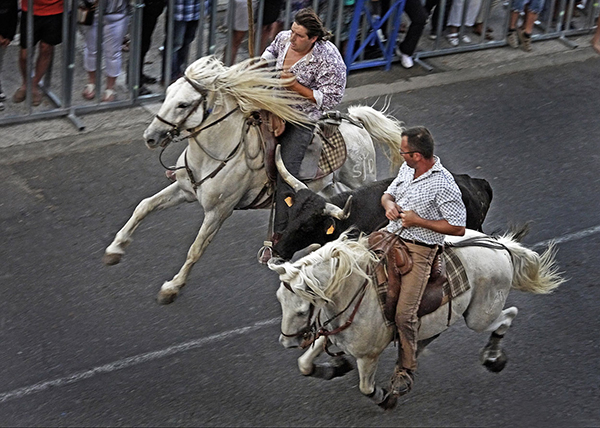
#6 Use Faster Shutter Speeds
Subject motion often induces blur in the image and is a sharpness killer. Image stabilization systems deal with camera shake but not with subject motion. Since the camera has no idea whether I am photographing a snow-covered mountain or the downhill skier on it, the camera doesn’t know what shutter speed to use. When photographing rapidly moving subjects, I use the camera’s “S” (shutter preferred) exposure mode and set a fast shutter speed of at least 1/500 second. In the photo below, to capture the horses with their feet in midair I used a 1/1200 second shutter speed to stop the action.
Also consider raising the ISO to a higher speed such as ISO 800, which lets you use faster shutter speeds without significantly adding noise to the image.
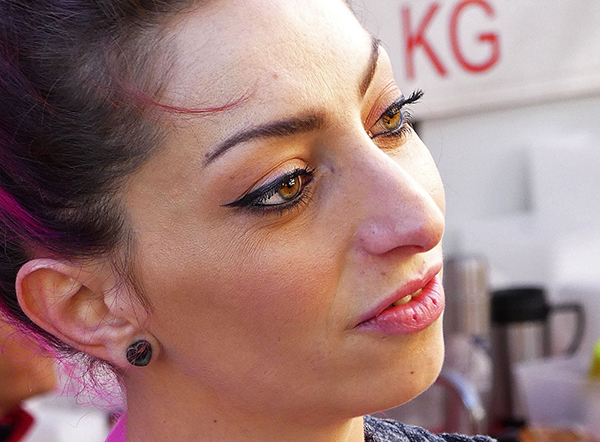
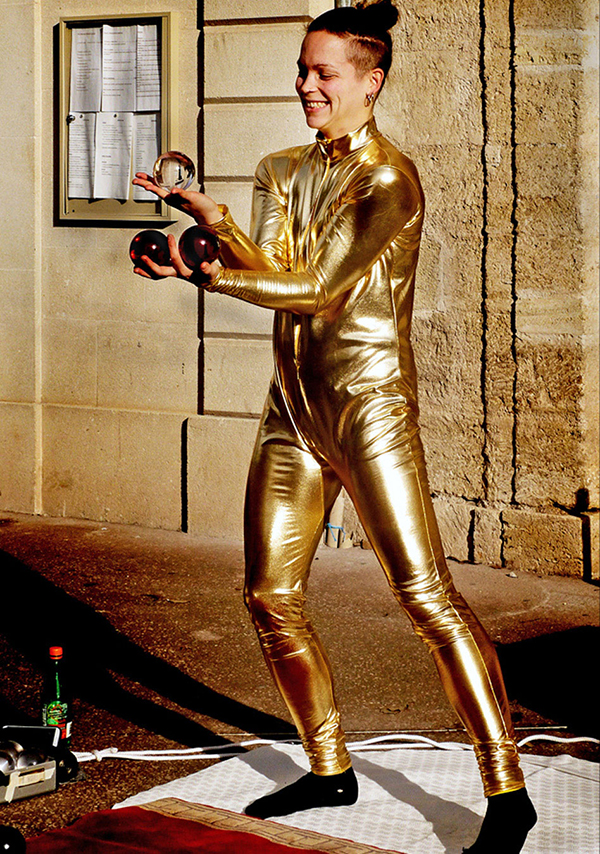
#7 Shoot for Contrast
Strong side lighting produces deep shadowing that emphasizes texture and enhances the impression of sharpness. That’s why photographers like to shoot early in the day or near sunset when the sun is low in the sky and the light is very angular. You can see this effect in the photo below of my friend Aurelle Pottier, a glass ball juggler that was taken early one winter’s morning.
#8 Switch to Prime Lenses
Zoom lenses cover a wide range of focal lengths but they aren’t equally sharp at all of them. Additionally, when zoom lenses are used at their longest telephoto setting, images can be very soft.
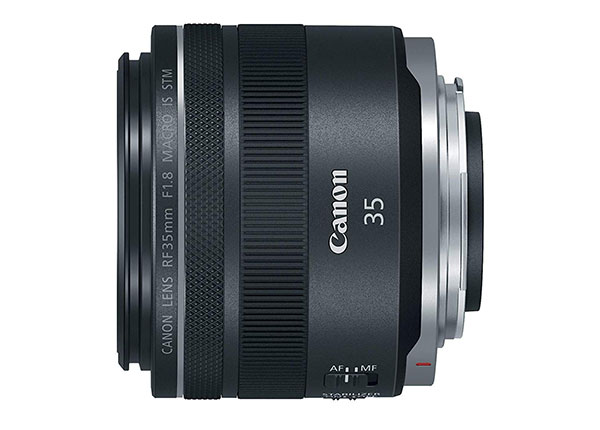
If you love photographing birds or if you do a lot of close-up work, consider investing in a single focal length “prime” lens. These lenses produce more noticeably sharper images than zoom lenses set to the same focal length.
#9 Mini Tripods for All Occasions
Tripods help get sharper images, but I won’t carry a big one around. As an alternative I have a small miniature tripod – a “minipod”— in my camera bag. With the minipod is closed I use it as a hand grip and when it is open, I use it as a tripod bracing it against something solid.
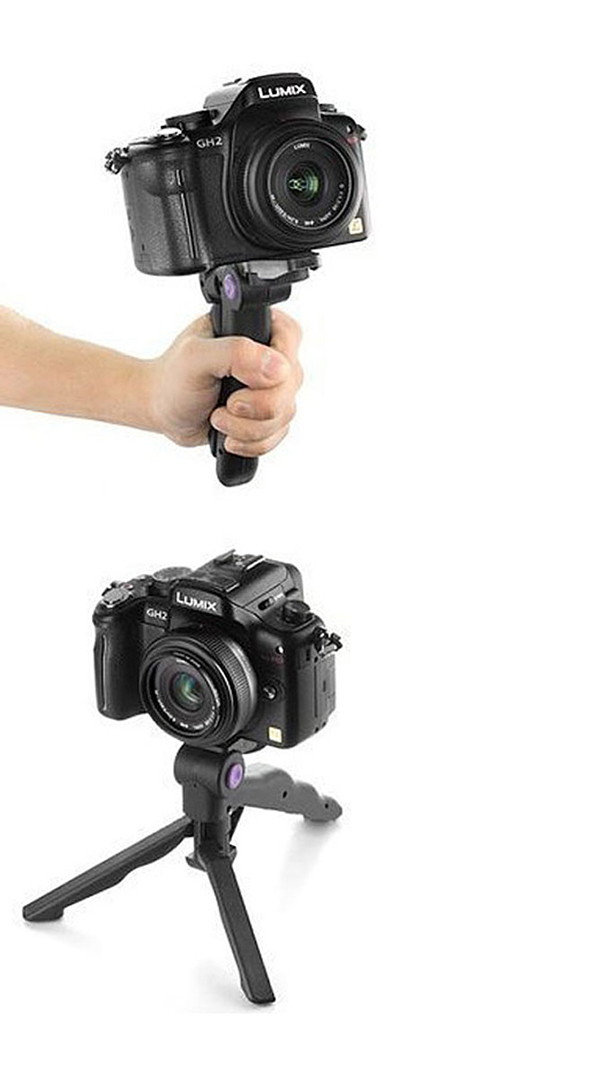
The picture below of a woman on the Paris metro was shot at a slow 1/8 second with my minipod braced against the subway seat.

#10 And Now for Your Moment of Zen
Speaking of steadiness, I see a lot of photographers who keep moving around as they take pictures. That doesn’t get sharp pictures and there’s a better way to work. When you see something to photograph stop, brace yourself, and then as you press the shutter button, inhale. At the top of your breath your hands shake less and that helps to get sharper images.
All of these sharpness tips are surprisingly easy to do, and, over time, they become a natural part of the way you shoot. So, keep it sharp and go out there and try them today!
- Log in or register to post comments


![]()
Get the Latest Photo Tips, News & Reviews from Shutterbug!
| Camera Reviews Other Reviews | Mobile Reviews Photography Reviews Columns | News | Features | How-To | Resources |
 © 2025 Shutterbug
AVTech Media Americas Inc., USA
All rights reserved