- REVIEWS
Camera Reviews 
More Reviews Mobile Reviews Photography Reviews - GALLERIES
- VIDEOS
- BUYER'S GUIDES
Digital In Black And White
Ink Jet Printing Problems And Solutions
|
The output device for most digital darkrooms has become the photo-realistic ink jet printer. The printers that are designed to produce high quality photographic image reproduction are primarily color printers. They can be used for a wider range of applications, including printing text in pure black and white, and provide a good quality result. However, if used to print a black and white (gray scale in computer terms) image when the printer driver is set on black ink only (gray scale), the range of print densities produced is usually not comparable to that produced when a color photograph is made with the printer. The reason is that ink jet printers are CMYK type printers, and, in the case of most photo-realistic models, use six instead of the four standard colors of garden-variety ink jets. A black ink only print from a gray scale image file is then limited to just the number of ink drops which can be applied from the black ink, approximately by 1/6 of those available to make a full color print. The result is a print that lacks the tonal range, smoothness, and depth of tones of a color image made with the same printer. However, as printer resolution has increased, combined with the use of smaller jet sizes (now down to four picoliters) the number of jets in a print head for each color including black has been increased. This new advantage, of course, functions only when the printer's top resolution setting is selected. And, in the case of the latest 2880dpi Epson printers, this highest setting can only be used when printing Glossy or Premium Glossy photo paper. This will satisfy many practical needs for black and white photographic prints. But for the photographer who has done fine black and white printing in a traditional darkroom, as well as anyone who wants to emulate the photographic tradition of fine black and white prints exemplified by the likes of Ansel Adams, and who has used high quality fine arts printing papers, there is no ready, automatic, click and print black and white solution. |
|||
Using Color Inks To Make
B&W Ink Jet Prints Not-So-Neutral Silver
Prints To achieve a similar result using an ink jet printer applying all of the printer's ink colors demands some individual trial and error testing to modify the image file being printed. The goal is to create a tone that is a bit off dead-center gray. To do this in a digital darkroom first requires that the 8-bit gray scale image mode is changed to 24-bit RGB mode. With a black and white image in RGB each of the three color channels have the same values, for instance a dark tone might be R-42, G-42, B-42. To get the printer off dead center the values need to be not all the same, maybe R-41, G-42, B-43. The combination of RGB values that will work to provide a pleasing and satisfactory result is where the trial and error testing comes into play. |
|||
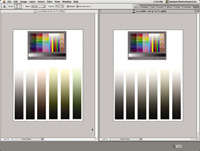
Bias Shifts The test image file then should contain several selections of color applied to an image area that contains all of the tone brightness values from black to white. I made my test print image by opening a new image that is 8x10" by 300dpi resolution. I also made another new image 1x6" by 300dpi. In this smaller image I used the Graduated Fill tool to apply a graduated tone from white at the top to black at the bottom. I then copied this gray scale image and pasted six copies of it in the 8x10 image. (I also pasted a copy of a scanned IT-8 reference image at the top of the page as a visual reference.) |
|||
I then used the rectangle selection tool to select each of the five individual gray scale bars on the right, leaving the one on the left neutral gray. As each was selected I applied a different color using the Fill Layer command detailed in illustration above. My first version of this test image was then printed. (This test should be printed once on each different paper that you might want to use for reproducing black and white images in the future.) On the basis of the result, it was revealed that each color addition was too strong, so I again used the rectangle selection tool applied to each bar and used the Hue&Saturation tool to shift the color value (Hue) as well as reduce the Saturation from 50 percent to as much as 75 percent. I then made another set of test prints. From this I was able to select a color to add to black and white images that would print a desirable warm black tone to my eyes. Once you have settled on a choice of color, make a note of the RGB values, and also if you have reduced saturation. Then choose a couple of black and white images with differing kinds of subjects and tonal distribution to make final, practical test prints. The procedure using Photoshop 6.0 or Elements, as well as a similar procedure with most image editors like PhotoPaint or Picture Window, is similar. First, use the Image/Mode menu to change the image from gray scale to RGB. Then select the Layer menu command Fill Layer and select color. Designate the Mode as Color (only), and when the Color Picker window is open type in the RGB number values for the color selection you have made. If you need to reduce the saturation, you will have to go to the Layer menu and select Merge Visible, and then open the Hue/Saturation dialog from the Image/Adjust menu selection. Apply the Saturation reduction. Now you are ready to print. |
|||
Using The Epson 2000P Pigment-based inks used with ink jet printers, unlike dye inks which soak into the printing material, tend to remain more on the surface and do not infuse into the paper material because pigments are solids while dyes are liquids. This makes the pigment ink on the surface of the print capable of reflecting some of the light illuminating the print. If the print illumination color characteristics change, as they do between daylight coming in a window and tungsten room lighting, the appearance of the print tone will shift color. This is a thoroughly researched and well documented phenomenon called metamerism. And, when the print is a monochrome, a black and white image, it is even more apparent in the print when illumination is changed. Because of this quite apparent effect of metamerism, Epson's recommendation is to make black and white prints with the 2000P which have more color, like a sepia-toned print. Of course, the other alternative is to make a more neutral colored black and white print if you are assured the print will always be illuminated by just one source of light, like a specific kind of indoor lighting. And it should be obvious that the illumination in your workroom should match the illumination where the print will be displayed, so the color you choose will be the tone of the print when viewed. To test this I printed three images, one with a very subtle color addition that produced a print very close to neutral warm black, another with a mild, warmer tone like that of a silver print processed with an archival amount of gold toner, and the last a richly colored sepia-toned print. |
|||
These three images were printed on both the Epson SemiGloss paper for the 2000P as well as a new finely textured matte fine arts paper called Schoellershammer Velvet, obtained from Digital Art Supplies (www.digi talartsupplies.com). The color tones were selected and the prints were made in a room lit with tungsten. When the prints were moved into a room illuminated by indirect window light varying amounts of metamerism was apparent. Both of the "sepia" prints appeared now to be a cool brown, the print on the semigloss more so. Both of the "gold tone" prints took on a yellowish green cast, which was more pronounced in the semigloss print. The neutral prints took on a cooler tint that was decidedly cyan in the semigloss print. It was apparent that the semigloss paper holds more of the 2000P ink on the surface and is more subject to the effect of metamerism, and the finely textured matte Schoellershammer Velvet paper was less so. The test also revealed that a deeply colored "sepia" print tone reduces the apparent metamerism effect, or at least the shift is not as unpleasant. Independent Brand All
Black Ink Sets I used the term "serious"
because the use of all-black ink sets involves thoroughly cleaning the
print head with special "cleaning" cartridges before the new black inks
are used, which involves some expense and time. So, it is really only
practical, convenient, and economical if you dedicate a printer to black
ink only use. In other words, switching a printer back and forth between
color inks and all-black inks is not a satisfactory solution. The cleaning
process has very stringent demands. You must thoroughly remove any trace
of the old ink from the print head. From the information I have, and
one sad personal experience ruining a printer, any mixing of one type
of ink with another raises the possibility of coagulation that could
result in permanent clogging of the print head jets. The all-black inks
include a standard full strength black and the color cartridge replacement
includes varying dilutions of black (grays). This assures the standard
printer driver set on color will apply ink densities that will result
in an appropriate range of tones in the final print. The Lyson Quad
Black inks are dye based and also provide what is considered archival
print life under normal display conditions (test results are available
at www.wilhelm-research.com). And, Lyson offers three selections of
print tone color choice--Cool, Neutral, and Warm. For my tests I had
to limit my use to the Neutral version of the Quad Black inks. Piezography BW By Cone
Editions Press Cone Editions founder Jon Cone provided a kit for me to test, but I had to acquire a compatible Epson printer on my own. Having a substantial interest in black and white printing, being an "old-timer" with 75-80 percent of my archives black and white negatives, I decided this was as good a time as any to equip myself with an appropriate printer. Colleagues as well as the staff at Cone Editions suggested an Epson Stylus Color 1160 as the best affordable choice in a 13" wide printer. The reasons given were that a four-color printer is better adapted to all-black ink printing, and the 1160 model, among 13" wide printers, uses the latest Epson technology utilizing a four picoliter ink droplet size which will achieve the sharpest detail and smoothest tone gradations. The very week I made the decision to buy this printer, Epson discontinued it. However, I was able to buy the last one in stock at my local office supply store. If anyone else is interested, refurbished units of the 1160 model are available from The Epson Store as well as other select outlets. Getting started with the Epson 1160 was the same as if I were going to use it for color printing with Epson inks, installing the hardware and software following the Epson guide. Then after making a couple of test prints to confirm it functioned properly, I removed the ink cartridges and replaced them with the cleaning cartridges from the Piezography kit and performed a thorough flushing of the print head. I then installed the Piezography software Photoshop plug-in and the Piezography BW ink cartridges. I then printed a number of images from the selection of about 40 fresh scans of medium and large format negatives, from which I selected all the images for test printing for this article. A package of letter-size papers stocked and sold by the Cone Editions web outlet, www.inkjetmall. com was used, as well as the Hahnemuhle Photo Matte I have come to value, and Concorde Rag included with the Cone Editions samples, plus the new Schoellershammer Velvet. The Schoellershammer Velvet and Hahnemuhle Photo Matte do not have ICQ profiles provided with the Piezography BW software, but by selecting a couple of "standard" profiles for papers with similar attributes and then making minor adjustments to the gamma and dot density sliders, I was able to obtain very comparable quality results to the profiled papers I test printed. My first impression from these print results is that the Piezography BW printing solution is very adept at handling both all kinds of image characteristics as well as a wide range of papers from moderate cost photo ink jet papers to premium fine arts papers. I was particularly pleased with the results obtained with the new Schoellershammer Velvet. It provided equal, if not better overall print image appearance compared to my previous favorite but pricier Concorde Rag, which I found sometimes limiting because it is a very warm-toned paper. B&W Digital Printing Conclusions
And Recommendations As with color images made with all dye-based ink jet printers, monochrome prints are subject to color shifts caused by differential ink fading if accepted display conditions and preparations are not observed. For those photographers who have or are considering the archival Epson Stylus Photo 2000P, the same approach produces either warm neutral or sepia tone prints of black and white images with excellent quality, given that the shifts in different lighting conditions are anticipated. My conclusion is that a major involvement in black and white imaging is best served by a printer that is dedicated to black and white only. This is quite cost effective and yields a more efficient workflow, assuring a more consistent and controllable level of print image quality. Whether to simply convert an older color printer like the Epson Stylus Photo 1200 to the use of all-black inks or to acquire a four-color printer, as I did, and invest in Piezography, I think will depend on your commitment and concern about your work. It will also give you the ability to use a greater selection of printing papers. With 3/4 of my image collection black and white, and a history of interest in quality black and white printing, the decision to favor Piezography BW is an easy one for me. Piezography BW Update: After using the Epson Stylus Color 1160 and the Cone Editions Piezography BW software and inks for several weeks and quite a few more prints after finishing my report, the result of that additional experience needs to be related. Although the prints produced continued to be very rewarding and were even improving in quality as I gained experience, not using the system regularly combined with changing the ink cartridges apparently introduced some air bubbles into the 1160's print head. This caused the clogging of some of the jets. After obtaining more information on print head nozzle clogging from the Cone Editions web site I attempted to clear the problem, but with no luck. I then got a new set of cleaning cartridges, and finally restored the performance of the Epson Stylus Color 1160. The one solution that was offered by the very supportive staff at Cone Editions was to add the continuous flow bulk ink supply kit to my printer, which eliminates introducing any air into the print head when cartridges are changed, the probable cause of the clogging. This kit would be another $150 for the hardware, plus even more for an initial ink supply. However, the per-print ink cost would be reduced over using cartridges, which are expensive and don't produce many prints. So, my original recommendation that the Cone Editions Piezography BW is a choice only serious black and white printers should make is now even more qualified, as I would not recommend planning to use the system based on any method except using a continuous flow bulk ink supply. The ink cartridges do not assure reliable performance, and are not cost effective. |


![]()
Get the Latest Photo Tips, News & Reviews from Shutterbug!
| Camera Reviews Other Reviews | Mobile Reviews Photography Reviews Columns | News | Features | How-To | Resources |
 © 2025 Shutterbug
AVTech Media Americas Inc., USA
All rights reserved