- REVIEWS
Camera Reviews 
More Reviews Mobile Reviews Photography Reviews - GALLERIES
- VIDEOS
- BUYER'S GUIDES
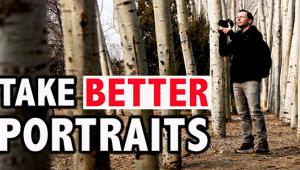
You Don't Need Photoshop!: Why Photographers Should Focus on Getting Their Shots Right in Camera

(Editor's Note: Hernan Rodriguez is a commercial photographer and one of Datacolor's Friends with Vision.)
Coming from an advertising and design background has trained me to shoot with the objective of the final print in mind. The agency I once worked for lived by the mantra, “garbage in garbage out.”
From the onset, they really stressed the importance of providing the most optimum images from the clients they worked with. Images captured with an expansive dynamic range would translate to the reproduction of images with ample print latitude.
And, take it from me, accuracy is not something you can reproduce in Photoshop. That's why you need to get it right, in camera, the first time.
Fast forward to now, in an era in which we have advanced technology. This has given photographers more reason to capture images with precise accuracy so they don't have to "fix it in post" later.
Accurate Color
In order to attain accurate color, you first need to make certain that any color cast, whether from colored walls, mixed kelvin from different light sources, or at times underexposed color, is rendered to a neutral white balance. I accomplish this through a two-step process:
First, I calibrate my monitor under the conditions I will be viewing my tethered images, and this guarantees producing accurate skin tones. In the examples provided, you will see how I worked with studio lighting as well as natural lighting, all while securing proper white balance.
The second step is to secure a neutral white balance in every set change I create. I do this by taking a picture of the SpyderCHECKR and using this shot as my target for an in-camera custom white balance. I make sure I do this before every wardrobe and lighting condition change, whether it is in natural light or with studio lighting.
Bold Fashion
When creating fashion, beauty or portraits in-studio, you have to rely on impactful lighting, coupled with interesting and unique poses in order to add that extra wow factor, which you are usually able to create with props.

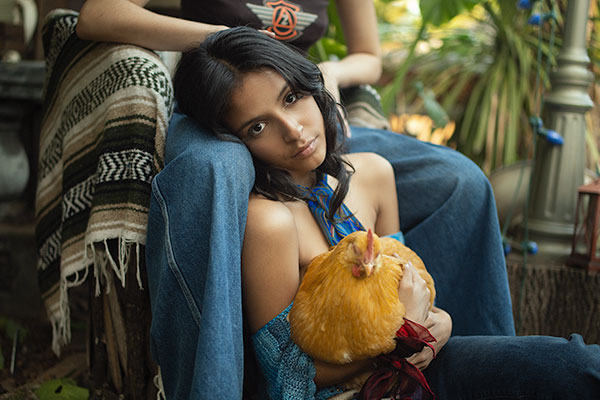
• The shot above was created by placing our model Arpine Davoian in front of a Savage Blue seamless paper roll. To add depth and separation, a small 16x20 soft box was placed high and pointed down toward the background. The light spill also served as a hair light.
• Key Light: A Westcott Beauty Dish was used without diffusion. This modifier creates a punchy light quality and with proper height placement I am able to create contour shaping shadows under the chin.
• Fill Light: To properly control the contrast, I used a satin umbrella directly behind my camera, and powered this down 1 ½ stops weaker than the key light.
Color Factor
To create even further interest, I added a Rosco Cyan filter on my key light, and to neutralize a heavy blue cast on the skin tones, I used a Rosco Gam cosmetic filter on my fill light.
As you can see from the image, this produced highlights that are not the ordinary white. For this technique to properly work, I first take a picture of the SpyderCHECKR to neutralize any color cast that might be present in the shot.
I am then able to customize the undertones of the portrait by carefully choosing my color filters. This makes the calibration of the monitor extremely important, as I am fine-tuning minor increments of color in post-production. The SpyderX is an integral part of this process.
Mixed Lighting Fashion
Not everything needs to be complicated. This is one of those shots where a simple light setup can render amazing results. It really comes down to elementary. Get the largest light source as close as you can to create soft well-balanced light, and you only need one light.
There are just a few key factors you have to keep in mind when creating balanced portraits outdoors with ambient light and flash.

• The first step is to access the scene, which includes the background. Pick something you like. I usually locate a spot that is interesting and has different layers of natural light occurring, as you can see from the example image.
• Determine the exposure reading for the ambient. I want to find out what the brightest spot of the image is, and the darkest point of the image is as well. In the California sun, it will usually be 1/250th of a second at f/11. I then try to find a balance of contrast to render accurate images within the sensor’s latitude.
NOTE: The SpyderX is very helpful here, when you are reviewing your black and white points on your monitor. If your monitor is not accurate, you can easily clip your highlights or your shadows.
• Balance your flash exposure to the ambient. I will usually start with my camera’s fastest shutter speed sync, which is 1/250th of a second and go down from there if I need to open up the ambient exposure.
HINT: Understand that when you are syncing flash with natural light, you are creating two exposures. One is the ambient exposure, and the other is the ambient and flash together.
The shutter speed will regulate the ambient, while the aperture will control the flash exposure.
• Create the mood of your portrait. In this step you basically "flavor to taste." Decide what role the sun will play in the portrait. If a dramatic cinematic portrait is the objective, you might consider overpowering the sun, (or underexposing the ambient) by using powerful flashes that can be used as your key lighting. In the example of Natalia our model in the artistic set, I matched my flash exposure to the brightest exposure reading of the sun, which was f/11. I also placed a large 7’ Parabolic umbrella with a diffuser in the same direction of the sun as to create a natural feel to the light coming from one source.
Find out more about Hernan Rodriguez here: https://bit.ly/34gSoi1


![]()
Get the Latest Photo Tips, News & Reviews from Shutterbug!
| Camera Reviews Other Reviews | Mobile Reviews Photography Reviews Columns | News | Features | How-To | Resources |
 © 2026 Shutterbug
AVTech Media Americas Inc., USA
All rights reserved