- REVIEWS
Camera Reviews 
More Reviews Mobile Reviews Photography Reviews - GALLERIES
- VIDEOS
- BUYER'S GUIDES
Why Your Handheld Nature & Wildlife Photos Aren't Sharp & What to Do (VIDEO)

All photographers strive to attain fast and precise focus no matter what type of images they make and achieving that goal can be a challenge when shooting handheld under challenging lighting conditions. Today's tutorial from pro Mark Denney reveals his secrets for getting the job done.
Denney is a professional landscape photographer and a highly respected instructor. He recently returned from leading a workshop in Greenland and says, "We were photographing in some of the most difficult handheld conditions imaginable, like low light during Blue Hour on a moving boat." Handheld photography doesn't get more difficult than that.
In this episode he walks you through the techniques he taught the participants, who we able to capture amazing images thanks to Denney's advice. This 11-minute discussions covers a variety of key topics, from optimal camera settings to employing image stabilization. He also demonstrates some interesting ways to hold a camera and steady your body that you likely haven't tried before.
Denney notes that this is the first photo excursion he's made without ever setting up a tripod and he promises that by following his suggestions you can get handheld photos that are just as sharp as when using this accessory that many landscape photographers consider essential.
The six tips you'll learn are presented in what Denney considers the order of importance, with different camera settings being the last thing you should try "when all else fails." At the top of his list is turning on IBIS (in-body-image stabilization) and OIS (optical image) depending upon the capabilities of your camera and lens.
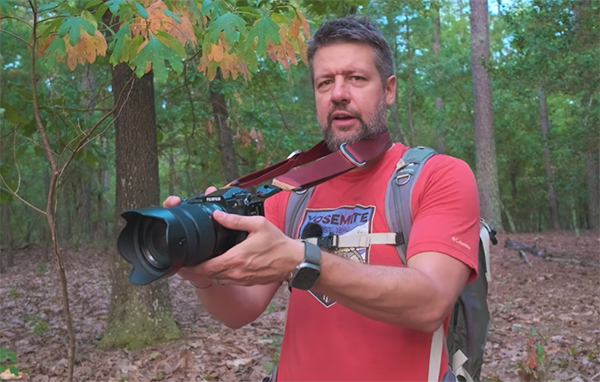
Less obvious considerations involve how you carry and support a camera, beginning with strap tension. Here he recommends shortening up the strap and using the tension between your neck and the camera body to hold it very tight.
Next is a positional trick that Denney refers to as the "elbow tuck technique" that enables you to securely brace the camera. This simply means pushing both elbows against your body while placing the camera close to your face. Denney says this is a method he uses often, and it makes a big difference.
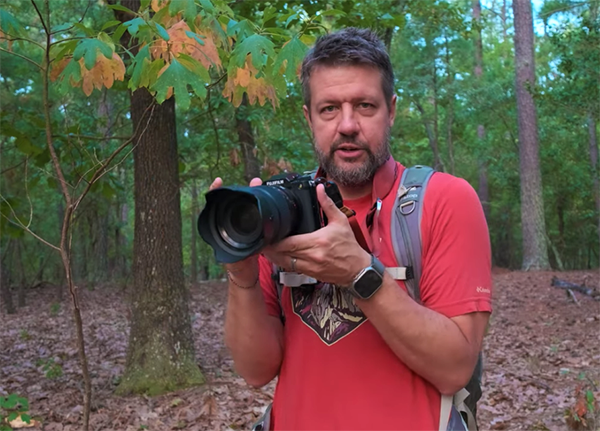
The lesson proceeds with two more methods for keeping the camera stable and secure. One is what he calls a "face brace," and the other is the "elbow platform." Last on Denney's list are camera settings to try, and when you put everything together you and your camera will be as steady as can be.
You can find more helpful tips on Denney's YouTube channel and in the tutorial we posted earlier, explaining what another pro says are the best camera modes for nature and wildlife photography, with tips on how to use them.


![]()
Get the Latest Photo Tips, News & Reviews from Shutterbug!
| Camera Reviews Other Reviews | Mobile Reviews Photography Reviews Columns | News | Features | How-To | Resources |
 © 2026 Shutterbug
AVTech Media Americas Inc., USA
All rights reserved