- REVIEWS
Camera Reviews 
More Reviews Mobile Reviews Photography Reviews - GALLERIES
- VIDEOS
- BUYER'S GUIDES
Wacom’s Intuos 3; For Total Control, Use A Graphic Tablet
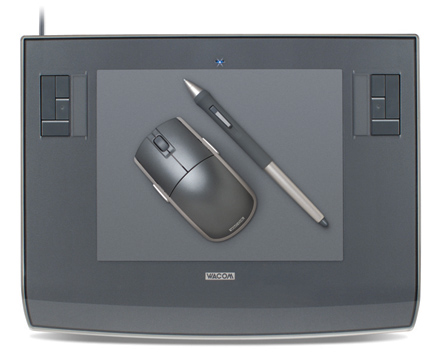
Many serious digital photographers have discovered the power and control available with a graphic tablet and are now letting their mouse gather dust when editing images. The additional control and features offered by the current generation of tablets makes image editing easier and more precise than ever. No longer will you feel like you're trying to draw with a brick. With the new Intuos 3 line from Wacom, tablets have become more helpful than ever. In this report, I'll show you how to get the most from your tablet.
Using A Tablet
Although it feels very different at first, using a tablet quickly becomes intuitive.
After all, you've been using a pen or pencil for years, right? For most
people, the hardest adjustment to make is learning to draw with the pen while
looking at the monitor rather than the pen itself. With a bit of practice though,
this becomes second nature.
The active area of the tablet maps directly to your screen. In other words,
wherever you touch the pen on the tablet, the cursor will be positioned on the
screen. This is unlike a mouse that can be picked up and moved without changing
the
pointer location.
Where the tablet really begins to shine is within your image-editing application,
such as Adobe Photoshop or Elements, Corel Painter, and Corel Paint Shop Pro.
(The Wacom tablets include Photoshop Elements, Corel Painter Essentials, and
a set of nik Color Efex filters, so if you don't have an image-editing
application that supports pen input, you'll be ready to go.) These applications
all understand pen input with support for pressure sensitivity and brush angle.
The control over the width and density of a stroke or erase is amazing, especially
if you've tried doing complex edits with a mouse in the past. A light
touch on the pen will give you a fine narrow line while more pressure will give
you a broader and heavier stroke. Wacom includes a selection of brush shapes
for Photoshop that take full advantage of the pen.
|
|
|

An example of using the pen with an adjustment layer is the handcolored look
shown here (#1). I began with creating a Channel Mixer adjustment layer in Photoshop
by selecting Layer>New Adjustment Layer>Channel Mixer and then checking
the Monochrome check box. I prefer using the Channel Mixer because it gives
me greater control over the conversion to black and white than a simple Convert
to Grayscale. Using the eraser end of the pen, I then go over the portions of
the image I want the color to show through. By varying the pressure the transparency
changes and I can control how much color shows through to give the image a softer
look.
The pen is an excellent method of fine-tuning your mask or selection as well.
Using a light touch to mask out small detailed areas of the image without constantly
changing brush sizes, as well as the extra control offered by a pen when compared
to a mouse, makes it possible to create more accurate selections in less time
than ever before.
|
|
|

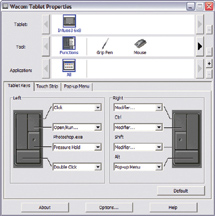
New to the Intuos 3 tablets, Wacom has added the Touch Strip and ExpressKeys (#2) which are fully programmable. By default, the Touch Strip acts as a scroll bar--slide your finger up or down and the window scrolls, just like using a mouse. A touch at the top or bottom works just like a click on the up or down arrow in your application. Even more useful, when using the brush or eraser tools, the Touch Strip functions as a sizing tool. Slide your finger up or down to change the default brush or eraser size without touching the keyboard or going to the toolbar.
|
|
|
|
| |||||||||


![]()
Get the Latest Photo Tips, News & Reviews from Shutterbug!
| Camera Reviews Other Reviews | Mobile Reviews Photography Reviews Columns | News | Features | How-To | Resources |
 © 2026 Shutterbug
AVTech Media Americas Inc., USA
All rights reserved