- REVIEWS
Camera Reviews 
More Reviews Mobile Reviews Photography Reviews - GALLERIES
- VIDEOS
- BUYER'S GUIDES
Use “Versions” to Create Variations of a Photo in Lightroom & Get Edits Done Fast (VIDEO)

Most of us would rather be out shooting than sitting behind a computer editing our work. In this quick episode of the popular “In a Lightroom Minute” series you’ll learn a remarkably easy technique that will save you tons of time processing photos. And that means getting back behind a camera where you belong.
In just 70 seconds instructor Aundre Larrow demonstrates how use Lightroom’s amazing “Versions” tool to easily create different variations of the same image. This powerful method enables you to avoid the cumbersome process of editing each version separately.
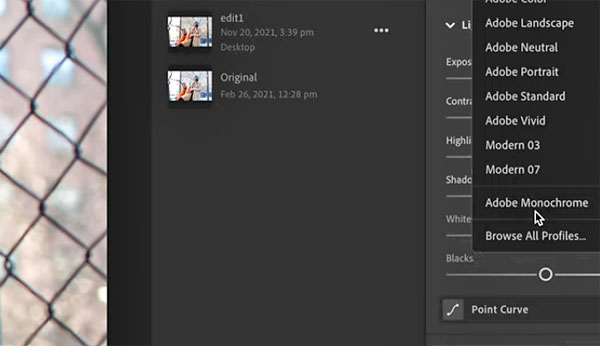
As Larrow explains, “Lightroom’s Versions tool “lets you do it all,” while creating a variety of looks from the same image. That means you can you can modify colors or convert a shot to black-and-white, achieve different aspect ratios for us on social media, and more.
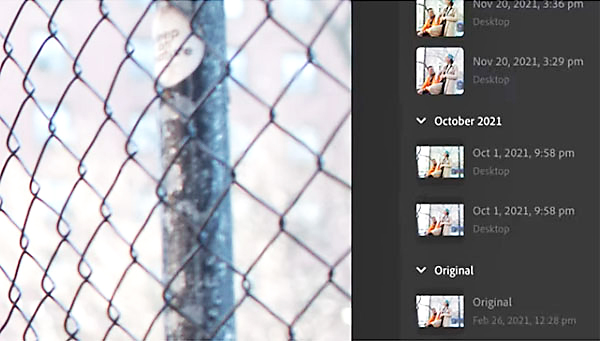
After opening Lightroom Larrow goes to the bottom of the screen and clicks on the “Versions” tab. Once you’ve done that, the panel you need pops up immediately. It displays your original image along with the option to “Create Version.” And you can make as many as you want.
Larrow explains how to use the various options available for creating the variations and even moving images to another device like a phone or tablet. He demonstrates how to quickly make color edits and convert images to monochrome.
You’ll marvel at the simplicity of this technique, and see how to toggle back and forth between the versions you create to easily choose and save the ones you like best. This could be the most valuable minute you spend today, and you’ll definitely want to add this simple method to your editing bag of tricks.
You can find more fast advice on the Adobe Photoshop Lightroom YouTube channel, so be sure and take a look. And check out the tutorial we posted recently from another image-editing expert, explaining the easiest way to remove distracting elements in Photoshop.


![]()
Get the Latest Photo Tips, News & Reviews from Shutterbug!
| Camera Reviews Other Reviews | Mobile Reviews Photography Reviews Columns | News | Features | How-To | Resources |
 © 2026 Shutterbug
AVTech Media Americas Inc., USA
All rights reserved