
This is what truly amazes me on how photography can transform an ordinary thing into something extraordinary. - Integrity Spas
- REVIEWS
Camera Reviews 
More Reviews Mobile Reviews Photography Reviews - GALLERIES
- VIDEOS
- BUYER'S GUIDES
Time And Again: Michael S. Miller’s Magical Moments
“When you’re prepared for the shot, that’s when the magic happens,” Michael S. Miller says. Seems simple enough, but there’s a lot of benefit in delving into Michael’s definition of “prepared.”
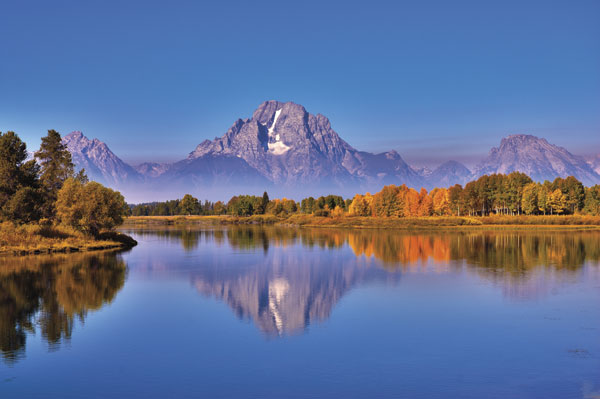
Mount Moran in Grand Teton National Park. “I tell my workshop students that I have a camera frame in my eyes. I may imagine how the light or the sun or the clouds or the mountains will look, and years later, after visit upon visit, I’ll see what I imagined.” D200, 18-70mm f/3.5-4.5G Nikkor, 1⁄100 sec, f/8, ISO 100.
All Photos © Michael S. Miller
All Photos © Michael S. Miller
Outdoor and nature images are Michael’s specialty, and he’s been photographing for over 20 years in two of the world’s best locations for great outdoor imagery: Grand Teton National Park and Yellowstone National Park. In fact, his images appear on posters sold by the National Park Service in their visitors centers. He also runs Visions Photographic Workshops, which regularly journeys to Yellowstone and the Grand Tetons.
His work presents a dual challenge: taking control of locations that offer practically unlimited photo opportunities and producing images that are at once popular, yet significantly beyond typical tourist snaps. His edge is preparation.
“Almost everyone in the parks goes to what I call ‘the postcard places’ to get their pictures,” Michael says. There’s a reason people take pictures from these points—they’re great locations—but to make his pictures distinctive he’ll try a different angle, or wait for better weather or better light. “My advantage is that these folks are coming to the park for a single day or a couple of days; they’re passing through. I’ve been going to these parks for 20 years, and I may go to the same spot time and again; I may go 10 times on the same trip, and I’ll wait for the light, the color, the weather to be exactly right. I’m basically looking for the shot everybody wants to get but doesn’t have the time to wait for…or discover.”

At a historic homestead site outside Grand Teton National Park in the Gros Ventre Wilderness. “It’s an off-the-beaten-path area, but continued visits help me discover and narrow down possibilities for pictures. The more you go, the more you can get the subject matter under control.” Color converted to black and white and toned. D200, 18-70mm f/3.5-4.5G Nikkor, 1⁄80 sec, f/22, ISO 200.
His preparation, then, is part planning and part patience. “I’ll take scouting pictures,” he says, “point-and-shoot shots basically, and then study those pictures, and when I go back to the spot I’ll know how to frame for a fleeting moment that happens very quickly.”
A good example is his photo of Mount Moran. “You don’t just get that brilliant combination of colors. I’d seen the colors just start to happen a few days before, so it was revisit and revisit until they were right. I went to that location seven times in the course of five days.” He got the shot on his final day in the park. “The haze you see in the photo is from a fire to the north. I knew I could get something unique because the cold temperatures from the night before pushed the smoke to that level.”

“I first went to Yellowstone in 1989, and it was overwhelming. I thought, I’m going to come back to this place probably a thousand times to get pictures.” One of Michael’s bison images has been a park poster for three years; this photo will soon be submitted. D200, 80-200mm f/2.8D Nikkor, 1⁄1250 sec, f/2.8, ISO 100.
Another example is the photo of a bison in Yellowstone. Shot in color, converted to black and white and toned in Photoshop, the image is the result of preparation honed by experience. “I’d been looking for a particular angle for a bison photograph for many years, and I pretty much got it in this shot. First I wanted a blank background—some sort of neutral cloud formation. Then the problem is that most of the time bison are eating, so their heads are down to the ground—mowing the lawn, I call it. Getting one with its head up, sort of the classic Indian nickel pose, that’s what was in my mind. And they don’t stand still; he’s moving along and I’m moving with him, camera on the tripod, keeping up and keeping that framing, waiting for him to look up. I probably took a dozen to 15 images, and this is the one that really works.”
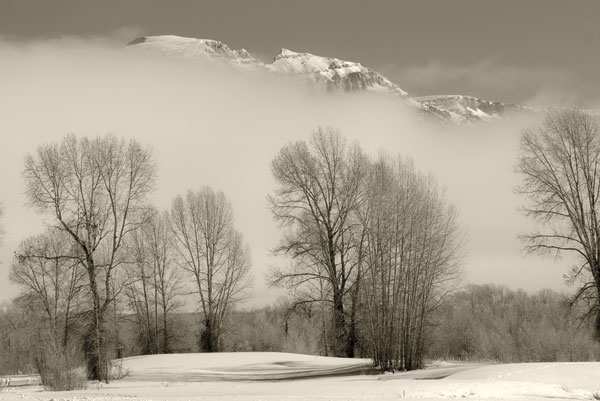
Winter view from the Grand Tetons looking east toward Sleeping Indian Mountain. “The temperature was minus 5 degrees, and that caused the fog rising from the Snake River, just behind that lower tree line.” D200, 80-200mm f/2.8D Nikkor, 1⁄800 sec, f/5.6, ISO 200.
Michael always shoots with a tripod—a Gitzo GT2541 Mountaineer, fitted with a Kirk Enterprises BH-3 ball head and their quick-release clamp. For a long time he shot with a D200 until a recent switch to a D700. His lenses include 18-70mm, 80-200mm, and 300mm Nikkors. “It’s all in the glass,” he says when asked about the image quality necessary for his posters. “I shoot at the sharpest aperture, which doesn’t necessarily mean stopping down to f/22 or f/32. Each lens has an optimum aperture—it could be f/8 or f/16—and when I get a new lens I’ll put it through its paces and test it at various apertures. I can pretty much judge the results by what I see on my screen; I’m working at 100 percent on a 27-inch monitor.”
Michael also shoots with skylight filters on his lenses. “The great color you see in many of the images is achieved at capture because the skylight filter cuts the bluish cast without jeopardizing the actual color of the sky or the scene.” And by shooting Raw files, he’s not defining a white balance until after capture of the image. “It’s all about process,” he says, “about having this information in your arsenal before you’re out there and the moment is happening.”
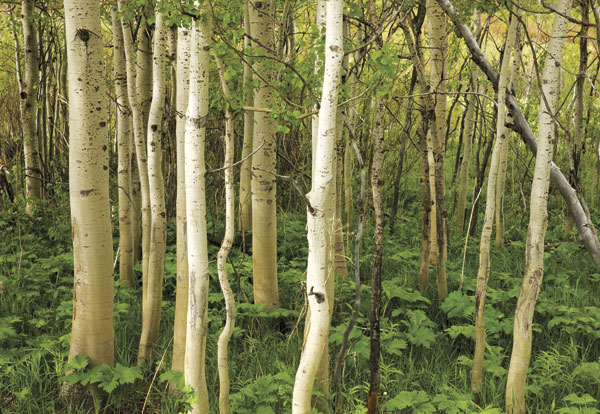
Aspen grove in the vicinity of Mount Moran. “I was teaching a workshop, and while everyone was shooting Mount Moran, I wandered away a bit, turned around and saw the glow of the trees in the soft light.” D200, 18-70mm f/3.5-4.5G Nikkor, 1⁄30 sec, f/8, ISO 100.
As you might imagine with anyone shooting for posters, there’s a lot of control, calibration, and fine-tuning going on. Once you get the door open to the National Park Service, you don’t walk in with anything less than excellence. “Shooting for them is a process that took a lot of patience and perseverance,” Michael says. “It started with a visit to a visitors center and seeing other photographers’ work for sale as posters. I made some inquiries, got some contacts, built a rapport and sent them a prototype of a poster and finally got the okay.” Looking back on the process, he says, “It’s probably easier to get the cover of National Geographic than the approval of the National Park Service.”
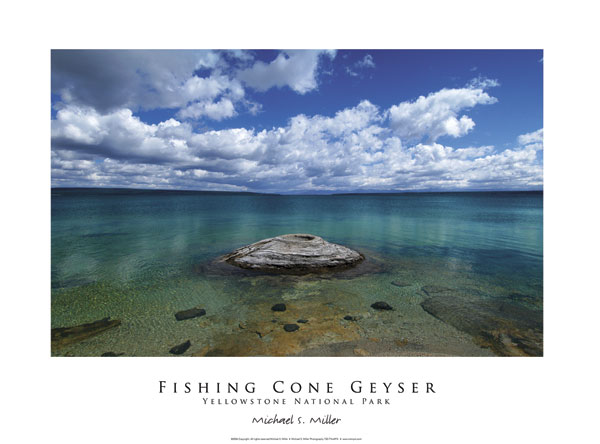
One of Michael’s National Park Service posters.
Once his images and poster layouts are approved, he handles the printing and sends the Park Service the completed posters. “It can take five years from the moment of capture to a poster being sold to them,” he says. “I regularly send them images—they’re always looking for new and exciting pictures. And while many are shots taken from locations frequented by tourists, they don’t get the shots I do because I’m there at all hours, in all weather, looking for all the possibilities of light and sky. And if it’s a postcard shot, it’s got to be a better one than most anyone else can get.”
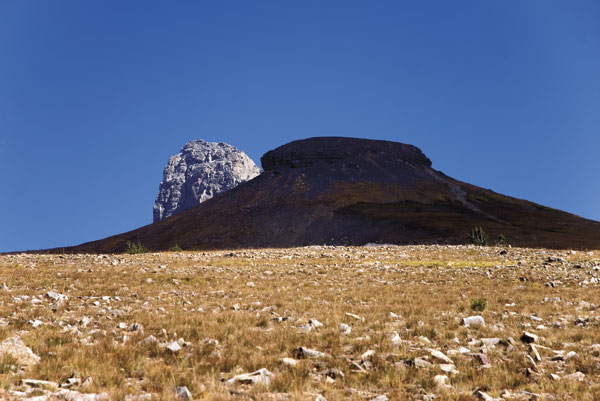
Table Mountain in full shade with the Grand Teton in the background. D200, 18-70mm f/3.5-4.5G Nikkor, 1⁄800 sec, f/4.5, ISO 100.

“This is in the north part of Grand Teton National Park. I shot it in color, converted it to black and white and then toned it for a colder look.” D200, 300mm f/2.8G Nikkor, 1⁄800 sec, f/8, ISO 100.
You can see many more of Michael S. Miller’s images, including a selection on National Park Service posters, at www.msmpix.com. For information about his workshops, visit www.visionsworkshops.net.
- Log in or register to post comments


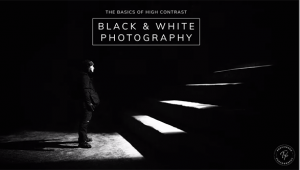


PHOTO OF THE DAY

Today’s photo is Capitol Reflecting Pool by Jeff Van Scoyk
eNEWSLETTER SIGNUP
![]()
Get the Latest Photo Tips, News & Reviews from Shutterbug!
| Camera Reviews Other Reviews | Mobile Reviews Photography Reviews Columns | News | Features | How-To | Resources |
 © 2025 Shutterbug
AVTech Media Americas Inc., USA
All rights reserved